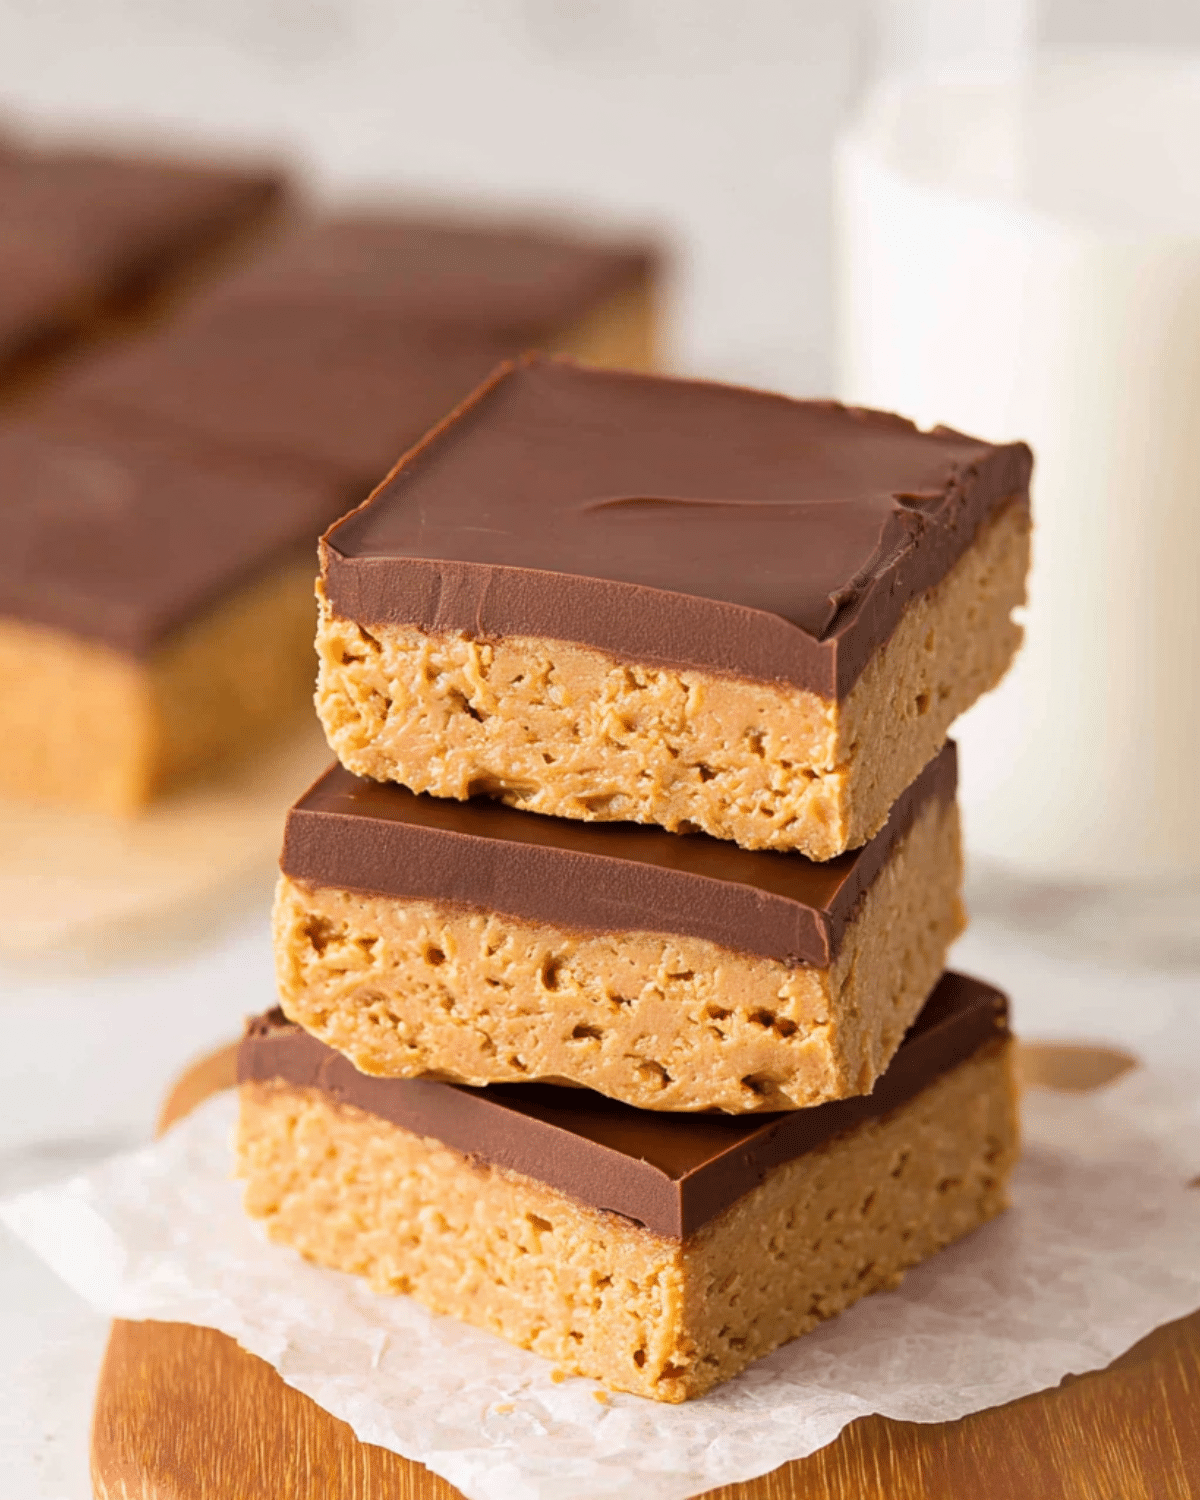
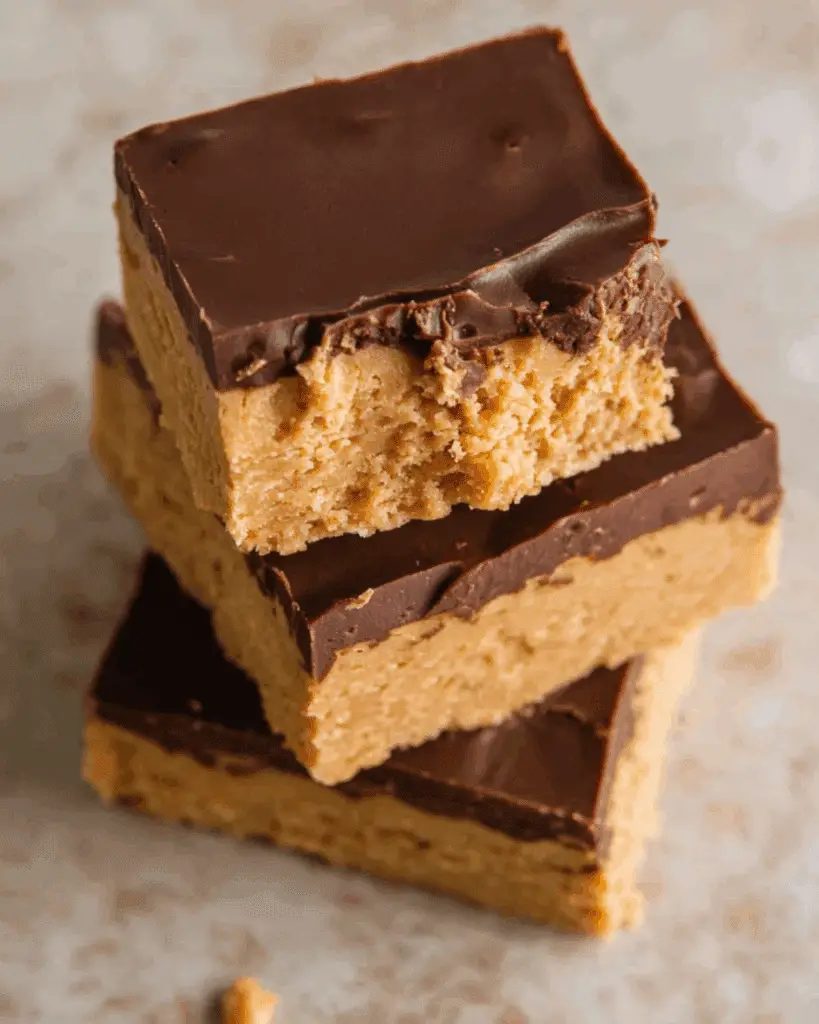
Looking for a sweet fix that’s fast, fuss-free, and absolutely crave-worthy? This peanut butter bars recipe checks all the boxes. With just five simple ingredients, no oven required, and a chocolatey-peanut butter combo that’s hard to beat, these bars are every dessert lover’s dream. Whether you’re whipping them up for a party, craving a late-night treat, or need a quick dessert for the kids, this no-bake recipe delivers every time.
Don’t miss our chocolate chip pumpkin bread for another moist and irresistible dessert!
JUMP TO
Table of Contents
What Makes This Peanut Butter Bars Recipe So Irresistible?
Why This Dessert Stands Out
There’s a reason peanut butter and chocolate are an all-time favorite duo—they balance each other perfectly. The salty richness of peanut butter paired with a smooth chocolate layer makes these bars deeply satisfying. What sets this recipe apart is the flawless texture: soft, slightly crumbly on the bottom, and silky on top.
Plus, they come together with zero baking time, making them one of the easiest indulgent desserts around.
The Appeal of No-Bake Treats
No-bake recipes like this one are not only convenient, but they also save you from heating up the kitchen. That’s a major bonus during summer or busy baking seasons. Plus, since this recipe is so foolproof, it’s a great one to let kids help with!
Perfect for Holidays, Parties & Cravings
From potlucks and birthday parties to holiday dessert trays, these bars are always a hit. You can even cut them smaller to make bite-sized treats. Keep a batch in the fridge for sudden guests or sweet cravings.
Key Ingredients for Perfect Peanut Butter Bars
Why You Need No-Stir Peanut Butter
One of the most common mistakes in this recipe? Using natural peanut butter. While it might be healthier, it’s often oily and doesn’t set well in no-bake desserts. For the best consistency, always go with no-stir varieties like Jif or Skippy. They give that creamy, sliceable texture every time.
Choosing Between Milk Chocolate & Semi-Sweet
Your choice of chocolate impacts the overall sweetness. Semi-sweet chips offer a balanced, slightly bitter note, while milk chocolate is smoother and sweeter. Either works beautifully—it just depends on your taste.
The Role of Graham Crackers in Texture & Flavor
Crushed graham crackers give the bars their classic base, adding both structure and a subtle honeyed flavor. You can pulse whole crackers in a food processor or buy pre-crushed for convenience.
Essential Pantry Ingredients You Likely Have Already
Here’s what you’ll need:
| Ingredient | Quantity | Notes |
|---|---|---|
| Unsalted Butter | 1 cup (226g) | Melted and cooled slightly |
| Creamy Peanut Butter | 1½ cups (396g) | Divided |
| Powdered Sugar | 1¾ cups (210g) | Adds sweetness and structure |
| Graham Cracker Crumbs | 2 cups (240g) | Store-bought or homemade |
| Chocolate Chips | 1½ cups (270g) | Milk or semi-sweet |
Looking for inspiration? Try our no-bake chocolate orange cheesecake for another simple win.
Step-by-Step: How to Make Peanut Butter Bars (No-Bake)
Prep Time & Tools You’ll Need
You’ll need just 10 minutes of prep time. Grab an 8×8 or 9×9-inch square baking dish, mixing bowls, a spatula, and either a hand mixer or a whisk. Line your dish with parchment paper to make clean-up easy.
Making the Peanut Butter Layer
- In a large bowl, combine melted butter and 1¼ cups peanut butter.
- Mix until smooth using a hand mixer or whisk.
- Add powdered sugar and mix well.
- Fold in the graham cracker crumbs until fully combined.
Press the mixture into the lined baking dish and smooth it into an even layer. Chill it while you prep the chocolate.
Melting & Layering the Chocolate Topping
- In a microwave-safe bowl, add chocolate chips and the remaining ¼ cup peanut butter.
- Microwave in 30–40 second bursts, stirring until melted and smooth.
- Pour the chocolate over the peanut butter base and smooth it with a spatula.
Refrigerate the bars for at least 2 hours to set completely. Once chilled, cut into squares and serve.
Discover great ideas like layered pumpkin cheesecake for a more festive dessert experience.
Expert Tips for the Best Peanut Butter Bars Ever
Avoiding Crumbly Texture Mistakes
The #1 complaint people have with homemade peanut butter bars? Crumbly, dry texture. This happens when you use natural peanut butter or skip the mixing step. Natural PB often separates, which throws off the balance of fat and solids. Always choose a no-stir peanut butter to ensure the mixture binds together properly. And make sure your butter is melted but not piping hot, which helps it blend smoothly.
Swapping Ingredients Without Compromising Taste
This recipe is super adaptable. Want a deeper flavor? Add a pinch of salt or a splash of vanilla extract. Craving a crunch? Fold in crushed peanuts or mini chocolate chips before layering. Want a nut-free option? Sunflower seed butter or cookie butter works well but may slightly alter firmness.
Don’t miss our cardamom cognac apple cake if you’re into unique twists on classic flavors!
Using the Right Pan Size for Perfect Thickness
This recipe works beautifully in both an 8×8 and 9×9-inch square pan. The smaller size gives you thicker, bakery-style bars, while the larger dish makes more servings with thinner layers—perfect for crowds or potlucks. No matter the size, line the dish with parchment paper for easy lifting and cleaner cuts.
Lining the Pan for Easy Lift & Clean Slices
Skip the foil unless you’re in a pinch—parchment paper is the real MVP here. It keeps your bars from sticking, makes cleanup a breeze, and helps with precise slicing. Want to go pro? Run your knife under hot water, dry it, then slice—this melts through the chocolate top cleanly without cracking.
Peanut Butter Bar Variations Worth Trying
Gluten-Free Options Using Alternative Cookies
To make this recipe gluten-free, just swap graham cracker crumbs with gluten-free versions, like Schär or Pamela’s brands. You can even use ground gluten-free shortbread cookies or crushed cereal as a base. It works just as well!
Check out our chewy pumpkin cookies recipe—they’re naturally gluten-free and soft-baked perfection.
Toppings to Dress It Up: Nuts, Sprinkles, Sea Salt
Add extra flair by sprinkling something fun over the chocolate layer before it sets. Try:
- Chopped roasted peanuts
- Flaky sea salt for contrast
- Mini pretzels for a salty crunch
- Festive sprinkles for birthdays or holidays
- Mini M&M’s for a pop of color
These toppings don’t just boost flavor—they also add great presentation value.
Flavor Twists: Cinnamon, Pumpkin Spice, Vanilla
Small additions go a long way. Stir in:
- ½ tsp vanilla extract for warmth
- ¼ tsp cinnamon for depth
- A pinch of pumpkin spice for fall vibes
These tweaks make the bars feel totally new—without changing the structure of the recipe.
Looking for inspiration? Try our pumpkin spice cupcakes with tangy frosting for another seasonal dessert option.
Storage, Shelf-Life & Make-Ahead Tips
How Long They Stay Fresh in the Fridge
Peanut butter bars store beautifully. Keep them in an airtight container in the refrigerator for up to 2 weeks. They stay soft yet firm, with the chocolate layer holding up well even after several days.
Freezer-Friendly? Yes, and Here’s How
Yes, these bars freeze like a dream! Simply:
- Cut them into squares
- Wrap each one in parchment or plastic wrap
- Store in a sealed freezer bag or container
They’ll last up to 3 months in the freezer. Thaw in the fridge or at room temp before serving.
Check out our apple cinnamon oatmeal cookies—another freezer-friendly treat to prep ahead.
Best Way to Slice & Serve for Clean Presentation
Want bars that look like they came from a bakery? Follow these slicing tips:
- Use a hot knife (run under water, then dry)
- Wipe the knife clean between slices
- Chill the bars for at least 2 hours, preferably overnight
Serve them chilled or slightly softened—either way, they’re melt-in-your-mouth delicious.
FAQ About Peanut Butter Bars Recipe
Can I use natural peanut butter in this recipe?
Not recommended. Natural peanut butter tends to separate, leaving bars crumbly and dry. Stick with no-stir peanut butter for the best results—it creates a smoother, firmer base that slices cleanly and holds together.
Why are my bars dry and crumbly?
This usually happens when the peanut butter isn’t fully blended or when natural peanut butter is used. Also, using too much powdered sugar can cause dryness. Double-check your measurements and always mix thoroughly.
Can I make these peanut-free?
Yes, you can substitute sunflower seed butter, almond butter, or cookie butter. Just keep in mind that flavor and firmness may vary slightly.
Do I need to temper the chocolate?
Nope. Since the bars are chilled, tempering isn’t required. Simply melt the chocolate with a bit of peanut butter—it adds creaminess and prevents the top layer from cracking when sliced.
How do I double the recipe for a crowd?
Use a 9×13-inch baking pan if you want to double the recipe. It yields about 24 large bars or up to 36 small ones. Chill time remains the same—just be sure to spread the layers evenly.
Conclusion: Why This Peanut Butter Bars Recipe Deserves a Spot in Your Favorites
If you’re searching for the ultimate no-bake dessert that’s fast, foolproof, and bursting with flavor, this peanut butter bars recipe is it. With just five pantry staples, it delivers creamy, chocolatey, peanut buttery bliss in every bite. Whether you’re prepping ahead for a party or whipping up a sweet surprise for your family, this recipe never disappoints.
Check out our eyeball brownies delicious recipe for a spooky twist on bar-style desserts!
PrintPeanut Butter Bars
This Peanut Butter Bars Recipe is a no-bake, five-ingredient dessert that’s creamy, chocolatey, and incredibly easy to prepare. Perfect for holidays, parties, or anytime sweet cravings hit.
- Prep Time: 10 minutes
- Cook Time: 2 minutes
- Total Time: 2 hours 10 minutes
- Yield: 12 servings
- Category: Dessert
- Method: No-Bake
- Cuisine: American
- Diet: Vegetarian
Ingredients
- 1 cup unsalted butter, melted and slightly cooled (226g)
- 1½ cups creamy no-stir peanut butter, divided (396g)
- 1¾ cups powdered sugar (210g)
- 2 cups graham cracker crumbs (240g)
- 1½ cups semi-sweet or milk chocolate chips (270g)
Instructions
- Line an 8×8 or 9×9-inch square baking dish with parchment paper.
- In a large bowl, combine the melted butter and 1¼ cups peanut butter. Mix until smooth.
- Add powdered sugar and mix until fully incorporated.
- Fold in graham cracker crumbs until the mixture is evenly combined.
- Press the mixture evenly into the lined dish and refrigerate.
- In a microwave-safe bowl, melt chocolate chips with the remaining ¼ cup peanut butter, stirring every 30–40 seconds until smooth.
- Pour the chocolate mixture over the chilled peanut butter layer and smooth it out.
- Refrigerate for at least 2 hours until set.
- Cut into squares using a warm knife for clean edges and serve.
Notes
- Always use no-stir peanut butter to avoid crumbly texture.
- Line the dish with parchment paper for easy lifting and clean slicing.
- Use a hot knife for clean cuts through the chocolate layer.
- Store bars in an airtight container in the fridge for up to 2 weeks.
- Bars can be frozen for up to 3 months.
Nutrition
- Serving Size: 1 bar
- Calories: 627
- Sugar: 35g
- Sodium: 236mg
- Fat: 45g
- Saturated Fat: 20g
- Unsaturated Fat: 21g
- Trans Fat: 1g
- Carbohydrates: 51g
- Fiber: 4g
- Protein: 10g
- Cholesterol: 42mg