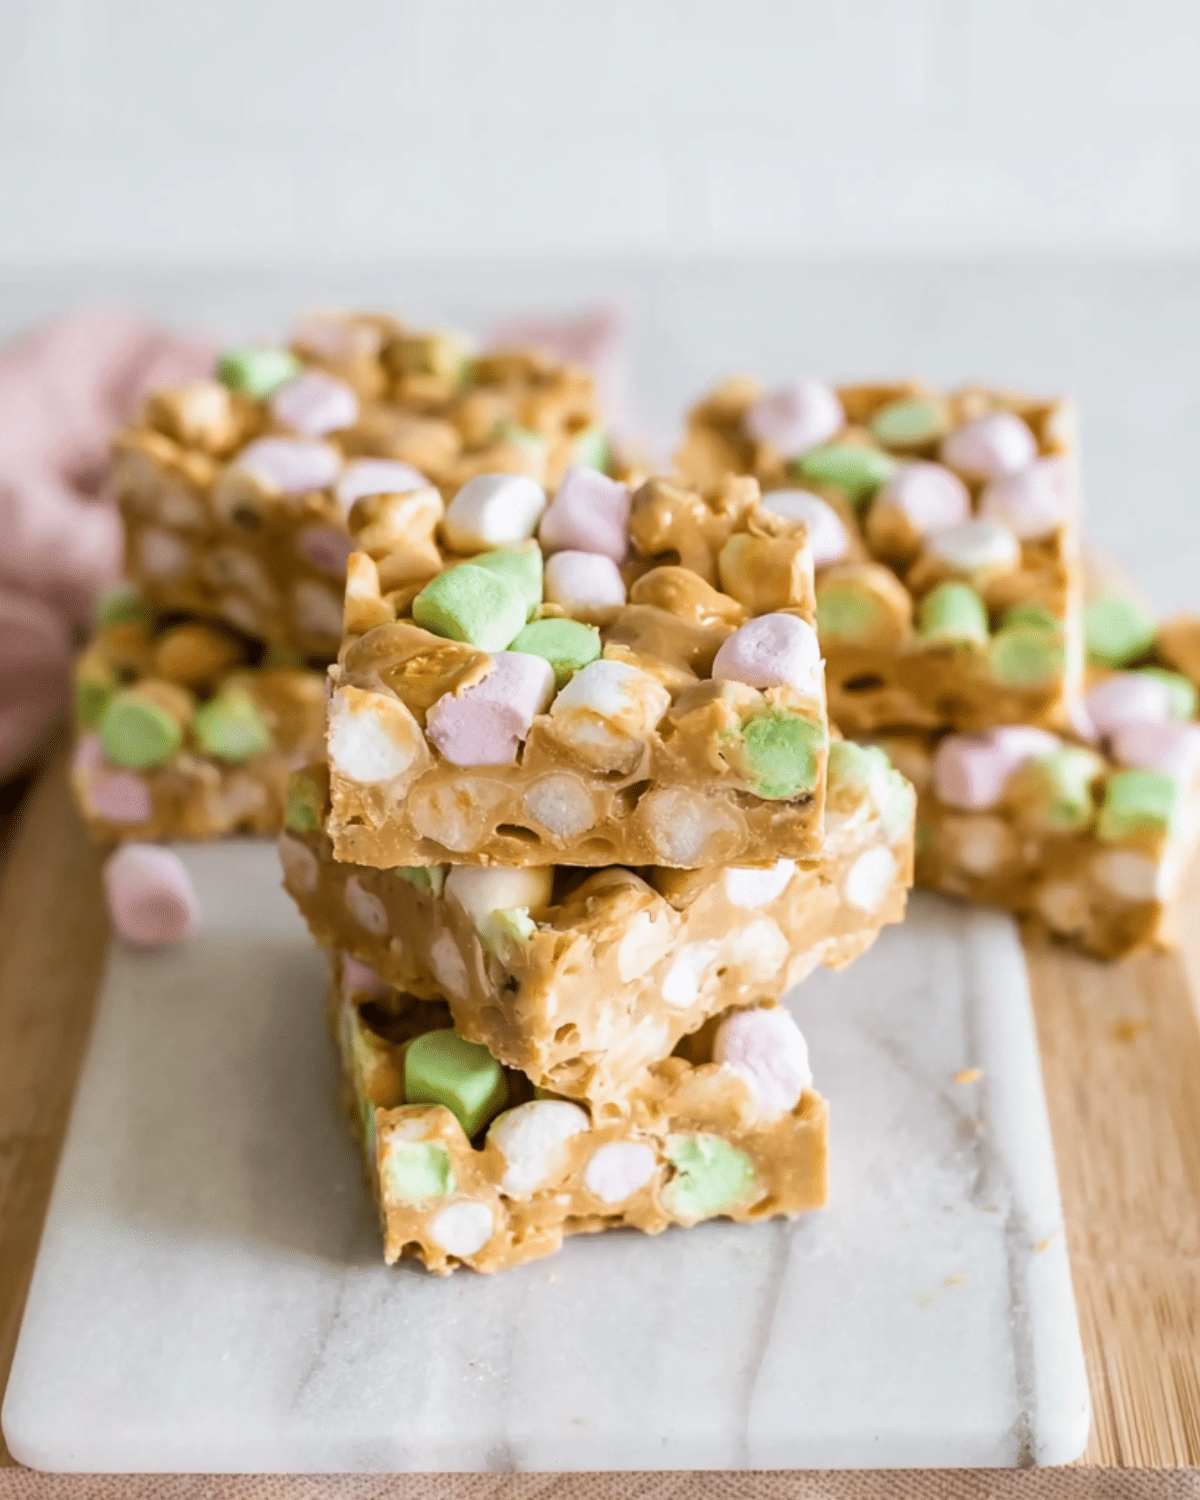
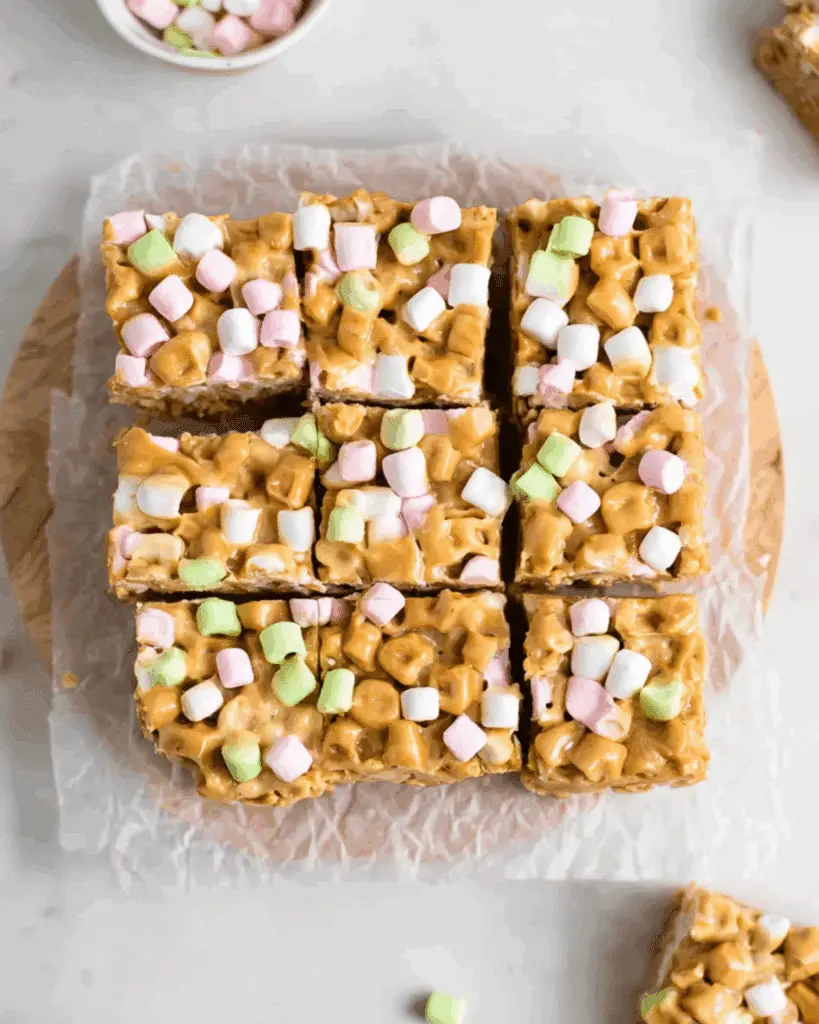
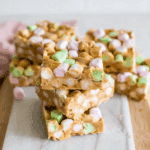
No bake butterscotch marshmallow bars are one of those desserts that deliver big satisfaction with minimal effort. Combining creamy peanut butter, sweet butterscotch chips, and colorful mini marshmallows, these bars are rich, chewy, and full of nostalgic charm. In this article, we’ll cover everything from the ingredients you’ll need, step-by-step instructions, creative variations, and expert tips to make sure your batch turns out perfectly every time. Whether you’re prepping a last-minute party snack or freezing a stash for sweet cravings, this no-bake classic is your new go-to.
Looking for inspiration? Try our apple cinnamon oatmeal cookies for another easy treat.
JUMP TO
Table of Contents
Why Everyone Loves No Bake Butterscotch Marshmallow Bars
A nostalgic dessert that stands the test of time
If you grew up in North America, chances are you’ve had some version of this classic. Sometimes called Confetti Bars or Peanut Butter Marshmallow Squares, they were a staple at bake sales and potlucks in the ’80s and ’90s. What makes them stand out? It’s that unmistakable combination of soft, chewy marshmallows and melt-in-your-mouth butterscotch flavor. They’re both comforting and indulgent in every bite.
Perfect for beginners, busy moms, and potlucks
These bars come together in under 20 minutes of prep—no oven, no fancy tools, and no guesswork. That makes them ideal for beginner bakers, busy parents, or anyone who just wants a homemade dessert without spending hours in the kitchen. They also scale easily, so whether you’re feeding a family or a full crowd, this recipe’s got your back.
Don’t miss our easy Halloween snack mix recipe if you’re planning a festive spread.
The magical combo of peanut butter and butterscotch
Butterscotch chips melt into a golden syrup when combined with peanut butter and butter, forming the rich base that binds the marshmallows. The salty, creamy notes of peanut butter balance the ultra-sweet butterscotch, and the soft marshmallows add a pop of color and squishy texture. It’s a balance of flavor and feel that keeps everyone coming back for seconds.
Ingredients You’ll Need For This Simple No Bake Treat
Key ingredients and substitutes that work
Here’s what you’ll need to whip up these chewy, colorful bars:
| Ingredient | Amount | Notes |
|---|---|---|
| Butterscotch chips | 1 package (300g) | Use Chipits or your favorite brand |
| Peanut butter | 1 cup | Creamy or crunchy both work well |
| Unsalted butter | ½ cup | Can substitute with vegan butter |
| Rainbow marshmallows | 1 package (250g) | Mini marshmallows preferred |
| Vanilla extract | 1 tsp | Optional, but adds flavor depth |
Optional Add-ins: Rice Krispies, shredded coconut, chocolate chips, or chopped nuts for texture.
Discover great ideas like our pumpkin s’mores cookies that also use minimal ingredients with maximum impact.
Gluten-free and dairy-free alternatives
Want to make it friendly for more dietary needs?
- Dairy-Free: Use plant-based butter and check that your butterscotch chips are dairy-free.
- Gluten-Free: Most ingredients are naturally gluten-free, but always double-check labels, especially on chips and marshmallows.
Tips for adjusting sweetness or adding crunch
If you want to tone down the sweetness, swap a portion of the butterscotch chips for semi-sweet chocolate. For crunch lovers, stir in Rice Krispies or crushed graham crackers to the melted base before adding marshmallows. A handful of chopped salted peanuts adds even more texture and a salty kick.
Check out our candy cane cookies if you’re looking to add variety to your holiday dessert table.
Step-by-Step Guide to Making Butterscotch Marshmallow Bars
Melt and mix: the only stove time you’ll need
Start by placing your rainbow marshmallows in the freezer for 10 minutes. This helps prevent them from melting when you fold them into the warm mixture later.
In a medium saucepan over low heat, melt the butter, peanut butter, and butterscotch chips together. Stir frequently until the mixture is silky and smooth. Be careful not to let it overheat—this is where patience pays off.
Chill and cut: how to get perfect squares every time
Once melted, remove the pan from heat and let the mixture cool for 3–5 minutes. Then, quickly fold in the vanilla extract and frozen marshmallows. Mix just enough to coat the marshmallows without melting them.
Pour everything into a parchment-lined 8×8 or 9×9 inch pan, and spread it evenly using a spatula. Chill in the fridge for at least 1 hour, or until firm.
To cut clean squares, remove the slab from the pan, place on a cutting board, and slice with a sharp knife that’s been warmed under hot water.
Don’t miss our no bake chocolate orange cheesecake for another irresistible chill-and-serve dessert.
Make-ahead tips and storage tricks for longer freshness
- Refrigerator: Bars stay fresh for up to 7 days in an airtight container.
- Freezer: Freeze in layers using parchment between each. They’ll keep well for up to 3 months.
- Pro tip: These bars are even better when eaten straight from the freezer—firm, chewy, and slightly frosty.
Tips, Variations, and Common Mistakes to Avoid
Can you freeze butterscotch marshmallow bars?
Absolutely—you can and should. Freezing helps preserve the texture and flavor, especially if you’re making a batch ahead of time for parties, holidays, or snacking emergencies. To freeze:
- Cut bars into squares once set.
- Place in a single layer on a baking sheet and freeze for 1 hour.
- Transfer to a freezer-safe bag or container, using parchment paper between layers to prevent sticking.
They’ll stay fresh for up to 3 months. Just thaw at room temperature for 10–15 minutes, or enjoy them straight from the freezer for a chewier bite.
Discover great ideas like our no bake lemon blueberry delight for another freezer-friendly dessert.
What to do if your marshmallows start melting
One of the biggest rookie mistakes is adding marshmallows before the butterscotch-peanut butter mix has cooled enough. When that happens, your marshmallows can dissolve, turning your bars into a dense, sticky mess.
Here’s how to prevent that:
- Freeze your marshmallows for at least 10 minutes beforehand.
- Let the hot mixture cool for 3–5 minutes after removing from the stove.
- Fold in the marshmallows quickly and gently to avoid overmixing.
It’s a small trick that makes a huge difference in the final texture.
Check out our layered pumpkin cheesecake recipe if you’re craving a creamy dessert with structure.
Fun mix-ins: coconut, Rice Krispies, chocolate chips, and more
Once you’ve mastered the base recipe, you can experiment with all kinds of add-ins for texture and flavor:
| Add-In | Amount | What It Adds |
|---|---|---|
| Shredded coconut | ½ cup | Tropical chewiness |
| Rice Krispies | 1 cup | Light crunch |
| Mini chocolate chips | ½ cup | Extra sweetness |
| Chopped walnuts or peanuts | ½ cup | Nutty contrast |
| Crushed graham crackers | ½ cup | S’mores-like flavor |
Just remember to keep the total volume of mix-ins under 1.5 cups, or you may throw off the balance of the sticky base.
Looking for inspiration? Try our Christmas tree deviled eggs recipe for creative party tray ideas.
No Bake Recipes You’ll Love Just as Much
Similar sweet bar recipes you can try next
If you love no bake bars with gooey textures and bold flavors, you’ll want to check out other reader-favorite recipes like:
- No bake caramel apple pie cheesecake parfaits
- Rice Krispie treats with browned butter
- Chocolate peanut butter fudge
- S’mores bars with marshmallow fluff
Each one builds on the same idea: minimal effort, maximum flavor.
How to turn this recipe into seasonal or themed treats
You can easily adapt these bars for holidays or party themes by changing the color of the marshmallows or adding toppings:
- Halloween: Use orange and black sprinkles on top.
- Christmas: Mix in red and green mini M&Ms.
- Valentine’s Day: Add pink and white marshmallows, top with heart-shaped sprinkles.
- Easter: Toss in pastel-colored candy eggs.
Food coloring and themed parchment paper go a long way in creating a festive vibe without extra effort.
Healthy(ish) spins on the classic bar
If you’re looking to lighten things up without sacrificing flavor, consider these simple swaps:
- Use natural peanut butter (no sugar or hydrogenated oils).
- Reduce butterscotch chips by half and replace with dark chocolate.
- Add flaxseed meal or chia seeds for fiber.
- Swap butter for coconut oil (refined for no coconut flavor).
You’ll still get a chewy, sweet bar with more balance and nutrients.
FAQ: No Bake Butterscotch Marshmallow Bars
Can I use crunchy peanut butter in these bars?
Yes, and it’s delicious. Crunchy peanut butter adds extra texture and a nutty bite that complements the smooth butterscotch. If you like more contrast in texture, go for crunchy. If you prefer creamier bars, stick to smooth.
How do I stop the marshmallows from melting?
-Chill marshmallows in the freezer for 10–15 minutes before using.
-Let the hot mixture cool slightly before folding them in.
-Mix quickly and gently—don’t over-stir.
How long do these bars last in the fridge or freezer?
–Fridge: Up to 7 days in an airtight container.
–Freezer: Up to 3 months when properly stored with parchment layers between.
They’re a great make-ahead dessert for holidays, parties, or meal prep.
Final Thoughts: Make These Bars a Staple in Your Sweet Repertoire
No bake butterscotch marshmallow bars aren’t just easy—they’re foolproof, nostalgic, and endlessly customizable. Whether you’re prepping for a bake sale, surprising your kids with an after-school treat, or just indulging in a little childhood comfort, this recipe hits the sweet spot every time. With minimal ingredients, no oven time, and make-ahead convenience, these bars are a must-have in your dessert lineup.
Check out our chewy pumpkin cookies recipe for another crowd-pleasing dessert that’s just as easy and satisfying.
PrintNo Bake Butterscotch Marshmallow Bars
No Bake Butterscotch Marshmallow Bars are a nostalgic, easy-to-make dessert combining creamy peanut butter, sweet butterscotch chips, and colorful marshmallows. Perfect for parties, potlucks, or freezer-friendly treats.
- Prep Time: 15 minutes
- Cook Time: 0 minutes
- Total Time: 1 hour 15 minutes
- Yield: 20 bars
- Category: Dessert
- Method: No Bake
- Cuisine: American
- Diet: Vegetarian
Ingredients
- 1 package butterscotch chips (300g)
- 1 cup creamy or crunchy peanut butter
- 1/2 cup unsalted butter
- 1 package rainbow miniature marshmallows (250g)
- 1 tsp vanilla extract
- Optional: 1/2 cup shredded coconut
- Optional: 1 cup Rice Krispies
- Optional: 1/2 cup mini chocolate chips
- Optional: 1/2 cup chopped walnuts or peanuts
Instructions
- Place the bag of marshmallows in the freezer for 10–15 minutes. Line an 8×8 or 9×9 inch pan with parchment paper.
- In a medium saucepan over low heat, melt the butterscotch chips, peanut butter, and butter. Stir until smooth and remove from heat.
- Let the mixture cool for 3–5 minutes.
- Quickly fold in the vanilla extract and frozen marshmallows. Stir gently to combine without melting the marshmallows.
- Pour the mixture into the lined pan and spread evenly with a spatula.
- Refrigerate for at least 1 hour or until firm.
- Once set, remove from pan and cut into squares. Store in the fridge or freezer.
Notes
- Freeze marshmallows before mixing to prevent melting.
- Let the melted mixture cool slightly before adding marshmallows.
- Store in an airtight container in the fridge for up to 7 days.
- These bars are even better served straight from the freezer.
- Add-ins should total no more than 1.5 cups to maintain consistency.
Nutrition
- Serving Size: 1 bar
- Calories: 238
- Sugar: 18g
- Sodium: 121mg
- Fat: 15g
- Saturated Fat: 8g
- Unsaturated Fat: 6g
- Trans Fat: 0g
- Carbohydrates: 23g
- Fiber: 1g
- Protein: 3g
- Cholesterol: 12mg