Valentine’s Day isn’t complete without something sweet, and nothing says love quite like a batch of homemade Hearts Fudge. This creamy, colorful dessert is the perfect way to share love with family, friends, or that special someone. Made with white chocolate and condensed milk, this fudge is rich, melt-in-your-mouth smooth, and easy enough for beginners. Whether you’re planning a romantic dessert or a fun treat for a party, this guide will walk you through every step — from ingredients and variations to storing and gifting.
If you’re looking for more delightful Valentine’s dessert ideas, you might also enjoy our Easy Chocolate Bark Recipe — another no-bake favorite that’s simple to customize for any occasion.
JUMP TO
Table of Contents
What Is Hearts Fudge and Why You’ll Love It
The Story Behind Hearts Fudge
Hearts Fudge has quickly become a favorite treat for Valentine’s Day celebrations. It’s inspired by traditional fudge recipes but designed with a romantic twist — heart shapes, pastel colors, and festive sprinkles. The beauty of this dessert lies in its simplicity: you only need a few ingredients and about 10 minutes of hands-on time. The result is a smooth, creamy fudge that’s as beautiful as it is delicious.
This fudge is especially loved for how versatile it is. You can make it for school parties, office treats, or Valentine’s Day gift boxes. The pink and white layers look beautiful when cut into heart shapes, and they’re perfect for wrapping in clear bags tied with ribbons.
Key Features That Make Hearts Fudge Special
What sets Hearts Fudge apart is its combination of texture, color, and flavor. It’s soft but not sticky, rich but not overly sweet. The blend of white chocolate and condensed milk creates a luxurious base that holds its shape beautifully once chilled. A touch of food coloring transforms it into a festive dessert that instantly captures the Valentine’s spirit.
You’ll also love how beginner-friendly this recipe is. No candy thermometer, no complicated steps — just melt, mix, pour, and chill. Even young bakers can join in on the fun.
For another fun Valentine’s recipe that’s just as easy, check out our Red Velvet Cake Mix Cookies.
Essential Ingredients for the Best Hearts Fudge Recipe
Before diving into the steps, let’s look at what you’ll need to make your Hearts Fudge perfect every time. These simple ingredients combine to create that creamy, dreamy texture everyone loves.
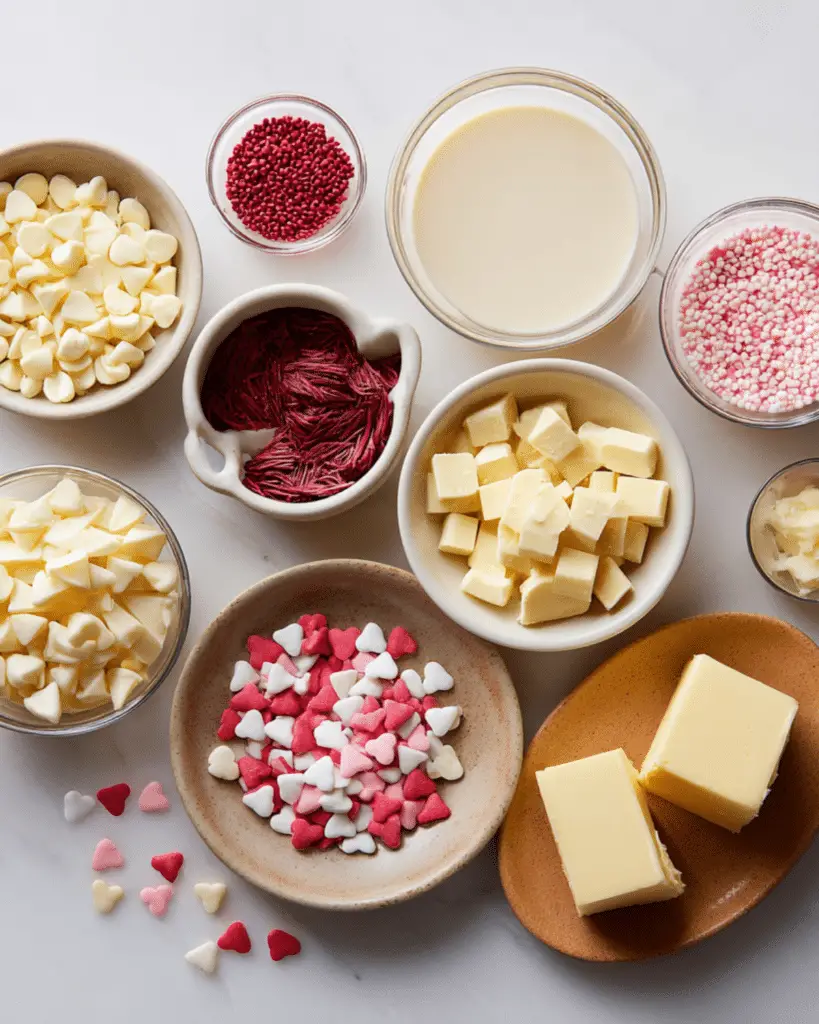
Core Ingredients You Need
| Ingredient | Quantity | Purpose |
|---|---|---|
| White chocolate chips | 2 cups | Smooth, rich base |
| Sweetened condensed milk | 1 can (14 oz) | Sweetness and creaminess |
| Vanilla extract | 1 tsp | Adds flavor depth |
| Pink or red food coloring | A few drops | Creates Valentine’s color |
| Heart sprinkles or candy hearts | 2–3 tbsp | Decoration and texture |
This simple list makes a batch that sets beautifully without needing any fancy tools. For extra shine and smoothness, use high-quality white chocolate chips — cheaper ones tend to separate or get grainy.
Optional Add-Ins for Flavor and Fun
Want to give your fudge a personal touch? Try adding:
- Crushed freeze-dried strawberries for a fruity twist
- Mini marshmallows for a chewy texture
- Crushed cookies (like Oreos) for crunch
- Edible glitter or heart-shaped sprinkles for presentation
These additions not only make your fudge stand out but also add layers of flavor and color.
You can also find inspiration for unique mix-ins in our White Chocolate Raspberry Fudge — another reader-favorite no-bake dessert.
Ingredient Substitutions and Allergy-Friendly Options
If you or your loved ones have dietary restrictions, don’t worry — Hearts Fudge can be customized:
- Substitute dairy-free white chocolate and vegan condensed milk for a lactose-free version.
- Add almond extract instead of vanilla for a nutty aroma.
- For nut allergies, make sure all toppings are nut-free certified.
Step-by-Step Guide – How to Make Hearts Fudge at Home
Creating your own Hearts Fudge is surprisingly easy. With a few basic ingredients and simple steps, you’ll have a gorgeous, creamy fudge ready to impress your Valentine. Follow this step-by-step process for the best results.
Preparing Your Pan and Melting the Base
Start by lining an 8×8-inch baking pan with parchment paper. Leave a little extra hanging over the edges — it’ll make lifting the fudge out easier once it’s chilled. Next, place your white chocolate chips and sweetened condensed milk in a heatproof bowl.
You can melt the mixture in one of two ways:
- Microwave Method: Heat in 30-second bursts, stirring after each until smooth.
- Stovetop Method: Use a double boiler to melt gently without burning the chocolate.
Once melted, stir in vanilla extract until fully combined. The mixture should look silky and glossy. If it’s too thick, warm it for another few seconds. For more chocolate melting tips, check out our Microwave Chocolate Fudge Recipe.
Coloring and Layering the Fudge
Here’s where the fun begins. Divide the fudge mixture into two bowls. Leave one white and add a few drops of pink or red food coloring to the other, stirring until evenly tinted.
Pour half of one color into your prepared pan, then layer the other color on top. You can also use a toothpick to swirl the colors together for a marbled effect.
Smooth the top with a spatula and gently tap the pan on the counter to remove air bubbles. This creates that clean, professional finish you see in bakery fudge.
Cutting into Heart Shapes
Refrigerate your fudge for at least 2–3 hours, or until firm to the touch. Once set, lift it out using the parchment paper and place it on a clean surface.
Now, grab your heart-shaped cookie cutters and press firmly into the fudge to create perfect Valentine hearts. Re-roll leftover pieces and cut again — waste nothing!
If your fudge sticks to the cutter, lightly oil the edges or chill the fudge a few minutes longer. For more creative dessert shapes, try our Cut-Out Sugar Cookies Guide.
Expert Tips for Perfect Texture and Flavor
Getting your Hearts Fudge just right comes down to a few small details. Here are some expert tips to guarantee success:
- Use quality chocolate: Low-grade chips can make fudge grainy.
- Don’t overheat: Burnt chocolate can’t be fixed — melt gently.
- Add mix-ins last: Fold in nuts, sprinkles, or candies after melting.
- Chill completely: Cutting too early can cause crumbling.
- Store properly: Always keep fudge in an airtight container to maintain creaminess.
If you’re making a big batch, you can double the recipe without issues — just use a 9×13-inch pan instead.
Decorating and Presenting Your Valentine’s Hearts Fudge
Valentine’s fudge isn’t just about taste — it’s about presentation. These adorable heart-shaped pieces make perfect gifts or party favors, and decorating them adds that final festive touch.
Creative Decoration Ideas
Once your fudge hearts are cut and firm, it’s time to decorate! Try these easy options:
- Drizzle with melted white or pink chocolate for a glossy finish.
- Top with mini candy hearts or sprinkles while the fudge is still slightly soft.
- Dust lightly with edible glitter for a sparkly Valentine vibe.
- Use colored candy melts to pipe little words like “Love” or “XO.”
These small details transform your fudge from simple to spectacular — perfect for gifting or party platters. If you enjoy visually stunning desserts, you’ll love our Layered Rainbow Fudge Recipe.
Packaging Hearts Fudge as Gifts
Homemade fudge makes a heartfelt Valentine’s gift that’s both affordable and personal. Here’s how to present it beautifully:
- Wrap in clear cellophane bags tied with red or gold ribbons.
- Arrange in decorative boxes lined with parchment.
- Place in mason jars with handwritten labels or tags.
- Create mini dessert trays with fudge, cookies, and candies for variety.
These packaging ideas turn simple fudge into elegant, thoughtful gifts. For presentation inspiration, take a look at our DIY Valentine’s Treat Packaging Guide.
Storage, Serving, and Freezing Tips
Your Hearts Fudge will stay fresh and creamy if stored correctly.
- Room Temperature: Up to 5 days in a cool, dry spot.
- Refrigerator: Up to 2 weeks in an airtight container.
- Freezer: Up to 2 months; thaw overnight in the fridge before serving.
Always separate layers with parchment to prevent sticking. Serve chilled or at room temperature for the best texture.
Hearts Fudge Variations You Must Try
There’s something magical about how customizable Hearts Fudge can be. Whether you like fruity flavors, chocolate richness, or playful layers, you can transform this simple recipe into multiple irresistible versions. Let’s explore some of the most loved variations you can try this Valentine’s season.
Red Velvet Hearts Fudge
If you’re a fan of classic red velvet cake, this version will be your favorite. Simply add 1 teaspoon of cocoa powder and a few drops of red gel food coloring to your white chocolate base. The mild cocoa flavor gives the fudge a subtle depth, while the red hue makes it ideal for Valentine’s Day.
Top it with white chocolate drizzle or heart-shaped sprinkles for a bakery-style finish.
For more red velvet-inspired desserts, visit our Red Velvet Brownies Recipe.
Strawberry and Cream Hearts Fudge
This fruity twist is as pretty as it is delicious. Add ½ teaspoon of strawberry extract to the pink fudge layer and swirl it with a white vanilla layer. The result is a strawberries-and-cream flavor combo that looks stunning when cut into hearts.
You can even mix in crushed freeze-dried strawberries for extra flavor and texture.
If you enjoy fruit-flavored sweets, you’ll also love our Strawberry Shortcake Fudge.
Chocolate Lovers Hearts Fudge
For those who can’t resist a deep chocolate flavor, switch out the white chocolate for semi-sweet or dark chocolate chips. The darker color contrasts beautifully with a pink swirl on top, creating a visually striking dessert.
This version is perfect for those who prefer a less sweet, richer fudge flavor.
Pair this treat with a cup of hot cocoa or coffee for a cozy Valentine’s evening.
For more chocolate-based desserts, check out our Classic Chocolate Truffles Recipe.
FAQs About Making Hearts Fudge
Why did my fudge not set properly?
This usually happens if too much condensed milk is added or the fudge isn’t chilled long enough. Always measure accurately and refrigerate for at least 2–3 hours.
Can I use regular chocolate instead of white chocolate?
Yes, but the texture and sweetness will differ slightly. White chocolate gives the creamiest texture, while milk or dark chocolate will make it firmer.
How do I make Hearts Fudge without a microwave?
You can melt the ingredients using a double boiler over simmering water. Stir continuously until smooth to prevent burning.
Can I double the recipe?
Absolutely. Double the ingredients and use a 9×13-inch pan for even results.
What’s the best way to cut perfect heart shapes?
Use metal heart-shaped cookie cutters and press firmly while the fudge is chilled but not rock-solid. For cleaner edges, wipe the cutter with a warm cloth between cuts.
Conclusion – Sweeten Your Day with Homemade Hearts Fudge
Making Hearts Fudge at home is one of the simplest and sweetest ways to celebrate love. With just a few ingredients and a touch of creativity, you can create a dessert that’s not only delicious but also beautiful to gift or share. Whether you go classic with white chocolate or experiment with strawberry or red velvet versions, every bite delivers a taste of Valentine’s joy.
If you enjoyed this recipe, try our Valentine’s Sugar Cookies — another quick and fun dessert to pair with your homemade fudge.
PrintHearts Fudge

Hearts Fudge is a creamy, white chocolate Valentine’s Day dessert that’s easy to make and perfect for gifting. With only a few ingredients and endless decoration options, this simple no-bake fudge is a festive treat everyone will love.
- Prep Time: 10 minutes
- Cook Time: 5 minutes
- Total Time: 2 hours 15 minutes (includes chilling time)
- Yield: 16 heart-shaped fudge pieces
- Category: Dessert
- Method: No-Bake
- Cuisine: American
- Diet: Vegetarian
Ingredients
- 2 cups white chocolate chips
- 1 can (14 oz) sweetened condensed milk
- 1 teaspoon vanilla extract
- A few drops pink or red food coloring
- 2–3 tablespoons heart sprinkles or candy hearts
Instructions
- Line an 8×8-inch pan with parchment paper, leaving extra overhang for easy removal.
- In a heatproof bowl, combine white chocolate chips and condensed milk.
- Melt using either a microwave in 30-second intervals or a double boiler, stirring until smooth.
- Stir in vanilla extract until fully incorporated.
- Divide mixture into two bowls. Tint one with pink or red food coloring.
- Pour one color into the prepared pan, then layer the other color on top. Swirl gently for a marbled look.
- Top with heart sprinkles or candy hearts.
- Refrigerate for 2–3 hours or until firm.
- Lift the fudge from the pan and use a heart-shaped cookie cutter to cut into pieces.
- Store in an airtight container at room temperature or refrigerate.
Notes
- Use high-quality white chocolate chips for best results.
- Don’t overheat the chocolate to avoid graininess.
- For dairy-free fudge, use vegan white chocolate and condensed milk alternatives.
- Fudge can be stored up to 2 weeks in the fridge or 2 months in the freezer.
- Decorate with edible glitter, drizzle, or candy melts for a festive look.
Nutrition
- Serving Size: 1 piece
- Calories: 190
- Sugar: 22g
- Sodium: 35mg
- Fat: 8g
- Saturated Fat: 5g
- Unsaturated Fat: 2g
- Trans Fat: 0g
- Carbohydrates: 28g
- Fiber: 0g
- Protein: 2g
- Cholesterol: 8mg