Planning a Halloween party and need a dessert that’s quick, creepy, and kid-approved? Halloween dirt cups are the ultimate last-minute no-bake treat that combines chocolate pudding, crushed OREOs, and gummy worms for a playful graveyard effect. Not only do they look festive, but they’re also so easy to make that your kids can help assemble them. In this article, you’ll discover everything from ingredient tips and assembly tricks to spooky topping ideas and storage solutions. Don’t miss our easy Halloween snack mix recipe if you want to build out your party table with more crowd-pleasers.
JUMP TO
Table of Contents
What Are Halloween Dirt Cups and Why They’re a Must-Try
The Origin of Dirt Cups and Their Halloween Evolution
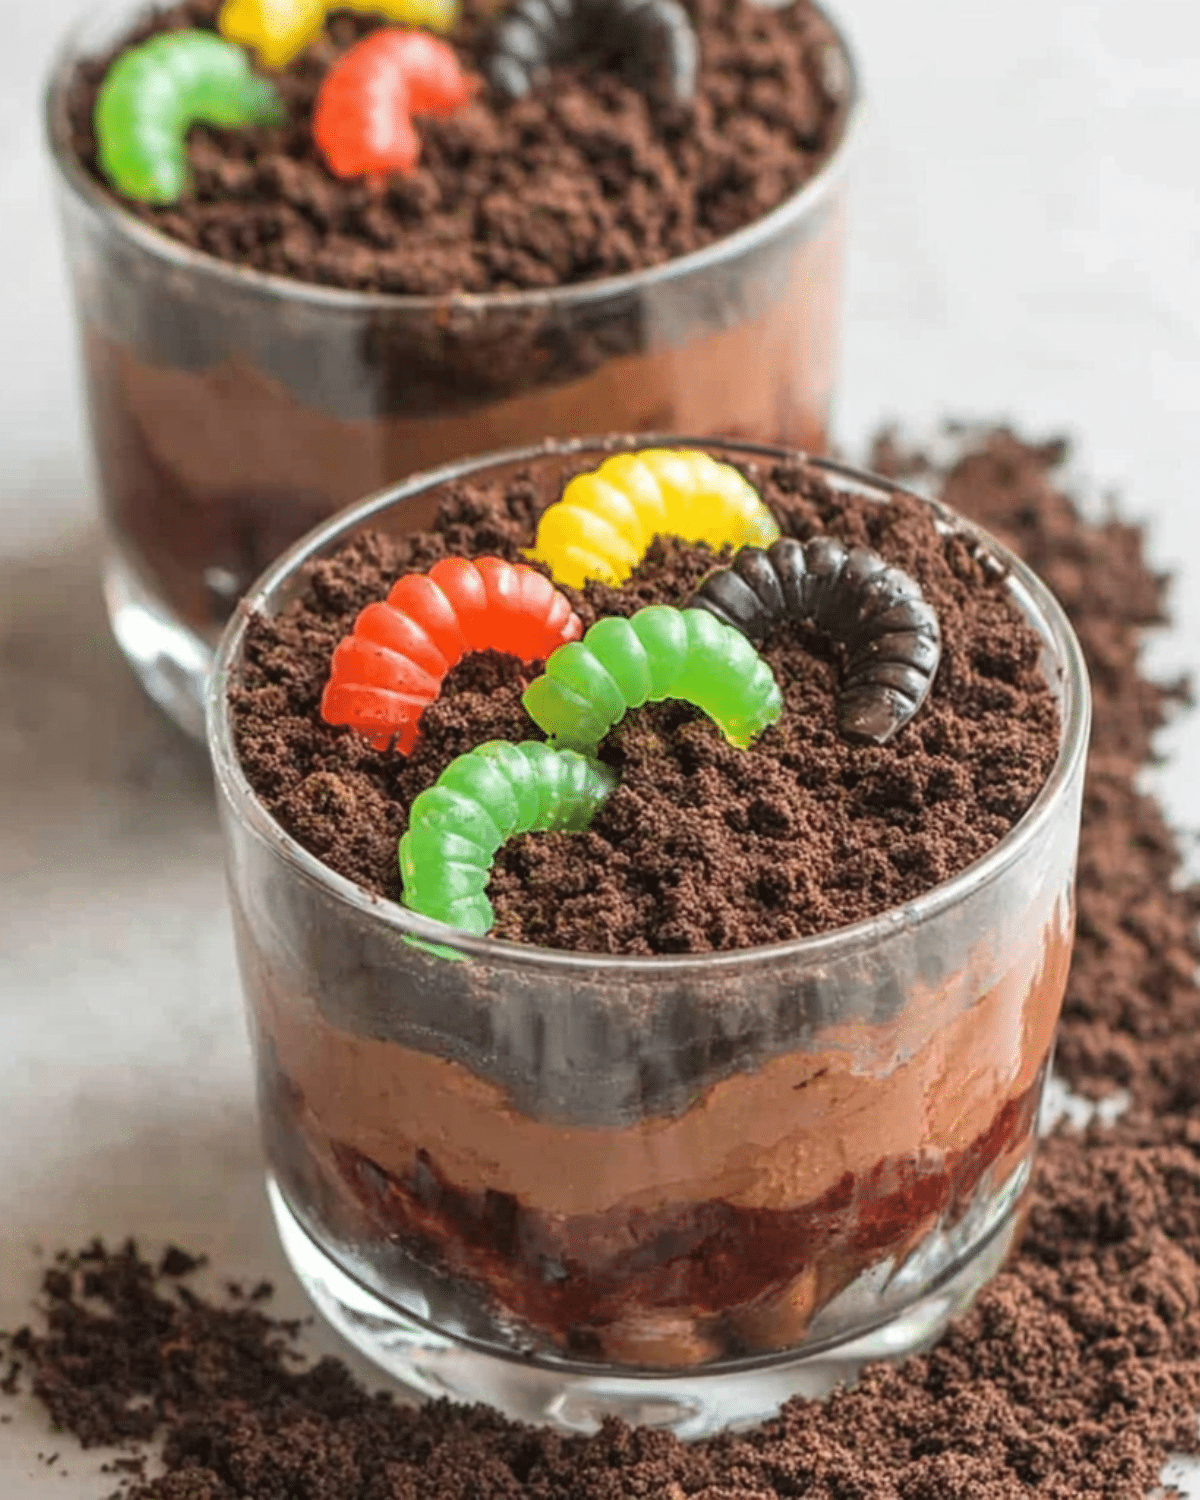
Dirt cups originally gained popularity as a whimsical dessert for kids, often seen at birthday parties and classroom events. They mimic a layered “dirt and worms” look using chocolate pudding as soil, OREO crumbs as dirt, and gummy worms as the creepy crawlies. For Halloween, they get a frightfully fun makeover with themed toppings like tombstone cookies, candy eyeballs, or even marshmallow ghosts.
What makes these treats especially beloved during spooky season is their visual appeal. They bring just the right amount of spooky and silly, making them perfect for kids and adults alike.
Why Kids and Adults Love This Creepy-Cute Dessert
Halloween dirt cups hit the sweet spot between fun and flavor. The pudding is silky, the OREO crunch adds texture, and the gummy worms introduce a surprise element that makes people laugh. Whether you’re a busy parent, a teacher organizing a Halloween classroom bash, or a Halloween enthusiast, this dessert delivers with minimal effort and maximum impact.
Better still, they’re single-serve, making cleanup easier and reducing food waste. No need to slice or scoop — just grab a cup and dig in.
Looking for inspiration? Try our eyeball brownies for a ghoulish dessert spread!
Perfect for Last-Minute Halloween Prep
With just five main ingredients and less than 10 minutes of prep, these dessert cups are a lifesaver for procrastinators. You can even prep components the night before and assemble them quickly before guests arrive.
Hosting a bigger bash? These cups are easy to scale. Double or triple the recipe and let guests grab them straight from a tray. They look fabulous on a decorated Halloween dessert table, especially alongside options like mummy dogs or witch hat crescent rolls.
Ingredients and Tools You’ll Need for Halloween Dirt Cups
Essential Ingredients: Just 5 Items to Buy
The beauty of Halloween dirt cups lies in their simplicity. You only need five pantry-friendly ingredients, most of which are ready-to-use:
| Ingredient | Details |
|---|---|
| Chocolate pudding mix | Use instant Jell-O mix for fast prep |
| Chilled milk | Cold milk helps pudding set quickly |
| Cool Whip | Thawed overnight in fridge; sub with whipped cream if needed |
| OREO cookies | Classic or double-stuffed work well |
| Gummy creatures | Worms, spiders, bats, or Halloween-themed gummies |
Don’t feel limited by tradition—some people swap in vanilla pudding, add cream cheese for a cheesecake twist, or even use golden OREOs to resemble sandy graveyards.
Want more fall desserts with a fun twist? Check out our chewy pumpkin cookies that go great with a Halloween spread.
Recommended Kitchen Tools for Easy Assembly
While you don’t need fancy equipment, having the right tools speeds things up—especially if little hands are helping:
- Mixing bowl & hand whisk – For blending the pudding and milk.
- Food processor – Crumbles cookies into fine “dirt.”
- Zip-lock bags + rolling pin – An alternative to the food processor.
- Plastic or glass cups – Mason jars or clear disposable cups for serving.
- Rubber spatula – Helps fold Cool Whip gently into pudding.
- Spoons – For neat layering of pudding and crumbs.
Planning to go all out for your Halloween table? Don’t miss our creepy deviled eggs for Halloween — they pair perfectly with these dirt cups on a spooky snack board.
How to Make Halloween Dirt Cups (Step-by-Step Guide)
These spooky treats come together in just minutes. Whether you’re using store-bought ingredients or whipping up homemade pudding, this guide will walk you through each layer of the delicious mess.
Step 1: Whisk the Pudding
In a large mixing bowl, combine the chocolate pudding mix with cold milk as per the package instructions. Use a hand whisk or electric mixer to beat until smooth and creamy. Let the mixture sit for about 5 minutes to thicken.
Step 2: Fold in the Cool Whip
Once the pudding is set, gently fold in the Cool Whip or homemade whipped cream using a rubber spatula. This makes the pudding light, airy, and more mousse-like — giving the cups that fluffy bite everyone loves.
Step 3: Crush the OREOs
Using a food processor, pulse the OREO cookies into fine crumbs. Don’t have a processor? Pop the cookies in a zip-lock bag and crush with a rolling pin — the kids will love helping with this part.
Step 4: Assemble the Dirt Cups
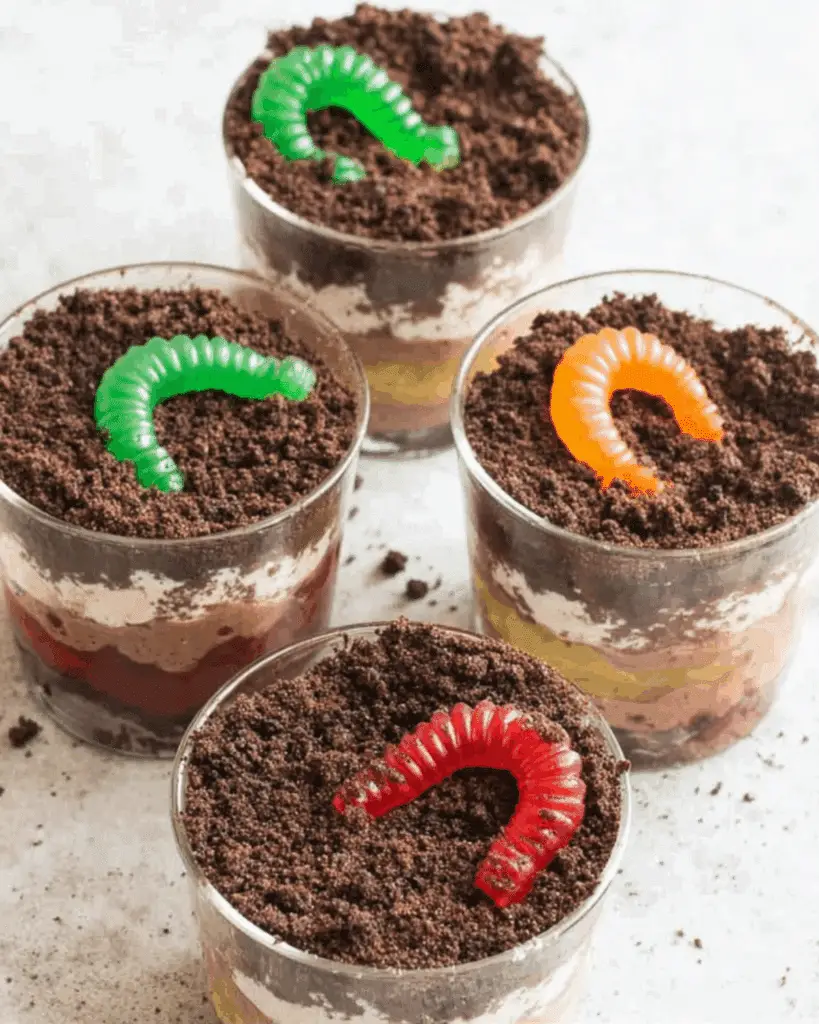
Get your clear cups ready (glass or plastic both work). Start by adding a spoonful of the pudding mixture at the bottom. Top it with a layer of cookie crumbs. Repeat the layers until the cup is nearly full.
Finish with a final layer of “dirt” — a thick topping of crushed OREOs to mimic the soil.
Step 5: Add Gummy Creatures & Creepy Decorations
Now for the fun part. Place gummy worms on top of each cup, letting them hang over the side like they’re crawling out. You can also use:
- Marshmallow ghosts
- Milano cookies decorated as tombstones
- Candy eyeballs
- Toffee bits or crushed candy bars
These finishing touches turn your dirt cups from simple to showstopping.
🕒 Quick Prep Table
| Step | Time Needed | Pro Tip |
|---|---|---|
| Whisk pudding | 2–3 minutes | Use cold milk for faster set time |
| Fold in Cool Whip | 1 minute | Don’t overmix to keep it fluffy |
| Crush OREOs | 1–2 minutes | Use food processor for even crumb size |
| Assemble layers | 2–3 minutes | Alternate layers for best visual effect |
| Add toppings | 1 minute | Place gummy worms last to avoid sinking |
Optional: Make It Your Own
Hosting a birthday party instead? Swap gummies for dinosaur figurines or toy trucks. For game day, tint the Cool Whip green and top with football-themed candies. Adults can enjoy a boozy twist by stirring in a splash of Baileys or Kahlua to the pudding base.
Want another show-stopper for your Halloween dessert spread? Don’t miss our pizza skulls — they’re savory, spooky, and so fun to make.
Creative Toppings and Fun Variations
Halloween dirt cups are all about presentation. Once you’ve got the base pudding and OREO layers set, the topping possibilities are endless. Whether you’re aiming for spooky, silly, or downright gross (in a good way), here are the best ways to customize your cups.
Gummy Worms, Creepy Candies & Graveyard Cookies
Traditional Halloween dirt cups wouldn’t be complete without gummy worms. They’re classic for a reason, but you can take things up a notch with creative additions:
- Tombstone Cookies: Stick in Milano cookies with “RIP” written in chocolate.
- Candy Eyes: Place in the “dirt” for a monster graveyard effect.
- Marshmallow Ghosts: Cute and puffy toppers for younger kids.
- Candy Corn or Pumpkin Candies: Bright pops of color and fall flair.
- Pretzel sticks: Great for twig or bone shapes.
You can even drizzle green or red icing over the top to mimic slime or blood for a spookier effect.
Looking for more creative Halloween treats? Don’t miss our witch’s cauldron beef stew — a savory main dish that balances out all the sweets.
Themed Cup Ideas for Birthday, Football, or Spring
One reason dirt cups stay popular year-round is how easy they are to customize:
- Dinosaur Party: Use dino gummies and chocolate rocks.
- Super Bowl Bash: Swap worms for chocolate footballs and green-dyed whipped cream for grass.
- Spring Garden Cups: Add flower gummies and butterflies.
- Valentine’s Day: Use pink pudding and candy hearts.
- Easter: Add bunny peeps and jelly beans.
You can even change the pudding flavor to match the theme. Think vanilla pudding with green dye for grass, or orange-colored pudding for a pumpkin patch vibe.
Adult Versions: Boozy Dirt Cups with Liqueur
Want to make a grown-up version of this childhood favorite? Simply add a splash of your favorite creamy liqueur to the pudding. Great choices include:
- Baileys Irish Cream
- Kahlua
- Amaretto
- Grand Marnier
Keep portions moderate to maintain the pudding texture, and always label clearly if serving to a mixed-age crowd.
Tips, Storage & Make-Ahead Instructions
Planning ahead for a Halloween party or school event? These dirt cups are perfect for prepping early—but only if you follow a few smart tricks to keep them fresh and Instagram-worthy until showtime.
Avoiding Soggy Cookie Crumbs
One of the most common mistakes is assembling the dirt cups too early. If OREO crumbs sit too long in the pudding, they soak up moisture and lose their crunch—turning your delicious “dirt” into mush.
Solution: Prep the pudding and cookie crumbs separately. Assemble just before serving, or at most 1–2 hours ahead of time. If you’re determined to layer them early, add a plastic film layer between the pudding and crumbs as a barrier, then remove before serving.
You’ll love these time-saving Halloween pretzels if you’re prepping a whole snack table — they’re cute, easy, and keep perfectly overnight.
Best Way to Store & Transport
Once assembled (without gummies), store the cups in the fridge in a covered container or individually wrapped. This keeps the pudding cool and prevents it from drying out. Add gummy candies and toppers right before serving for the freshest look.
Transport Tip: Use a muffin tin to hold individual dessert cups upright while transporting to parties or school events. No more sliding or spilling in the car!
Freezing and Thawing Options
Want to prep weeks in advance? You can freeze the chocolate pudding mixture—but not the assembled cups. Pudding with whipped topping freezes well for up to a month in airtight containers. Thaw overnight in the refrigerator and layer with fresh crumbs and gummies before serving.
Halloween Dirt Cups vs Traditional Dirt Pudding
You might be wondering: “Aren’t dirt cups just dirt pudding in a cup?” The answer is yes—and no. While they share similar ingredients, Halloween dirt cups bring a unique visual flair and seasonal twist that make them stand out.
What Makes This Version Spookier?
Traditional dirt pudding is often served in large casserole dishes and topped with a basic layer of crushed cookies and gummy worms. It’s tasty, but lacks the wow factor. Halloween dirt cups take the concept further by adding spooky toppings, themed candies, and creative layering inside individual clear cups for full creepy-cute visibility.
In Halloween versions, you’ll find:
- Gummy eyeballs and bats
- Tombstone cookies
- Marshmallow ghosts
- Candy corn pumpkins
- Slime drizzle (green frosting or dyed syrup)
All these elements scream Halloween without being too scary, making them a hit for all ages.
Differences in Ingredients & Presentation
Here’s a breakdown comparing the two:
| Feature | Traditional Dirt Pudding | Halloween Dirt Cups |
|---|---|---|
| Presentation | Served in a dish, scooped out | Individually portioned clear cups |
| Toppings | Usually just gummy worms | Gummy worms + Halloween-themed toppers |
| Layers | One or two | Multiple, more visually appealing |
| Occasion | Year-round | Halloween-focused |
| Theme adaptability | Limited | Highly customizable for spooky fun |
Halloween dirt cups win on creativity, portion control, and party appeal — especially when you’re setting up a themed dessert table.
Looking for something equally playful but savory? Try these spooky fun mummy dogs — perfect for balancing all the sugar.
FAQs About Halloween Dirt Cups
Can I make Halloween dirt cups in advance?
Yes, but only partially. Prepare the pudding and cookie crumbs ahead of time, then assemble the cups no more than 1–2 hours before serving. Add gummy toppings last to keep everything fresh and crisp.
What can I use if I don’t have a food processor to crush OREOs?
Place the cookies in a zip-lock bag and crush them with a rolling pin or the bottom of a glass. It works just as well and makes cleanup easy.
Can I use whipped cream instead of Cool Whip?
Absolutely. Homemade whipped cream gives a richer, fresher taste. Just whip heavy cream with a little powdered sugar until stiff peaks form.
How long do Halloween dirt cups stay fresh?
Once assembled, they’re best served within 12–24 hours. After that, the cookie crumbs may become soft, and gummies can harden.
Are there gluten-free or dairy-free versions of dirt cups?
Yes! Use gluten-free cookies, dairy-free pudding mix, and coconut whipped topping for an allergy-friendly alternative that tastes just as good.
Conclusion: Why Halloween Dirt Cups Deserve a Spot at Your Party Table
Whether you’re planning a classroom celebration, neighborhood bash, or just a spooky movie night, Halloween dirt cups are the ultimate crowd-pleasing dessert. They’re simple, quick, and endlessly customizable — plus, they look as fun as they taste. With a little pudding, a few crushed cookies, and some creative toppings, you’ll have a no-bake Halloween treat that’ll wow kids and adults alike.
Don’t miss our pumpkin s’mores cookies for another creative Halloween-themed dessert with fall flavors!
PrintHalloween Dirt Cups
Halloween Dirt Cups are fun, no-bake layered desserts made with chocolate pudding, crushed OREOs, Cool Whip, and gummy candies—perfect for spooky parties or last-minute Halloween treats.
- Prep Time: 5 minutes
- Cook Time: 0 minutes
- Total Time: 5 minutes
- Yield: 4 servings
- Category: Dessert
- Method: No-Bake
- Cuisine: American
- Diet: Vegetarian
Ingredients
- 1 pack (3.9 oz) Jell-O Chocolate Pudding Mix
- 2 cups cold milk
- 1/2 cup Cool Whip (or whipped cream)
- 15 OREO cookies, crushed (about 1 1/2 cups)
- 12 gummy worms or other Halloween-themed gummy candies
Instructions
- Thaw frozen Cool Whip overnight in the refrigerator if using.
- In a mixing bowl, beat chocolate pudding mix with chilled milk until smooth and thickened (about 2-3 minutes).
- Fold Cool Whip into the pudding until well combined.
- Crush OREO cookies in a food processor or place them in a zip-lock bag and crush with a rolling pin.
- Assemble dessert cups by layering pudding first, then OREO crumbs. Repeat if desired.
- Top with gummy worms and Halloween candies for decoration.
- Serve chilled and enjoy!
Notes
- Only assemble 1–2 hours before serving to avoid soggy cookie crumbs.
- Store pudding and cookie crumbs separately if prepping ahead.
- Use homemade whipped cream as an alternative to Cool Whip.
- Add alcohol like Baileys or Kahlua for an adult version.
- Decorate with candy eyes, tombstone cookies, or marshmallow ghosts for a festive touch.
Nutrition
- Serving Size: 1 cup
- Calories: 425
- Sugar: 40g
- Sodium: 279mg
- Fat: 13g
- Saturated Fat: 5g
- Unsaturated Fat: 7g
- Trans Fat: 0g
- Carbohydrates: 68g
- Fiber: 1g
- Protein: 10g
- Cholesterol: 14mg