If you’ve ever torn into a soft, holey, and slightly chewy ciabatta roll, you already know there’s nothing quite like it. In this guide, you’ll learn how to make your own fluffy ciabatta bread at home—complete with that signature open crumb and golden crust. We’ll explore its Italian origins, the science behind its airy texture, and give you every step you need to succeed, even if you’re a beginner. Looking for inspiration? Try our no-knead bread tutorial for another simple artisan option.
JUMP TO
Table of Contents
What Makes Fluffy Ciabatta Bread So Unique?
A Look at Ciabatta’s Italian Origins
Ciabatta means “slipper” in Italian, and it’s easy to see why. This rustic bread’s long, flat shape resembles a house slipper. Invented in 1982 by Italian baker Arnaldo Cavallari as a response to the popularity of French baguettes, ciabatta quickly spread across Europe and the U.S., earning fans with its crunchy crust and soft, open interior.
Unlike soft sandwich breads, ciabatta is an artisan loaf that requires skill and patience. It’s known for its high hydration, loose structure, and chewy texture. Traditionally baked with minimal ingredients—just flour, water, salt, and yeast—it relies on time and technique to create its beloved character.
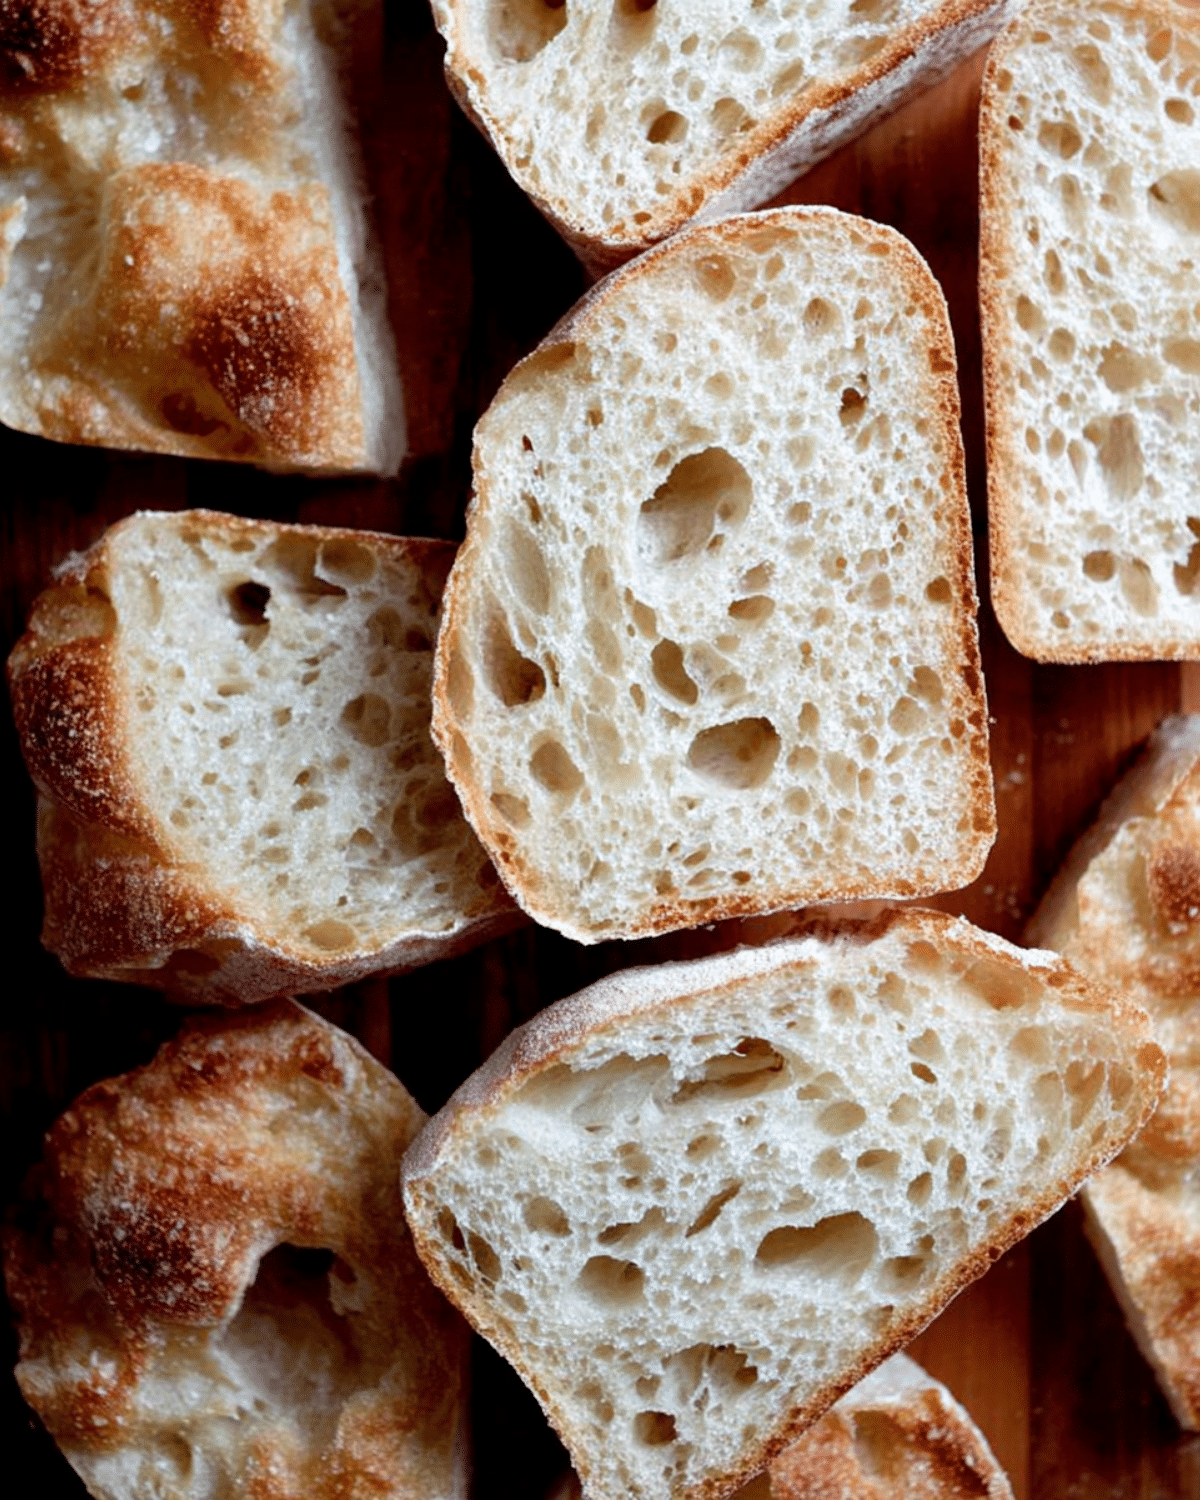
The Secret to That Soft, Open Crumb
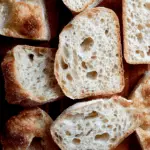
What makes fluffy ciabatta so irresistibly light? It’s all in the crumb. That airy texture is a result of high hydration dough—meaning lots of water relative to flour. When properly handled, this dough creates large, irregular holes and a feathery inside that’s perfect for mopping up olive oil or making gourmet sandwiches.
Another key is gentle dough handling. Instead of kneading, bakers use the stretch-and-fold method to develop gluten while preserving the air bubbles. This allows the loaf to rise without collapsing, giving you that dramatic, honeycombed interior.
Poolish vs. Biga: Which Preferment Works Best?
Many ciabatta recipes rely on a preferment—either poolish or biga. Both are made from flour, water, and a bit of yeast and left to ferment before being added to the final dough. In this recipe, we use a poolish, which is slightly wetter and ferments faster, resulting in deeper flavor and lighter texture.
Why use a preferment? It enhances gluten structure, adds complexity to the flavor, and contributes to the signature crumb. If you’re short on time, skip it—but for the fluffiest ciabatta possible, using poolish is worth every extra hour.
Discover great ideas like our fluffy French bread for another beginner-friendly artisan option.
Step-by-Step Guide to Baking Fluffy Ciabatta Bread at Home
Ingredients You’ll Need for This Perfect Ciabatta
Here’s what you’ll need to make this homemade masterpiece:
| Ingredient | Amount | Notes |
|---|---|---|
| Bread flour | 450g (3.5 cups) | High-protein preferred |
| All-purpose flour | 50g (for poolish) | Can substitute if needed |
| Instant yeast | ½ tsp | SAF recommended |
| Water | 410g (1.75 cups) | Lukewarm |
| Salt | 12g (2 tsp) | Kosher or sea salt |
The type of flour matters—bread flour with a higher protein content gives the dough strength to hold shape. Water should be room temperature, and using a digital scale ensures accuracy for this high-hydration formula.
Don’t miss our easiest rustic bread recipe for another forgiving loaf to practice your skills.
Make the Poolish: The Foundation of Flavor
- In a bowl, mix 50g flour, 50g water, and ½ tsp instant yeast.
- Stir well, cover, and let it sit at room temperature for 3–4 hours.
- Once bubbly and dimpled, your poolish is ready for the main dough.
The poolish not only improves the flavor but also helps with the dough’s extensibility, making it easier to handle later. Check out our Amish white bread recipe for another easy yeast-based favorite.
Mixing, Folding, and Fermenting the Dough
- Add 360g water to the poolish. Stir.
- Mix in 12g salt, stir again.
- Add 450g bread flour, and combine into a sticky dough.
- Let rest, covered, for 30 minutes.
Now it’s time to build structure using stretch-and-folds. Every 30 minutes for 2 hours, stretch one side of the dough to the center, rotate, and repeat. Do this for 3–4 rounds total. You’ll feel the dough go from sticky to strong and elastic.
After folding, place the dough in a tall container. Let it rise until doubled in volume—this can take 1.5 to 2 hours depending on your room temperature.
Learn more about gentle handling in our bread bowl recipe which also uses high hydration techniques.
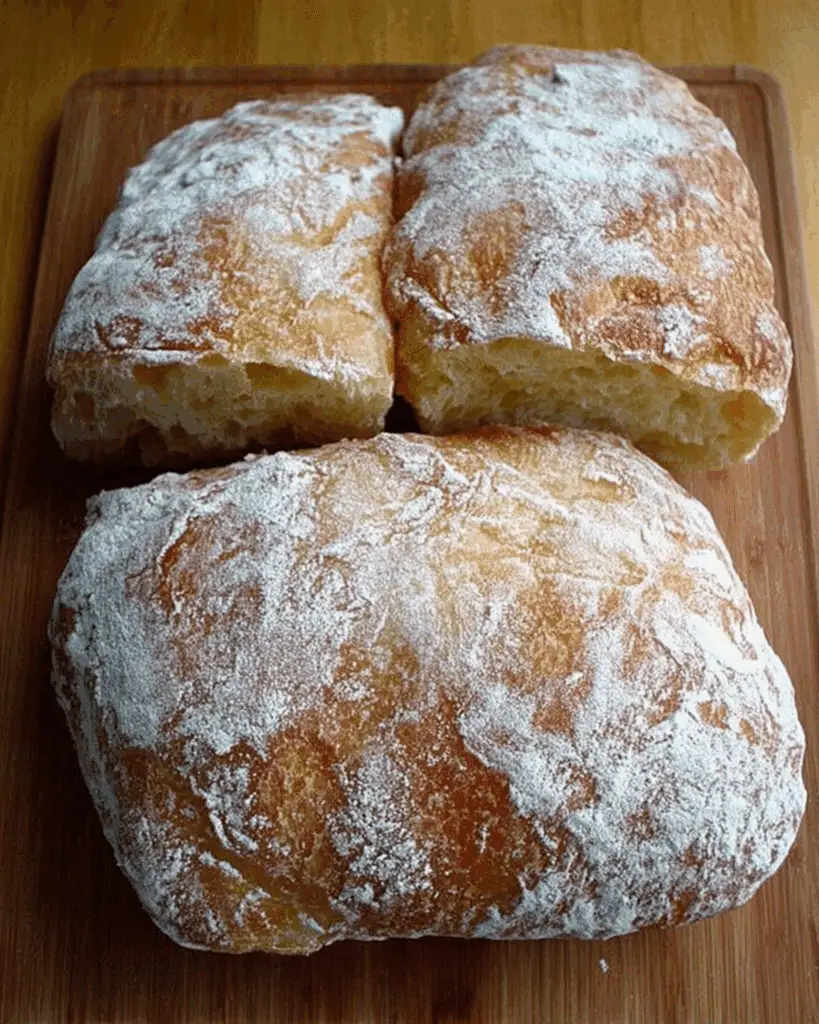
Shaping and Baking Your Ciabatta Bread
After the dough has risen, gently deflate it and refrigerate overnight for maximum flavor and strength.
The next day:
- Turn the cold dough onto a floured surface.
- Cut into two equal parts.
- Shape gently into rectangles or slipper shapes.
- Let rest, covered, for 2.5 hours.
- Preheat oven to 425°F.
- Flip loaves onto parchment and bake 20–25 minutes until golden.
Resist slicing immediately—let it cool for at least 20 minutes. That crumb is still setting, and cutting too soon can ruin its texture.
Variations, Serving Ideas & Storage Tips
Fluffy Ciabatta Rolls: Perfect for Sandwiches
Transforming the classic ciabatta loaf into rolls is a game-changer—especially for sandwich lovers. To make rolls instead of loaves, follow the original dough preparation, including the overnight proofing step. The only change? After refrigeration:
- Turn the dough onto a floured surface.
- Gently flatten into a rectangle, avoiding deflation.
- Cut into 8 even portions.
- Dust with flour and transfer to a parchment-lined baking sheet.
- Let rest for 2–2.5 hours, then bake at 425°F for 20–25 minutes.
These fluffy ciabatta rolls are ideal for paninis, sliders, or hearty breakfast sandwiches. Their crispy edges and pillowy centers hold up beautifully to bold fillings like grilled chicken, pesto, or roasted vegetables.
Check out our cheesy chicken and rice casserole as a great filling idea for your ciabatta rolls.
Serving Suggestions for Maximum Enjoyment
Few breads are as versatile as ciabatta. Here’s how to turn it into the star of any meal:
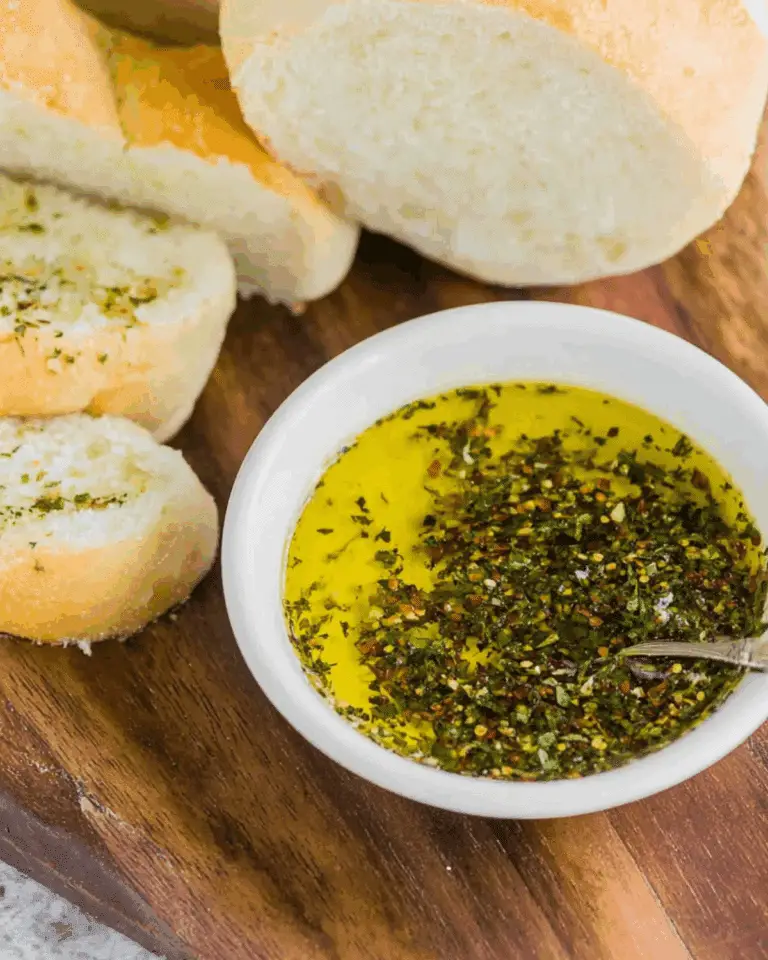
- Appetizer Platter: Serve sliced and grilled with olive oil, balsamic vinegar, and crushed garlic. Add cured meats, olives, and cheeses for a Mediterranean twist.
- Soup Companion: This bread’s sturdy crumb makes it a perfect match for soups like creamy chowders or tomato basil.
- Ciabatta Toast: Brush with olive oil, add a pinch of sea salt, and toast it under the broiler for a quick breakfast base.
- Sandwich Base: Use fluffy ciabatta bread to elevate your classic BLT, steak sandwich, or Caprese stack.
Looking for a salad to pair it with? Don’t miss our strawberry spinach salad—a fresh, light side that complements the chewiness of the bread.
Storage & Reheating Without Losing Softness
Homemade bread doesn’t include preservatives, so proper storage is key. Here’s how to keep your ciabatta fluffy longer:
- Room Temp: Wrap in a clean kitchen towel or store in a paper bag for up to 2 days.
- Freezer: Wrap loaves or rolls tightly in plastic wrap, then place in a zip-top bag. Freeze up to 2 months. Thaw at room temp.
- Reheating Tips: To revive the crust without drying the interior, mist the bread lightly with water and reheat at 350°F for 5–7 minutes. Avoid microwaving—it ruins the texture.
Learn more about pairing fluffy breads with warm dishes in our oven-baked chicken and rice recipe.
FAQ: Answering Popular Questions About Ciabatta Bread
What makes ciabatta different from sourdough?
While both breads can look similar, sourdough relies on natural fermentation with wild yeast, giving it a tangy flavor. Ciabatta, on the other hand, uses commercial yeast and is known for its soft, chewy texture and neutral flavor, making it more versatile for meals.
Why is my ciabatta bread so flat?
Flat loaves often happen when dough is over-proofed or not strong enough to hold shape. Be sure to handle it gently and use stretch-and-folds to build gluten. Also, avoid overhydrating the dough if your flour can’t absorb much water.
Can I make ciabatta without a preferment?
Yes, but the texture and flavor will be less complex. Preferments like poolish help create the signature airy crumb. If you’re short on time, skip it—but know that results may vary.
What flour is best for ciabatta bread?
Bread flour is best due to its higher protein content, which helps support the wet dough and produces better structure. You can use all-purpose in a pinch, but expect a less open crumb.
How do I get more holes in my crumb?
Use a high-hydration dough, minimal handling, and a gentle shaping method. Also, avoid degassing the dough too much before baking. Let the dough rest fully before transferring to the oven to preserve the internal air pockets.
Conclusion: The Joy of Homemade Fluffy Ciabatta Bread
There’s something magical about baking your own fluffy ciabatta bread—from the bubbly poolish that starts the process to the crisp, golden crust that crackles fresh from the oven. This loaf brings together rustic Italian tradition and modern techniques, creating a versatile bread that shines at any table.
Whether you’re making sandwich rolls, a cozy appetizer board, or dipping it into olive oil next to a hearty dinner, this bread delivers every time. And with just a few ingredients and a little patience, you’ll master that airy crumb and chewy crust with ease.
Looking for more no-fail bread options? Don’t miss our moist chocolate cupcakes as a sweet follow-up treat after your bake day.
PrintFluffy Ciabatta Bread
Learn how to make fluffy ciabatta bread with a soft, open crumb and crisp golden crust using a simple poolish preferment and high-hydration dough.
- Prep Time: 24 hours
- Cook Time: 25 minutes
- Total Time: 24 hours 25 minutes
- Yield: 2 medium ciabatta loaves
- Category: Bread
- Method: Baking
- Cuisine: Italian
- Diet: Vegetarian
Ingredients
- 50g all-purpose flour (for poolish)
- 50g water (for poolish)
- ½ tsp instant yeast
- 360g water (lukewarm)
- 12g salt (kosher or sea salt)
- 450g bread flour
Instructions
- Make the poolish: Mix 50g flour, 50g water, and ½ tsp yeast in a bowl. Let it sit covered at room temperature for 3–4 hours until bubbly.
- Add 360g water to the poolish and stir. Add 12g salt, stir again.
- Mix in 450g bread flour until a sticky dough forms. Cover and let rest for 30 minutes.
- Perform stretch-and-folds every 30 minutes for 2 hours (3–4 sets) to build gluten strength.
- Transfer dough to a container and let it rise until doubled, then refrigerate overnight.
- Next day, turn the dough out onto a floured surface. Divide into two portions. Gently shape into ciabatta loaves.
- Let rest covered for 2.5 hours. Preheat oven to 425°F during the final proof.
- Transfer dough to a parchment-lined baking sheet. Bake for 20–25 minutes until golden brown.
- Cool for at least 20 minutes before slicing.
Notes
- Use a digital scale for accurate measurements.
- High-protein bread flour gives the best structure and rise.
- Overnight fermentation enhances flavor and texture.
- Handle dough gently to preserve air pockets.
- Adjust hydration if using lower protein flour or in humid conditions.
Nutrition
- Serving Size: 1 slice (approx. 60g)
- Calories: 160
- Sugar: 0.5g
- Sodium: 240mg
- Fat: 0.5g
- Saturated Fat: 0.1g
- Unsaturated Fat: 0.4g
- Trans Fat: 0g
- Carbohydrates: 33g
- Fiber: 1g
- Protein: 5g
- Cholesterol: 0mg