Few treats capture the comfort and nostalgia of the holidays like Danish Butter Cookies. With their golden edges, rich buttery flavor, and crisp yet tender texture, these timeless cookies have found their way into hearts—and decorative blue tins—all over the world. In this guide, you’ll discover how to make authentic Danish Butter Cookies at home using simple ingredients and easy steps. We’ll also explore their cultural origins, ingredient secrets, and expert tips to help you bake cookies that truly melt in your mouth.
Whether you’re baking for Christmas, a tea party, or just a quiet afternoon snack, these cookies will never disappoint. Let’s start with where they come from and what makes them so special.
JUMP TO
Table of Contents
What Are Danish Butter Cookies?
A Taste of Danish Tradition
The story of Danish Butter Cookies begins in Denmark, where they’re known as “småkager”, meaning “small cakes.” Traditionally baked during Christmas, these cookies became a symbol of warmth and hospitality. Over time, they gained international fame, often sold in decorative tins that many people now reuse for sewing supplies or keepsakes.
What sets Danish Butter Cookies apart is their perfect balance of sweetness and richness. They’re not overly sugary, which lets the butter shine through—creating that signature “melt-in-your-mouth” experience.
What Makes Them Special?
Unlike typical sugar cookies or shortbread, Danish Butter Cookies rely on precision and high-quality butter to achieve their delicate crumbly texture. Their shapes—swirls, pretzels, rings, and rounds—each have unique textures but share the same buttery essence.
In Denmark, these cookies are often paired with tea or coffee and served to guests during festive gatherings. They’ve become a global favorite not only because they’re delicious, but also because they’re simple to prepare and incredibly versatile.
Ingredients for Authentic Danish Butter Cookies
The beauty of Danish Butter Cookies lies in their simplicity. With just a few basic pantry ingredients, you can create a cookie that tastes like it came from a bakery in Copenhagen.
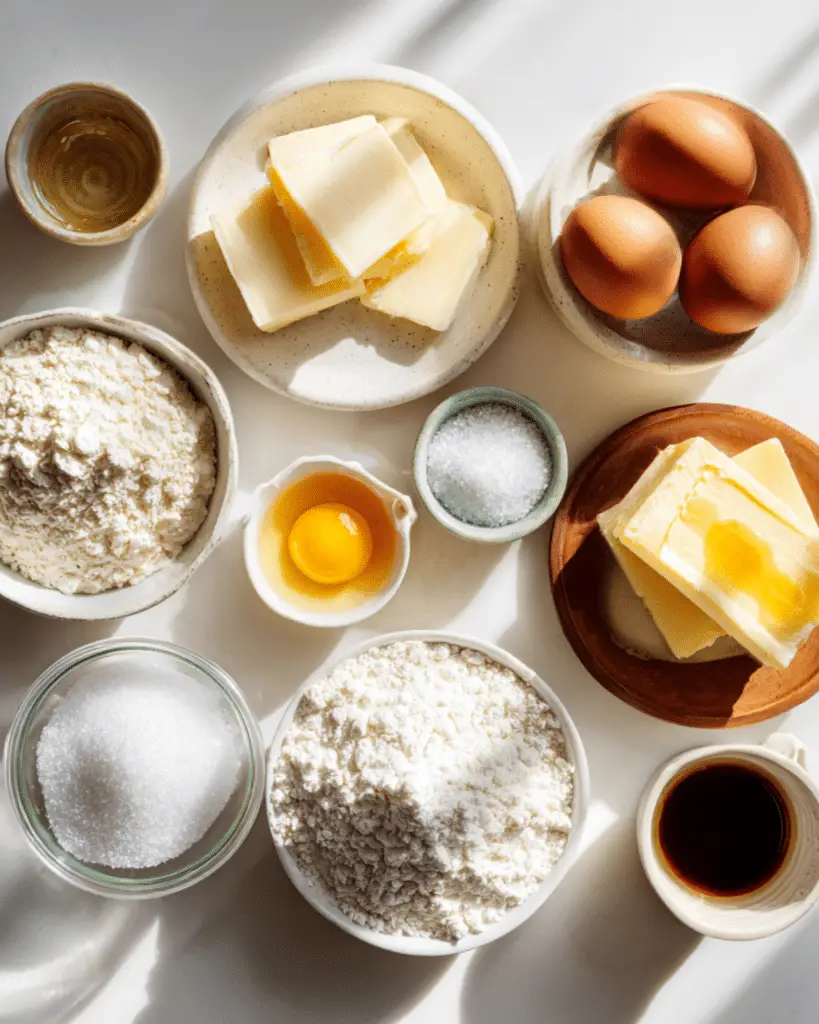
Simple Pantry Ingredients
Here’s what you’ll need and why each ingredient matters:
| Ingredient | Purpose in the Recipe |
|---|---|
| Unsalted Butter | The star of the recipe. Use high-quality butter for a rich flavor and soft crumb. |
| Powdered Sugar | Adds smooth sweetness and helps the dough stay light. |
| Egg | Binds the dough and adds slight richness. |
| All-purpose Flour | Provides structure without making cookies dense. |
| Vanilla Extract | Enhances the buttery aroma and rounds out flavor. |
| Salt | Balances sweetness and deepens flavor. |
The combination of butter and powdered sugar gives these cookies their smooth, creamy dough that pipes easily into elegant shapes.
Optional Add-ins and Variations
While the classic recipe is beloved for its simplicity, you can easily adapt it:
- Lemon Zest – adds a refreshing citrus note.
- Almond Extract – creates a nutty undertone.
- Melted Chocolate – drizzle or dip cookies for an elegant finish.
These variations are perfect when you want to personalize your cookies or give them as gifts.
How to Make Danish Butter Cookies Step-by-Step (Perfect Every Time)
Now that you know what goes into authentic Danish Butter Cookies, it’s time to bake them like a pro. Don’t worry—this recipe is beginner-friendly and uses simple tools. The secret lies in technique and temperature, not complicated methods.
Step-by-Step Instructions to Make Danish Butter Cookies
Mixing the Perfect Dough
Start by creaming unsalted butter and powdered sugar together. This step is crucial—it traps air in the butter, giving your cookies a light texture. Use a hand or stand mixer on medium speed for about 3–4 minutes until the mixture is pale and fluffy.
Add the egg and vanilla extract, mixing just until combined. Overmixing can make your cookies dense. Next, sift the all-purpose flour and salt, then add them gradually to the mixture. Mix on low speed until the dough is soft and slightly sticky but holds its shape.
If you notice the dough feels too thick to pipe, add 1–2 teaspoons of milk for a smoother texture. The perfect dough should be soft enough to squeeze through a piping bag but firm enough to retain its pattern.
Piping or Shaping the Cookies
Here’s where the artistry comes in. Traditional Danish Butter Cookies are piped using a large open-star nozzle, usually a Wilton 1M or 4B tip.
- Transfer your dough to a piping bag fitted with your chosen tip.
- On a parchment-lined baking sheet, pipe small 2-inch swirls, pretzel shapes, or simple rings.
- If you prefer a rustic look, roll the dough into balls and flatten gently with a fork.
To help the cookies maintain their shape, chill the piped dough for about 15–20 minutes before baking. This step prevents spreading and keeps the edges crisp.
Baking for the Perfect Texture
Preheat your oven to 350°F (175°C). Bake your cookies for 10–12 minutes, or until the edges just begin to turn golden brown. Avoid overbaking—they’ll continue to cook slightly on the baking sheet after removal.
Let them cool for 5 minutes before transferring to a wire rack. Once cooled, your cookies should be crisp on the outside and buttery-tender inside.
Tips for the Best Danish Butter Cookies
Perfect Danish Butter Cookies aren’t just about the recipe—they’re about technique. Here’s how to elevate yours to bakery level.
Achieving the Right Consistency
- Use real butter, not margarine. The flavor and texture depend entirely on high-fat butter.
- Butter should be soft but not melted; about 65°F (18°C) is ideal.
- Always measure flour correctly—spoon it into your cup and level it off. Too much flour makes dry cookies.
- Chill the dough briefly if it feels too soft for piping.
Storage and Shelf Life
Your cookies can last up to 2 weeks in an airtight tin at room temperature. This makes them ideal for gifting or storing ahead of the holidays. For longer storage, freeze the raw dough or baked cookies:
- Freeze dough: Shape or pipe, then freeze flat on a baking sheet before transferring to a freezer bag.
- Freeze baked cookies: Place in a sealed container with parchment between layers to prevent sticking.
When ready to enjoy, let frozen cookies thaw at room temperature for 15 minutes or warm them slightly in the oven for that fresh-baked crispness.
Pro Tips for Holiday Gifting
- Place assorted shapes in vintage tins lined with parchment paper.
- Tie with a ribbon and attach a handwritten label for a personal touch.
- Mix in lemon or almond-flavored variations for visual variety.
If you’re planning a festive dessert spread, pairing these cookies with homemade hot cocoa or spiced tea makes for an elegant and heartwarming presentation.
Delicious Variations & Serving Ideas for Danish Butter Cookies
Once you’ve mastered the classic version, it’s time to get creative. Danish Butter Cookies are a blank canvas for your imagination — their buttery base works beautifully with dozens of flavors and decorations.
Fun Twists on the Classic Recipe
You don’t need to stick to the traditional swirl. Try these fun variations to give your cookies a signature touch:
| Variation | Flavor Addition | Result |
|---|---|---|
| Chocolate-Dipped | Dip half of each cooled cookie in melted dark or white chocolate. | Elegant contrast and extra richness. |
| Lemon Zest | Add 1 tsp grated lemon zest to the dough. | Bright, tangy aroma with buttery base. |
| Almond Extract | Replace vanilla with almond extract. | Subtle nuttiness and stronger aroma. |
| Coconut Flakes | Mix in 1 tbsp fine desiccated coconut. | Slightly chewy texture and tropical twist. |
| Cinnamon Sugar | Sprinkle before baking. | Warm and comforting holiday flavor. |
If you’re gifting them, alternate cookie shapes and flavors for visual appeal. These variations also make wonderful party favors or holiday gifts, especially when packed in decorative tins lined with parchment paper.
Pairing and Presentation Ideas
Classic Danish Butter Cookies pair perfectly with hot drinks and desserts that enhance their rich flavor:
- Coffee or Espresso: The buttery crispness complements bold, roasted flavors.
- Black or Earl Grey Tea: Balances sweetness and adds a refined touch.
- Hot Chocolate: Perfect for cozy winter evenings.
- Ice Cream Sandwiches: Place two cookies around a scoop of vanilla or caramel ice cream.
For a simple dessert board, combine your cookies with berries, nuts, and chocolate pieces — creating a delightful mix of textures.
FAQs About Danish Butter Cookies
What’s the difference between Danish butter cookies and shortbread?
Shortbread uses more flour and less sugar, giving it a denser texture. Danish Butter Cookies are lighter and crisper due to their creamed butter-and-sugar base.
Can I use salted butter instead of unsalted?
Yes, but reduce or omit added salt. Salted butter gives a slightly stronger flavor, which some people love in this recipe.
Why did my cookies spread too much?
Your butter may have been too soft or your dough wasn’t chilled before baking. Always chill piped dough for at least 15 minutes before baking.
Can I make Danish Butter Cookies without a piping bag?
Definitely! You can roll the dough into small balls, flatten gently, or use a cookie press. The flavor remains the same — only the shape changes.
How do I store Danish Butter Cookies for freshness?
Keep them in airtight tins at room temperature for up to 14 days. For long-term storage, freeze the dough or cookies in sealed containers.
Conclusion — Bring a Touch of Denmark to Your Kitchen
Danish Butter Cookies are proof that simple ingredients can create extraordinary results. With just butter, flour, sugar, and a touch of vanilla, you can make a treat that’s crisp, golden, and deeply satisfying. Whether you pipe them into elegant swirls or dip them in chocolate, these cookies will always impress.
They’re perfect for sharing — as gifts, party snacks, or cozy evening bites with tea. Once you’ve made a batch, you’ll understand why they’ve been loved for generations.
PrintDanish Butter Cookies

Classic Danish Butter Cookies with a crisp, buttery texture and delicate vanilla flavor. Perfect for holidays, gifts, or afternoon tea.
- Prep Time: 20 minutes
- Cook Time: 12 minutes
- Total Time: 32 minutes
- Yield: About 30 cookies
- Category: Cookies, Dessert
- Method: Baking
- Cuisine: Danish, European
- Diet: Vegetarian
Ingredients
- 1 cup (226g) unsalted butter, softened
- 2/3 cup (80g) powdered sugar
- 1 large egg
- 2 cups (250g) all-purpose flour
- 1 teaspoon vanilla extract
- 1/4 teaspoon salt
- (Optional) 1 teaspoon lemon zest or 1/2 teaspoon almond extract
- (Optional) Melted chocolate for dipping
Instructions
- Preheat oven to 350°F (175°C) and line a baking sheet with parchment paper.
- In a large bowl, cream together the butter and powdered sugar for 3–4 minutes until light and fluffy.
- Add the egg and vanilla extract, mixing until just combined.
- Sift in flour and salt. Mix on low speed until dough is smooth and slightly sticky.
- Transfer the dough into a piping bag fitted with a large star tip.
- Pipe small swirls, rings, or pretzel shapes onto the baking sheet.
- Chill the piped dough for 15–20 minutes to prevent spreading.
- Bake for 10–12 minutes or until the edges turn light golden brown.
- Cool cookies on the baking sheet for 5 minutes, then transfer to a wire rack to cool completely.
- (Optional) Dip half of each cookie in melted chocolate or decorate as desired.
Notes
- Use high-quality butter for the richest flavor.
- Butter should be soft but not melted — around 65°F (18°C).
- Do not overmix the dough; mix only until combined.
- Chilling helps the cookies retain their shape.
- Store in airtight tins for up to 2 weeks or freeze for 3 months.
Nutrition
- Serving Size: 2 cookies
- Calories: 120
- Sugar: 6g
- Sodium: 60mg
- Fat: 7g
- Saturated Fat: 4g
- Unsaturated Fat: 3g
- Trans Fat: 0g
- Carbohydrates: 12g
- Fiber: 0g
- Protein: 1g
- Cholesterol: 25mg