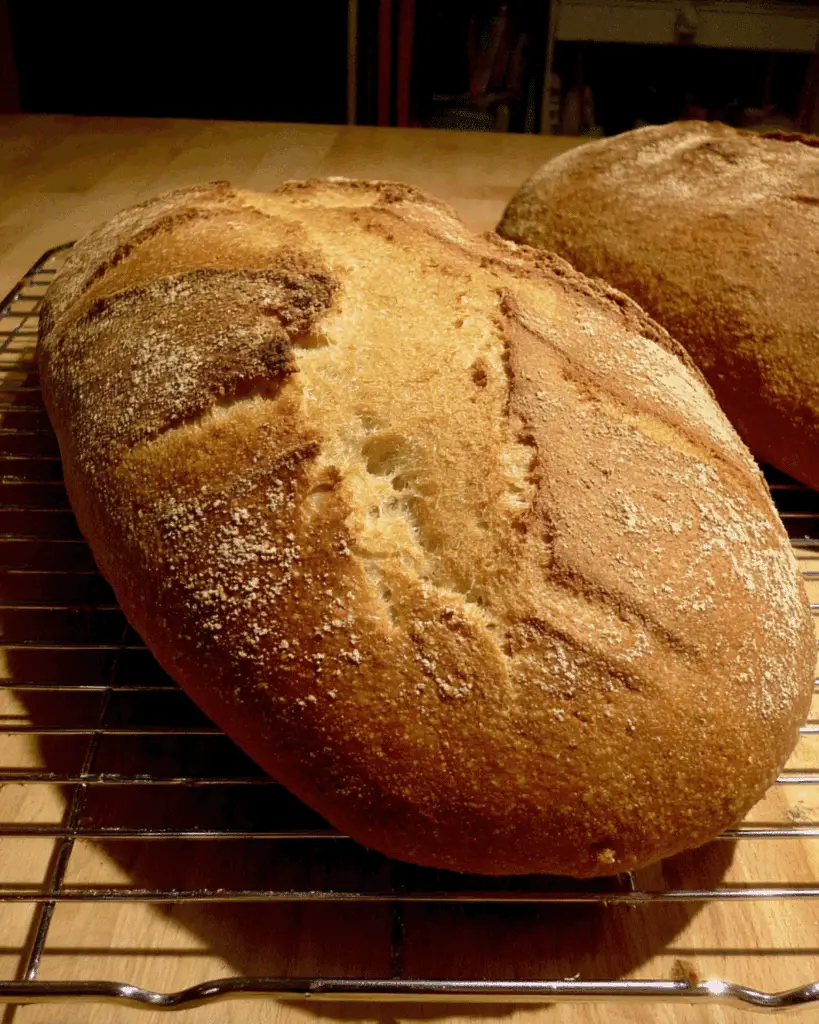
If you’ve ever craved a hearty, crusty artisan bread with a chewy, open crumb and rich flavor, learning how to bake your own crusty batard bread at home is a must. This recipe, rooted in traditional French breadmaking methods, delivers a golden, blistered crust and airy interior that’s ideal for toast, sandwiches, or serving alongside soup. In this guide, we’ll break down everything from flour selection to fermentation, shaping, baking, and troubleshooting—so you can craft rustic loaves like a pro.
Don’t miss our Focaccia Bread recipe for another amazing homemade loaf.
JUMP TO
Table of Contents
Choosing the Right Ingredients for Your Crusty Batard
What flour blend gives the best crust and chew?
To get that distinctive chewy texture and beautifully caramelized crust, start with a mix of unbleached bread flour and whole wheat flour. For this recipe, we’re using 470g of unbleached bread flour and 30g of whole wheat flour. The bread flour’s high protein content develops strong gluten, which holds the structure and allows a more open crumb. Whole wheat adds depth and a subtle nuttiness to the flavor.
Why hydration percentage matters for artisan texture
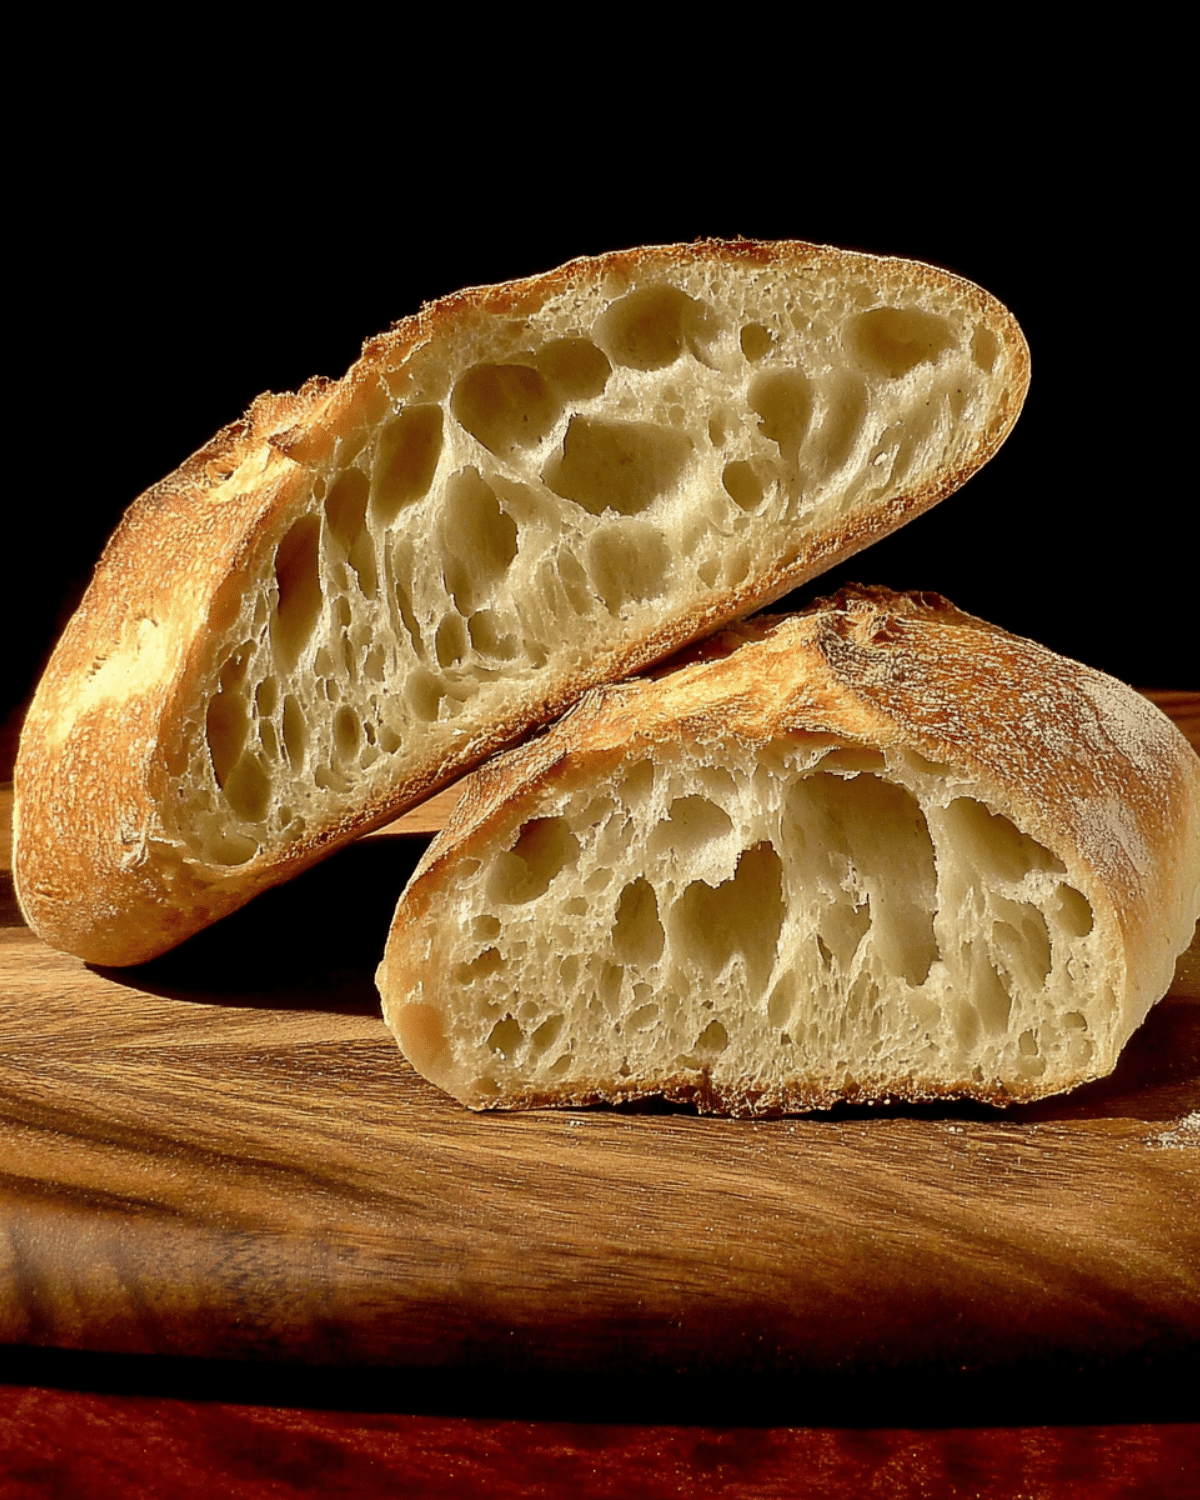
Hydration is the secret sauce to batard bread. In our case, 375g of filtered water gives us a 75% hydration level, which is ideal for a light, open crumb while still being manageable for home bakers. High hydration lets the dough rise well and keeps it moist during baking. Just make sure you’re comfortable handling sticky dough—it’s worth it.
The role of salt and yeast in flavor development
It’s easy to underestimate salt and yeast, but they’re essential. This recipe uses 2 tsp of fine sea salt and just 1/4 tsp of dried yeast. Salt tightens the gluten structure and enhances flavor, while the tiny amount of yeast ensures a slow, overnight fermentation—developing rich, complex notes that commercial breads can’t match.
Learn more about mixing and prepping techniques
To start, combine all the ingredients in a large bowl until there are no dry spots. Let it rest for 15 minutes. Then, perform three sets of stretch and folds at 20-minute intervals to develop the dough’s structure. You’ll be amazed how elastic and pillowy it becomes.
Looking for inspiration? Try our Easiest Rustic Bread and notice how similar folding techniques improve results.
Mastering the Fermentation and Proofing Process
Long fermentation vs. short: What’s better for batard?
When it comes to crusty batard bread, long fermentation wins every time. After mixing and folding the dough, it’s left to proof for 12 hours overnight, but can be extended up to 48 hours for deeper flavor. This slow fermentation, using a small amount of yeast, breaks down the starches and proteins in the flour, improving both digestibility and taste. The result? A nutty, complex flavor with beautiful irregular holes inside.
Shorter fermentation can work, but you’ll sacrifice that artisan texture and flavor. The dough won’t develop the same extensibility or depth, and the final loaf may lack that rustic character you’re aiming for.
Bulk fermentation: Signs your dough is ready
Bulk fermentation happens right after your stretch-and-fold sessions. Leave the dough covered in a bowl overnight at room temperature. How do you know it’s ready? Here are a few visual cues:
| Sign | What It Means |
|---|---|
| Dough has doubled in size | Strong fermentation activity |
| Bubbles on surface | Healthy yeast action |
| Feels soft and jiggly | Good hydration and gluten dev. |
If your dough checks these boxes, it’s ready to move to shaping.
Check out Fluffy French Bread for more bulk fermentation tips for beginner-friendly doughs.
Final proofing: How to shape and rest your dough
Gently transfer the fermented dough onto a well-floured surface, then divide it in two. Let each half rest for 15 minutes, uncovered, to relax the gluten. Next comes shaping. Unlike a baguette, a batard has a short, oblong form with gently tapered ends. To shape:
- Pat into a rectangle
- Fold the top third down
- Fold the bottom third up, like a letter
- Seal and roll slightly for surface tension
Let the shaped batards rise again, seam side down, for 1.5 to 2 hours. Don’t expect a big rise—it’s subtle. But in the oven, you’ll see the magic of oven spring take over.
Don’t miss our Bread Bowl Recipe for another shaping technique worth exploring.
Shaping and Baking Techniques for the Perfect Batard
Step-by-step batard shaping for beginners
Once your dough has gone through its final proofing, shaping is what defines that signature batard look. Unlike a baguette, which is long and slender, the batard is shorter with tapered ends. Here’s how to shape it like a pro:
- Flour your hands and work surface generously.
- Gently flatten your dough into a small rectangle.
- Fold the top edge one-third of the way down.
- Fold the bottom edge up, overlapping the previous fold.
- Pinch the seam together, then gently roll it to elongate and taper the ends slightly.
It’s important not to deflate the dough. Work with a light touch so you maintain that beautiful airy interior. You can also check out Amish White Bread for a softer shaping style that adapts well for sandwiches.
Using steam in the oven for a crispy crust
Steam is the not-so-secret weapon behind that crispy artisan crust. Preheat your oven to 240°C (464°F) and let a baking stone or heavy tray get hot as well. Before baking:
- Lightly mist your shaped loaves with water.
- Place them on the preheated stone.
- Spray the oven walls with water 10 to 15 times in 3–4 minute intervals for the first 10 minutes.
- Don’t spray after 10 minutes, or you’ll soften the crust.
Steam keeps the dough surface soft long enough to allow maximum expansion before the crust sets, producing that coveted oven spring.
Looking for steam-free methods? Learn more from our Easiest Rustic Bread, which works well without added humidity.
How long and how hot: Baking time and temperature tips
Bake your loaves at 240°C (464°F) for 25 to 30 minutes, or until they’re dark golden brown. Here’s a quick breakdown:
| Baking Stage | Temp | Time |
|---|---|---|
| Initial Bake | 240°C (464°F) | 10 mins (with steam) |
| Finish Baking | 240°C (464°F) | 15–20 mins (no steam) |
You’ll know it’s done when the crust is firm, sounds hollow when tapped, and the bottom feels dry. For extra assurance, the internal temp should read around 96°C (205°F).
Check out No-Knead Bread for a low-effort baking schedule that delivers solid results.
Troubleshooting Common Batard Bread Issues
Why didn’t my dough rise as expected?
If your batard dough isn’t rising, the issue could stem from temperature, yeast, or hydration. A few possibilities:
- Your room is too cold. Dough ferments slower below 70°F. Move it to a warmer spot or extend proofing time.
- Old or inactive yeast. Even a small amount of yeast must be fresh.
- Incorrect flour-to-water ratio. A very dry or very wet dough can underperform.
To improve rise, make sure your water is lukewarm (around 75–78°F), and give the dough ample time to develop—don’t rush it.
Check out Fluffy French Bread for a beginner-proof dough that rises with ease.
Fixing a dense or gummy crumb
A gummy interior usually means one of two things: underproofing or underbaking. Underproofed dough hasn’t built enough gas for structure. Underbaked loaves trap moisture inside. Here’s how to fix it:
- Let your dough fully proof—even if it takes longer than expected.
- Bake until the internal temperature hits 205°F.
- Allow the bread to cool completely before slicing, or steam trapped inside will make it gummy.
If your bread always turns out dense, your gluten may not be developed enough. Add more folds next time or knead longer during early prep.
Getting a deep golden crust without overbaking
Achieving that dark, blistered crust is all about high heat and moisture balance—not extra time in the oven. Follow these tips:
- Use steam early on, then stop after 10 minutes.
- Bake at a consistent 240°C (464°F)—don’t lower the temp.
- Don’t skip preheating your baking stone or steel.
If your crust browns too fast, tent the bread with foil for the last 10 minutes to avoid burning.
Don’t miss our guide on Bread Bowl Recipe to explore more crust strategies for soup-ready loaves.
FAQ: Crusty Batard Bread (Based on Google’s PAA Section)
What is the difference between a batard and a baguette?
While both are classic French breads, a batard is shorter and thicker, with a more oval shape. A baguette is long and thin, known for its crisp crust and fine crumb. Batards are more versatile for sandwiches and slicing, while baguettes are often served whole or torn at the table.
Can I use all-purpose flour instead of bread flour?
Yes, but expect a slightly different texture. Bread flour has more protein, which helps create better gluten development for chewy crumb and structured rise. All-purpose flour will work but may result in a softer, denser loaf with less oven spring.
How do I know when my batard is fully baked?
The bread should have a deep golden crust and sound hollow when tapped. Internally, use a thermometer to check—it should reach 205°F (96°C). If you don’t have one, trust visual cues and the hollow sound when tapping the bottom.
What does high hydration do in batard dough?
High hydration (like 75%) gives the dough better elasticity, promotes larger holes in the crumb, and yields a moist interior. It also helps form a thinner, crispier crust. The dough will be sticky, but it’s worth learning to work with it for professional-quality results.
Conclusion: Your Homemade Batard, Crusty and Perfect Every Time
Making crusty batard bread at home may seem intimidating, but once you understand the basics—flour selection, slow fermentation, proper shaping, and baking with steam—it becomes a rewarding and repeatable process. Whether you’re slicing it for toast, pairing it with soups, or enjoying it straight out of the oven, this rustic loaf elevates every meal.
Looking for more artisan-style recipes? Check out our No-Knead Bread for a fuss-free alternative or try Easiest Rustic Bread if you’re just starting out.
PrintCrusty Batard Bread
This Crusty Batard Bread recipe delivers rustic, artisan-style loaves with a golden crisp crust and a soft, chewy crumb. Perfect for toast, sandwiches, or serving with soups, this step-by-step guide covers everything from flour selection to fermentation, shaping, and baking techniques.
- Prep Time: 30 minutes
- Cook Time: 30 minutes
- Total Time: 13 hours
- Yield: 2 loaves
- Category: Bread
- Method: Baking
- Cuisine: French
- Diet: Vegetarian
Ingredients
- 470g unbleached bread flour
- 30g whole wheat flour
- 1/4 tsp dried yeast
- 375g filtered water (75% hydration)
- 2 tsp fine sea salt
Instructions
- In a large bowl, mix all ingredients until no dry flour remains. Let rest for 15 minutes.
- Stretch and fold the dough inside the bowl using a scraper. Repeat 3 times at 20-minute intervals.
- Cover and let the dough ferment at room temperature overnight (about 12 hours).
- The next day, gently turn the dough onto a floured surface and divide into two pieces.
- Shape each piece into a small rectangle and let rest for 15 minutes.
- Fold and shape each into a batard: fold top third down, bottom third up, pinch seam, and gently taper ends.
- Let the shaped batards proof for 1.5 to 2 hours.
- Preheat the oven to 240°C (464°F) with a baking stone inside.
- Mist the loaves with water and score the tops before placing them on the hot stone.
- Spray the oven walls with water 10–15 times over the first 10 minutes of baking to create steam.
- Do not spray after 10 minutes. Bake for a total of 25–30 minutes until crust is deep golden brown.
- Cool the loaves on a wire rack before slicing.
Notes
- Use fresh yeast to ensure a proper rise.
- Don’t skip steam—it’s essential for crust development.
- Let the bread cool fully to avoid a gummy crumb.
- Store in a paper bag to preserve crustiness.
- High hydration doughs are sticky but yield superior texture.
Nutrition
- Serving Size: 1 slice (based on 16 slices per loaf)
- Calories: 120
- Sugar: 0g
- Sodium: 180mg
- Fat: 0.5g
- Saturated Fat: 0g
- Unsaturated Fat: 0.5g
- Trans Fat: 0g
- Carbohydrates: 25g
- Fiber: 1g
- Protein: 4g
- Cholesterol: 0mg