Looking for a dessert that’s quick, creamy, and endlessly customizable? Look no further than cheesecake in a jar—the ultimate no-bake treat that blends convenience with irresistible flavor. Whether you’re planning a dinner party, hosting a summer BBQ, or simply want a sweet snack that doesn’t require baking, this layered delight is your new go-to. These portable jars are not only easy to make in under 30 minutes, but they also offer endless topping and flavor variations to match any occasion.
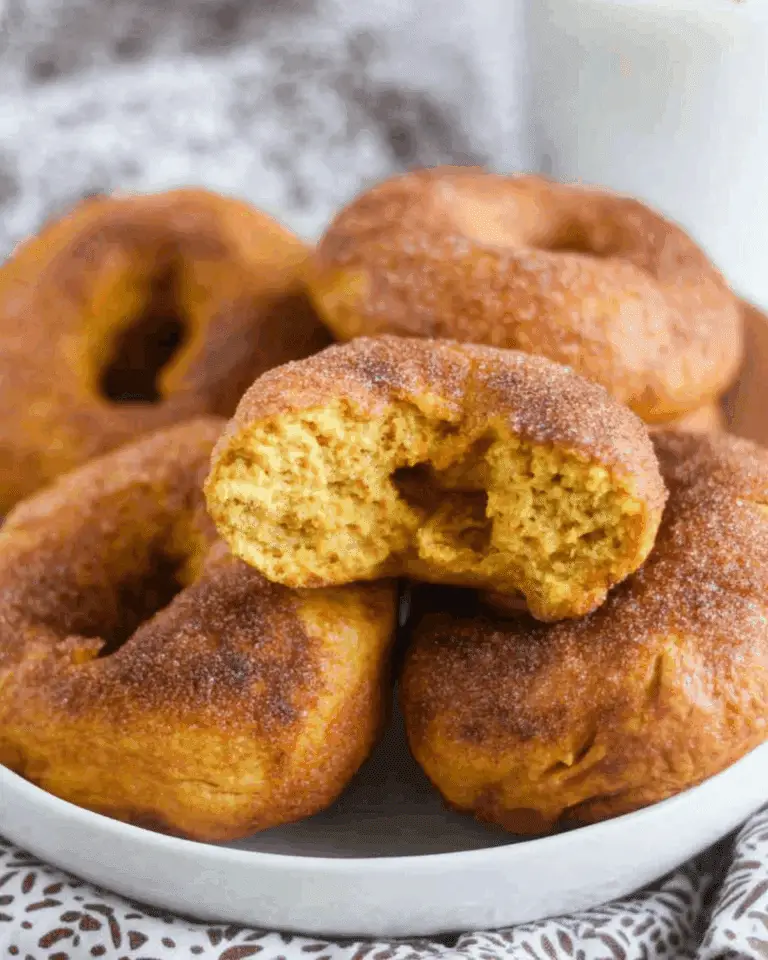
Looking for inspiration? Try this rich and zesty layered pumpkin cheesecake that brings seasonal flair to your dessert jars.
Let’s break down what makes cheesecake in a jar so wildly popular—and how you can whip up a batch that’s better than anything store-bought.
JUMP TO
Table of Contents
Why Cheesecake in a Jar Is the Perfect No-Bake Dessert
Convenience and Versatility in One Treat
There’s something magical about desserts that require no baking and minimal cleanup. Cheesecake in a jar is perfect for anyone with a tight schedule, limited kitchen tools, or no interest in using the oven. All you need is a mixing bowl, an electric beater, and some jars to build your layers.
From brunches and birthdays to casual get-togethers, these single-serve cheesecakes fit right in. Plus, the ability to add different toppings to each jar means you can satisfy a range of flavor preferences with just one recipe.
No Oven Needed — A Win for Busy Days
Skipping the oven isn’t just a time-saver—it’s a lifesaver on hot days or when you’re multitasking in the kitchen. Traditional cheesecake recipes require baking, cooling, and long chill times. With this no-bake version, the base and filling come together quickly, and chilling is optional depending on your schedule.
Don’t miss our chunkin’ chocolate pumpkin cheesecake for a decadent baked option when you do have time!
Perfect for Parties, Picnics, and Gifts
These jars travel beautifully and make adorable gifts when tied with a ribbon or label. Hosting a shower or holiday dinner? Offer a tray of assorted cheesecake jars and let guests pick their favorite. From weddings to Mother’s Day brunches, they’re a guaranteed crowd-pleaser.
Check out our autumn cheesecake recipe for festive flavors perfect for the season.
Ingredients You Need for Easy Cheesecake in a Jar
Making cheesecake in a jar doesn’t mean compromising on taste. In fact, these mini desserts deliver big on flavor with just a few pantry staples.
The Base: Buttery Graham Cracker Crust
A classic crust sets the stage for the rich cheesecake filling. You’ll need:
- 1 cup graham cracker crumbs (about 8 crackers)
- 2 tbsp melted unsalted butter
Mix them until the texture resembles wet sand, then press into the bottom of each jar. No baking required!
Want to mix it up? Try chocolate graham crackers or crushed Oreos for a twist. Discover great ideas like our no-bake chocolate orange cheesecake that starts with a cookie crust base.
The Filling: Creamy No-Bake Cheesecake Mix
Here’s where the magic happens. The filling is fluffy, smooth, and full of authentic cheesecake flavor thanks to a few key ingredients:
- 1 cup cold heavy cream
- 8 oz full-fat brick cream cheese (softened)
- 1/3 cup granulated sugar
- 2 tbsp sour cream
- 1 tsp lemon juice (optional)
- 1/2 tsp vanilla extract
Start by whipping the heavy cream into stiff peaks. Separately, blend the remaining ingredients until creamy. Then, fold the whipped cream into the mixture for an airy, mousse-like consistency.
Optional Add-Ins and Flavor Variations
Want to elevate your cheesecake jars? Add a flavor twist to the filling. Here are some tried-and-true options:
- Peanut Butter – 1/3 cup creamy peanut butter
- Nutella – 1/3 cup Nutella
- Lemon – Extra lemon juice + zest
- Raspberry – Add 1.5 tbsp raspberry preserves
- Coconut – 1 tsp coconut extract
- Chocolate – 1.5 tbsp cocoa or melted ganache
Don’t miss our pumpkin cheesecake dip for a spiced twist you can repurpose into a jar-friendly version.
Step-by-Step Guide: How to Make Cheesecake in a Jar
Prepare the Crust and Layer It Right
Start by dividing the buttery graham cracker crust evenly among jars. Press it down gently with a spoon or tamper to form a solid base. Pro tip: wide-mouthed 8-ounce jars make layering easier and neater.
Whip the Filling to Perfect Fluffiness
Use a hand or stand mixer to whip the cold heavy cream first. This step is crucial for creating a light, mousse-like texture. In a separate bowl, beat the cream cheese, sugar, sour cream, vanilla, and lemon juice until smooth and creamy. Finally, fold in the whipped cream until well combined but not overmixed.
Learn more about building layers like a pro in our pumpkin caramel cheesecake, which combines flavors and textures in stunning balance.
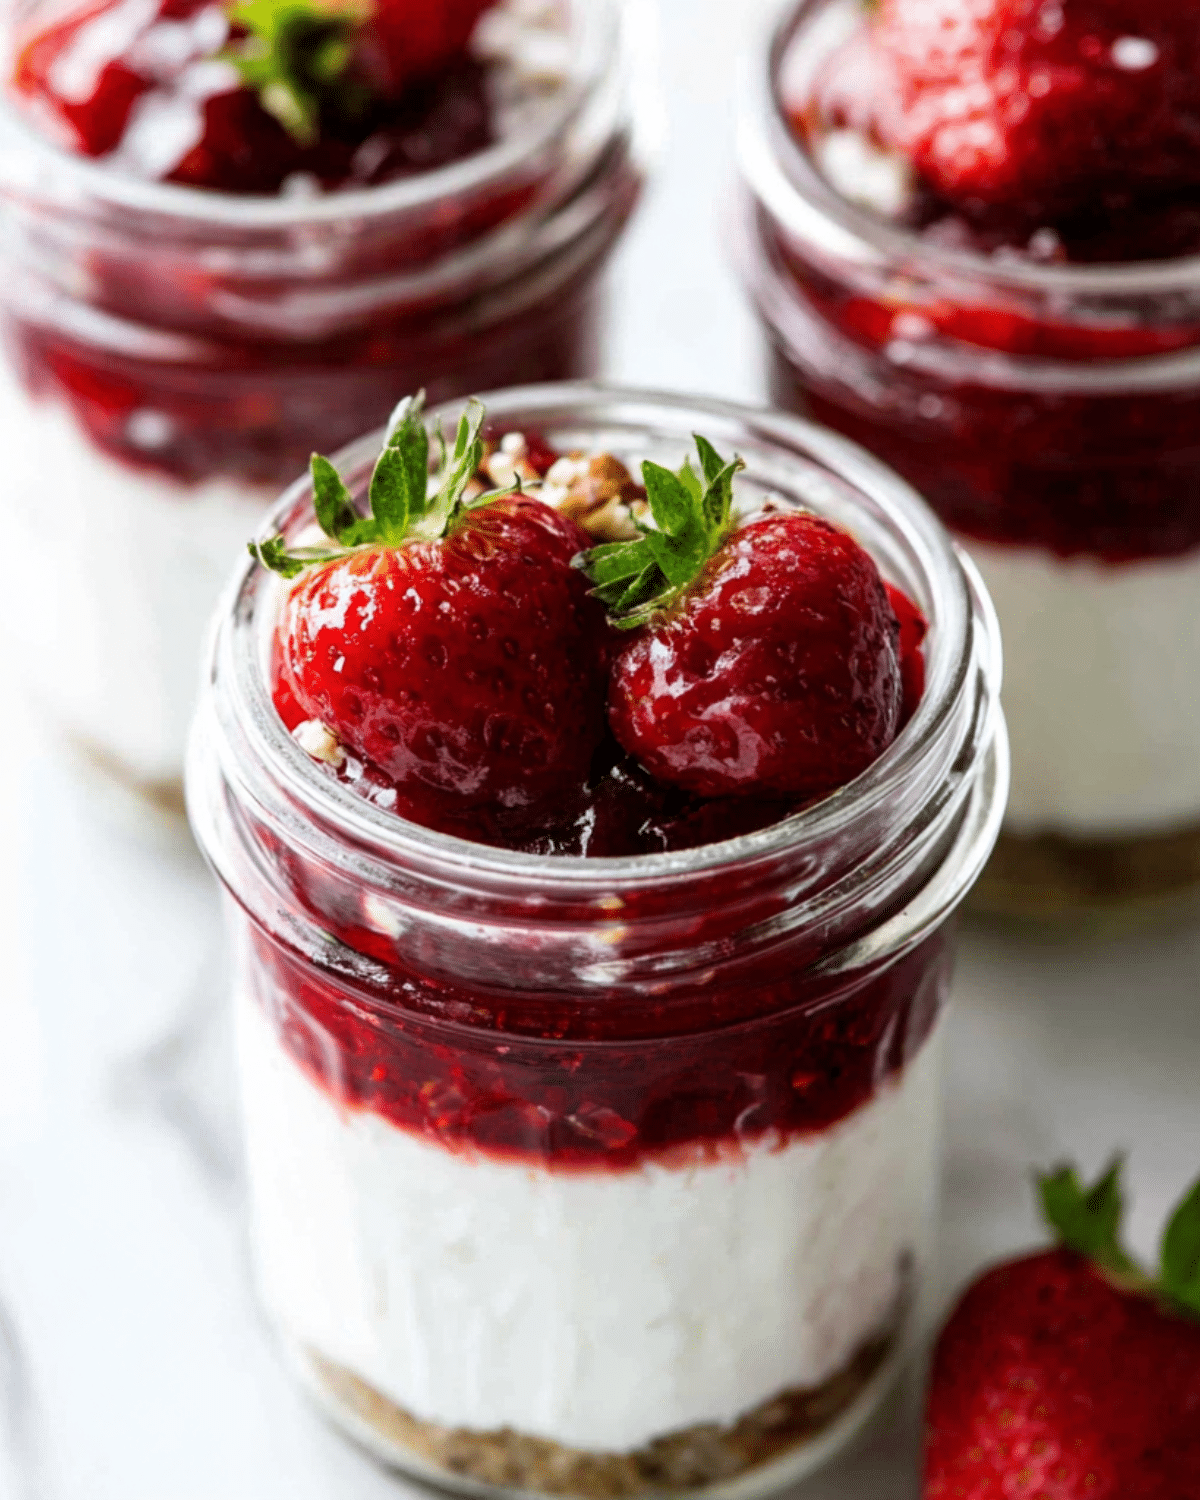
Layer, Chill, and Top with Delicious Toppings
Spoon the cheesecake filling over the crust—about 1/4 cup for 8-ounce jars. Smooth out the tops and refrigerate for 30 minutes or up to 3 days. When ready to serve, add your favorite toppings like berry compote, chocolate ganache, caramel drizzle, or fresh fruit.
Flavor Ideas and Topping Variations for Every Occasion
If you’re already loving the base recipe, here’s where things get even more fun. One of the biggest reasons people rave about cheesecake in a jar is the ability to mix and match toppings and flavors to suit any season or event. You can go fruity, chocolatey, nutty—or even a little spicy if you’re feeling adventurous.
Fruity Delights: Strawberry, Blueberry, Raspberry
Fresh or saucy fruits are a match made in heaven with creamy cheesecake. Add a layer of:
- Strawberry sauce or chopped fresh berries
- Blueberry compote
- Raspberry preserves or jam
These not only add color and brightness but balance the richness of the cream cheese with tangy sweetness.
Check out our no-bake lemon blueberry delight for a flavor combo that works beautifully layered in a jar.
For an extra burst of flavor, try adding citrus zest (lemon, lime, or orange) to the filling or the topping.
Chocolate Lovers’ Options: Ganache, Nutella, Cocoa
For a rich twist, chocolate is always a winner. You can swirl:
- Melted chocolate or ganache between layers
- A dollop of Nutella into the filling
- A sprinkle of cocoa powder or shaved chocolate on top
You can also substitute the graham crust with crushed Oreos or chocolate cookies for a cookies-and-cream vibe.
If you’re hosting, why not offer multiple flavors in one tray of jars? Discover great ideas like our coffee cheesecake recipe that can easily be adapted into mocha-style cheesecake jars.
Seasonal Twists: Pumpkin, Lemon, and Coconut Variants
When the holidays roll around, it’s the perfect time to infuse your cheesecake jars with seasonal spirit:
- Pumpkin Spice – Add 1/4 cup pumpkin puree + pumpkin pie spice
- Lemon Cheesecake – Use fresh lemon juice and zest
- Coconut Cream – Stir in coconut extract and top with toasted coconut
These versions make fantastic Thanksgiving or springtime desserts. You can even theme the toppings—sprinkles, colored whipped cream, or edible flowers—for a personalized touch.
Tips to Store, Serve, and Customize Cheesecake Jars
Best Jar Sizes and Containers to Use
Jar size matters when it comes to presentation and portion control. For a generous serving, 8-ounce wide-mouth jars are ideal. For bite-sized treats, go with 6-ounce jars or custard cups.
You can even repurpose this recipe as a trifle in a larger jar or dessert bowl—great for casual family dinners.
If you’re gifting or transporting the jars, be sure to use ones with secure screw-on lids to keep everything intact and fresh.
Make-Ahead Instructions and Storage Tips
One of the best parts about cheesecake in a jar is how make-ahead friendly it is.
Here’s how to keep things fresh:
- Refrigerate assembled jars (without toppings) for up to 3 days
- Add toppings just before serving to avoid sogginess
- Freeze jars for up to 3 months, covered tightly, without toppings
To thaw frozen jars, place them in the fridge overnight and top right before serving. These make perfect emergency desserts for unexpected guests!
Learn more about make-ahead no-bake treats in our no-bake caramel apple pie cheesecake parfaits—another great option for fall.
Serving Suggestions and Presentation Ideas
Serve directly in the jars with small dessert spoons for a clean, elegant presentation. Add garnishes like:
- Mint leaves
- Crushed cookies
- Candied fruit
- Chocolate curls
- Edible flowers
Layer toppings with intention—this makes the jars more Instagram-worthy and appealing at gatherings.
Hosting a buffet? Add name tags or chalkboard labels for each flavor so guests can choose their favorite.

Cheesecake in a Jar FAQs
How long can cheesecake jars last in the fridge?
Your cheesecake in a jar can last up to 5 days in the refrigerator when properly sealed. Be sure to keep them chilled, especially if you’ve added fresh fruit toppings, which are best consumed within 48 hours.
Can I freeze no-bake cheesecake jars?
Yes! These jars freeze beautifully for up to 3 months. Make sure they’re tightly sealed and frozen without the toppings. Thaw overnight in the fridge and top just before serving for best results.
Can I make this recipe gluten-free or keto?
Absolutely. Use gluten-free graham crackers or almond flour crust for a GF version. For a keto-friendly version, replace sugar with erythritol and use a nut-based crust like crushed pecans and butter.
What are the best jars to use?
8-ounce wide-mouth mason jars are the most convenient for layering and scooping, but you can also use 6-ounce hex jars for smaller portions. Glass custard cups or disposable dessert cups work too!
Do I have to chill the jars before serving?
Although you can enjoy them right away, chilling for at least 30 minutes enhances the texture and flavor. For an extra-firm filling, refrigerate for 2–3 hours or overnight.
Conclusion: Why You’ll Keep Coming Back to Cheesecake in a Jar
Whether you’re hosting a party, prepping a holiday dessert, or simply satisfying a craving, cheesecake in a jar offers the perfect balance of ease, taste, and charm. With just a few pantry ingredients and endless topping options, you can create a dessert that’s equally impressive and effortless.
From berry-filled beauties to rich chocolate indulgence or seasonal pumpkin spice jars, this no-bake treat checks all the boxes. It’s beginner-friendly, kid-approved, and sophisticated enough for any event.
Looking for more sweet, creamy creations? Check out our classic pumpkin cheesecake dip and let your dessert imagination run wild.
PrintCheesecake in a Jar

Cheesecake in a Jar is a quick and easy no-bake dessert that’s creamy, customizable, and perfect for any occasion. Made in just 30 minutes, it’s ideal for parties, holidays, or as a giftable treat.
- Prep Time: 20 minutes
- Cook Time: 0 minutes
- Total Time: 30 minutes
- Yield: 6–10 jars
- Category: Dessert
- Method: No-Bake
- Cuisine: American
- Diet: Vegetarian
Ingredients
- 1 cup (100g) graham cracker crumbs (about 8 graham crackers)
- 2 tablespoons (28g) unsalted butter, melted
- 1 cup (240ml) heavy cream or heavy whipping cream, cold
- 8 ounces (226g) full-fat brick cream cheese, softened
- 1/3 cup (65g) granulated sugar
- 2 tablespoons (30g) sour cream, at room temperature
- 1 teaspoon lemon juice
- 1/2 teaspoon pure vanilla extract
- Toppings and garnishes of choice (e.g., berries, chocolate ganache, caramel, whipped cream)
Instructions
- Prepare your jars (6 to 8-ounce jars recommended) and set them aside.
- Mix melted butter with graham cracker crumbs until the texture resembles wet sand.
- Spoon about 2 tablespoons of the crust mixture into each jar and gently press it down.
- Using a mixer, whip the cold heavy cream into stiff peaks (about 3–4 minutes) and set aside.
- In another bowl, beat the cream cheese, sugar, sour cream, lemon juice, and vanilla until smooth and lump-free.
- Fold the whipped cream into the cream cheese mixture gently to maintain the airy texture.
- Layer the cheesecake filling over the crust in each jar (about 1/4 to 1/3 cup per jar).
- Refrigerate for at least 30 minutes if desired, or up to 3 days.
- Add desired toppings just before serving.
Notes
- Use wide-mouth jars for easier layering and serving.
- Chill jars before serving for a firmer texture.
- Store in the refrigerator for up to 5 days.
- Freeze jars (without toppings) for up to 3 months.
- Add toppings just before serving to prevent sogginess.
- Customize with flavor additions like peanut butter, Nutella, lemon zest, or fruit preserves.
Nutrition
- Serving Size: 1 jar (8 oz)
- Calories: 420
- Sugar: 14g
- Sodium: 160mg
- Fat: 32g
- Saturated Fat: 19g
- Unsaturated Fat: 11g
- Trans Fat: 0g
- Carbohydrates: 25g
- Fiber: 0g
- Protein: 5g
- Cholesterol: 90mg