Looking for a cute, clever, and ridiculously easy treat for the school season? Wafer Pencil Cookies are the perfect sweet surprise to celebrate back-to-school moments. These adorable no-bake cookies are shaped like little pencils, made with crispy vanilla wafers, icing, and mini chocolate chips. Whether you’re a parent packing fun snacks or a teacher organizing classroom parties, this quick recipe brings smiles with minimal effort.
Check out our Strawberry Shortcake Cookies recipe if you’re craving more school-friendly cookie ideas.
JUMP TO
Table of Contents
Easy and Adorable Wafer Pencil Cookies for Every Occasion
What Are Wafer Pencil Cookies?
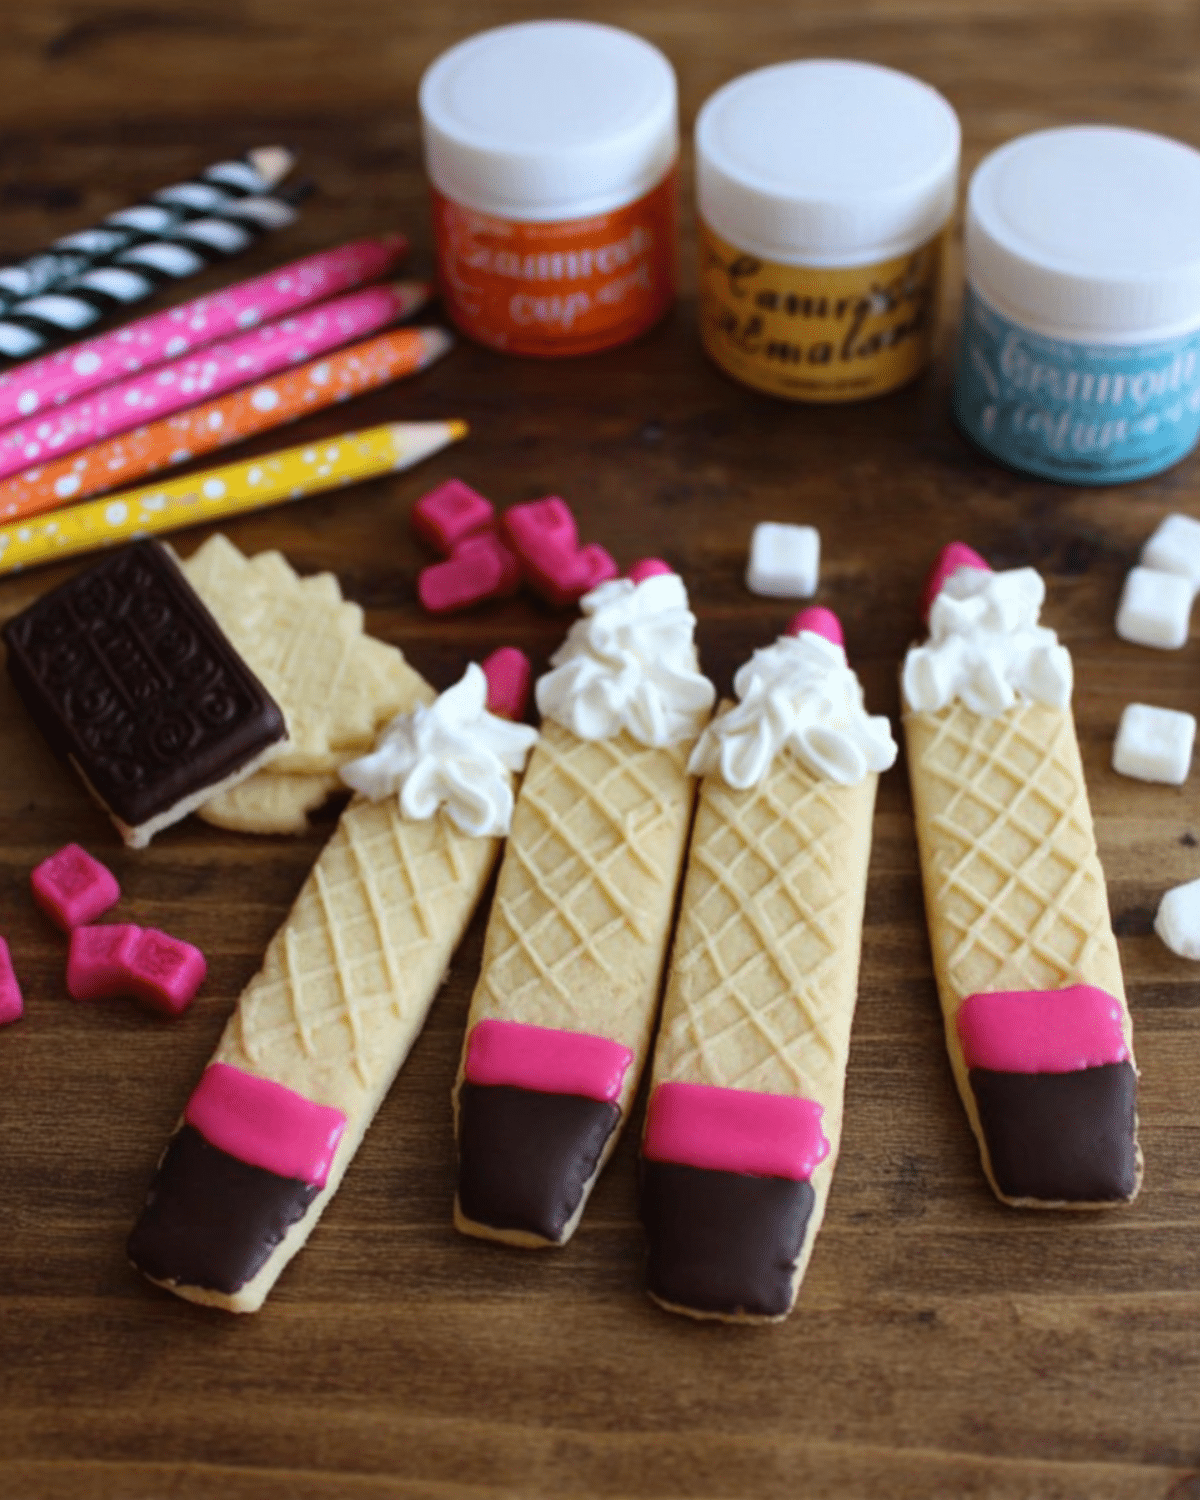
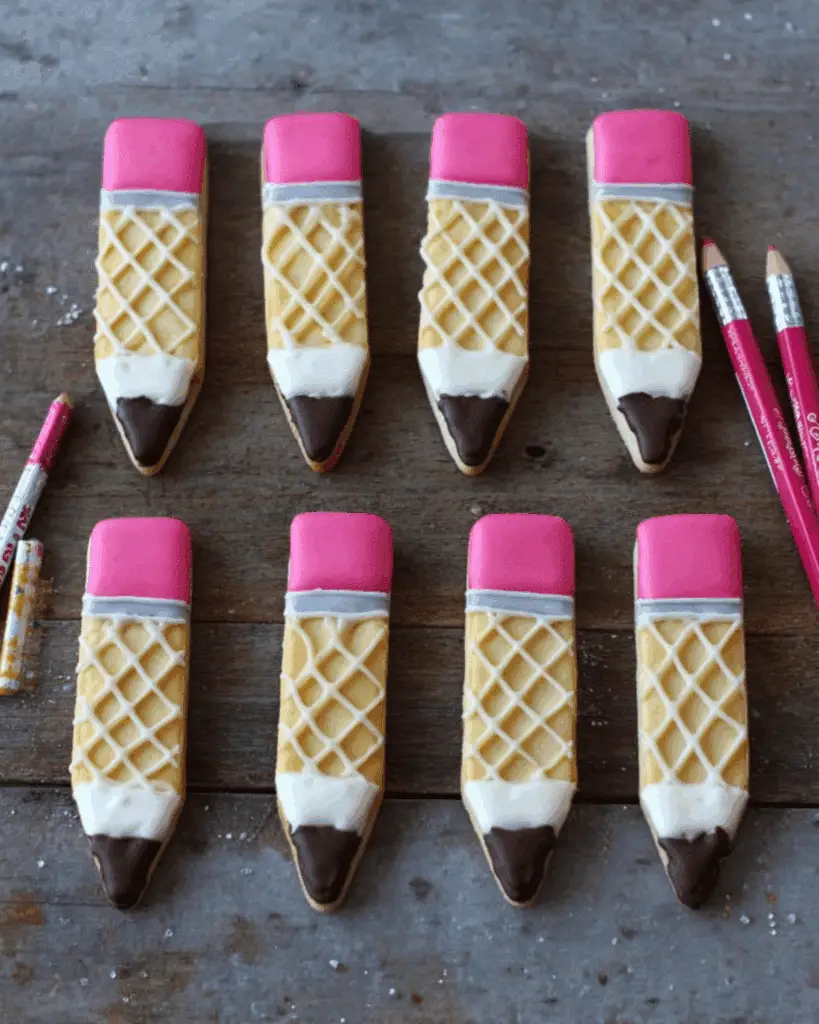
Wafer pencil cookies are decorative treats made from store-bought wafer sticks transformed into pencil-shaped snacks with just icing and chocolate chips. They mimic real pencils with pink “erasers,” white tips, and a chocolate “lead.” Despite their stunning look, they’re incredibly easy to make—ideal for those who want a Pinterest-worthy result without a mess in the kitchen.
These cookies are particularly popular in the school season, especially during back-to-school time, meet-the-teacher nights, or as lunchbox surprises.
The Origin and Inspiration Behind the Pencil Design
The idea of pencil-themed cookies gained popularity through social media platforms like Pinterest and Instagram, often posted by creative parents and teachers. The original concept likely started as a clever classroom snack, and has since been adopted for birthdays, holiday events, and even teacher appreciation days.
Inspired by the version featured on The Three Snackateers, these cookies simplify traditional pencil cookies by using pre-colored cookie icing instead of melted chocolate—cutting prep time in half and cleanup to near zero.
Occasions to Make Pencil Cookies
These cookies aren’t just cute—they’re incredibly versatile. Here are some events where wafer pencil cookies can shine:
- Back-to-School Parties: Kick off the school year with treats that feel fun and festive.
- Teacher Appreciation Gifts: Show gratitude with edible “school supplies.”
- Classroom Celebrations: Great for birthdays, holiday parties, or reward days.
- Lunchbox Surprises: Tuck one in to brighten your child’s first-day lunch.
- Bake Sales and PTA Events: Unique and eye-catching, they’ll go fast!
Looking for inspiration? Try our Graduation Cap Cookies for another easy, school-themed dessert idea.
How to Make Wafer Pencil Cookies Like a Pro
Simple Ingredients You’ll Need
One of the best parts about wafer pencil cookies is how minimal the ingredient list is. You can pick up everything you need at your local grocery store or order online. Here’s what you’ll need:
| Ingredient | Description |
|---|---|
| Vanilla Wafer Cookies | The base of the cookie; choose classic sugar wafers in any flavor. |
| Pink Icing Pouch | Used to create the eraser. Choose cookie icing for easy decorating. |
| White Icing Pouch | Forms the pencil tip. Also available in cookie icing format. |
| Mini Chocolate Chips | These create the “lead” at the tip of each cookie. |
You can also opt for candy melts or homemade icing, but ready-made pouches save time and reduce cleanup.
Check out our Lemon Crinkle Cookies for another vibrant, colorful cookie option.
Step-by-Step Instructions for Decorating
Decorating these wafer pencil cookies is easy enough for kids to help with—just three steps and you’re done.
- Trim the Point
Start by using a serrated knife to carefully cut one end of the wafer into a triangle shape to resemble a pencil point. - Add the Eraser
On the opposite flat end, squeeze a small square of pink icing to mimic the eraser. Let it settle slightly. - Draw the Tip and Add the Lead
Use white icing to fill in the triangle point. While it’s still soft, gently press a mini chocolate chip into the center to act as the pencil’s lead.
Want even more colorful cookie designs? Discover great ideas like our Lemon Raspberry Cookies.
Tips for Perfect Results Every Time
These tricks will help you avoid messes and ensure the cookies stay looking sharp:
- Use Cookie Icing Pouches: They’re cleaner, quicker, and come with a built-in nozzle for precision.
- Drying Time Matters: Let the icing dry at room temp for at least 30–60 minutes before stacking or packaging.
- Personalize Them: Use fine-tipped icing pens to write names on each cookie for party favors or place settings.
Don’t miss our Chewy Snickerdoodle Cookies for a soft, classic option kids love.
Storage and Make-Ahead Tips
These cookies are a great make-ahead treat. Here’s how to store them:
| Storage Method | Shelf Life | Notes |
|---|---|---|
| Airtight Container (Room Temp) | 3–4 days | Keep in a cool place away from moisture |
| Refrigerator | Up to 1 week | Icing may firm up, but cookies stay fresh |
| Freezer | Not recommended | Wafer texture may change upon thawing |
Keep them on wax paper if stacking to avoid smudging the icing. They’re a mess-free solution to classroom treat guidelines.
Don’t miss our Best S’mores Cookies Recipe for another fun and thematic cookie idea.
Creative Twists and Helpful Resources
Fun Variations to Try
There’s more than one way to decorate wafer pencil cookies! If you want to add personality or match a party theme, these variations are easy to pull off:
- Use Colored Wafers: Strawberry, chocolate, or lemon-flavored wafers offer a pop of color and flavor variety.
- Dip in Chocolate: Melt chocolate or candy melts to coat the “eraser” or “tip” for added texture.
- Edible Markers: Add stripes or faux text on the cookie “pencil” body.
- Sprinkles for Flair: Top the pink eraser icing with edible glitter or sanding sugar.
These ideas make the cookies even more festive—and kid-approved.
Don’t miss our Watermelon Sugar Cookies Recipe for another colorful crowd-pleaser.
Serving Ideas and Pairings
Wafer pencil cookies are perfect as:
- Classroom Treats: Place on trays with themed napkins for parties.
- Party Favors: Wrap in clear bags tied with ribbons or “You’re sharp!” tags.
- Lunchbox Fun: A sweet surprise next to a sandwich and fruit.
- Snack Boards: Pair with pretzels, popcorn, and juice boxes for kids’ events.
They go great with light beverages like lemonade or vanilla milkshakes. For more themed snack ideas, check out our Circus Animal Cookie Truffles.
Troubleshooting Common Mistakes
Running into issues? Here are some easy fixes:
- Icing Sliding Off
Make sure the cookie is dry and room temperature before decorating. Pat off any oily residue. - Wafer Cracking While Cutting
Use a serrated knife and cut slowly with light pressure. You can also freeze the wafers for 10 minutes beforehand to reduce crumbling. - Chocolate Chip Won’t Stick
Press gently while the white icing is still soft. If it’s already set, apply a dot of icing as glue. - Too Much Icing
Less is more! A small amount creates a cleaner look and keeps the cookie balanced in sweetness.
Want more creative cookie projects? Discover great ideas like our Blueberry Cream Cheese Bars to keep your baking game strong.
FAQs About Wafer Pencil Cookies
What kind of icing works best?
Ready-to-use cookie icing from a pouch is the best option for clean lines, easy application, and less cleanup. Brands like Betty Crocker or Wilton work great.
Can I use colored candy melts instead of icing?
Yes! Candy melts offer a different texture and dry faster, but require extra prep time. Just melt, color, and apply with a piping bag.
How far in advance can I make these cookies?
They can be made up to 3–4 days ahead and stored in an airtight container at room temperature.
Can I use chocolate instead of mini chips for the lead?
Sure! You can pipe a small dot of dark chocolate or use black writing gel. Mini chips are just the easiest to work with.
Are wafer pencil cookies safe to freeze?
Not recommended. Freezing affects the texture of the wafers and may cause icing to crack when thawed.
Conclusion: Make Your School Events Sweeter with Wafer Pencil Cookies
From classroom parties to lunchbox surprises, wafer pencil cookies bring charm and creativity without requiring baking expertise. With just a few pantry items and simple steps, you can craft a memorable treat that looks like it took hours. Whether you’re personalizing them with names or pairing them with themed snacks, these cookies guarantee smiles.
Don’t miss our Chocolate Chip Cookies for another classic go-to dessert that never fails.
PrintWafer Pencil Cookies
Wafer Pencil Cookies are a fun, no-bake treat perfect for back-to-school celebrations, made with just wafers, icing, and mini chocolate chips.
- Prep Time: 15 minutes
- Cook Time: 0 minutes
- Total Time: 15 minutes
- Yield: 12 cookies
- Category: Dessert
- Method: No-Bake
- Cuisine: American
- Diet: Vegetarian
Ingredients
- 12 Vanilla Wafer Cookies
- 1 Pink Icing Pouch
- 1 White Icing Pouch
- 12 Mini Chocolate Chips
Instructions
- Use a serrated knife to trim one end of each wafer into a triangle to form a pencil tip.
- Apply pink icing on the flat end to create an eraser.
- Fill the pointed end with white icing to form the pencil tip.
- Gently press a mini chocolate chip into the center of the white icing to resemble the pencil lead.
- Let cookies sit until icing is fully set before handling or packaging.
Notes
- Freeze wafers briefly before cutting to avoid crumbling.
- Use cookie icing pouches for cleaner application and less mess.
- Allow icing to dry at room temperature before stacking or storing.
- Add edible glitter or use edible markers for personalized designs.
Nutrition
- Serving Size: 1 cookie
- Calories: 110
- Sugar: 9g
- Sodium: 40mg
- Fat: 4g
- Saturated Fat: 2g
- Unsaturated Fat: 1g
- Trans Fat: 0g
- Carbohydrates: 17g
- Fiber: 0g
- Protein: 1g
- Cholesterol: 0mg