Making marshmallows at home may sound intimidating, but once you try this strawberry swirl marshmallows recipe, you’ll never go back to store-bought. These fluffy, fruity squares deliver a burst of natural strawberry flavor with a mesmerizing swirl that’s as pretty as it is delicious. Whether you’re making treats for a party, prepping gifts for friends, or looking for a fun baking activity with kids, this recipe checks all the boxes.
Plus, it’s simpler than you think — no baking involved, just the right timing and ingredients. You’ll learn how to layer flavors, get that perfect pink swirl, and store your marshmallows for weeks of enjoyment. Don’t miss our peanut butter marshmallow cups if you’re into unique marshmallow-based desserts!
JUMP TO
Table of Contents
Why Strawberry Swirl Marshmallows Are Worth Making from Scratch
A gourmet twist on classic marshmallows
Store-bought marshmallows are convenient, but they lack personality and flavor depth. Homemade strawberry swirl marshmallows bring a gourmet touch to your dessert table. Not only do they look stunning with their soft pink swirls, but they also offer a flavor punch that’s entirely missing from mass-produced varieties.
Making them from scratch means you can control the sweetness, texture, and ingredients—no preservatives, no artificial flavors, just pure, vibrant strawberry goodness.
Healthier and fresher with real strawberries
Using real strawberry purée sets these marshmallows apart. The fresh fruit not only colors the mix naturally but also adds nutrients like vitamin C and antioxidants. The purée brings a delicate tartness that cuts through the sugar for a balanced bite.
Forget about artificial pink dye and lab-made flavors—when you blend fresh strawberries into your marshmallow base, you elevate both the taste and nutritional value. It’s the ultimate upgrade from traditional white marshmallows.
Better flavor, texture, and customization
Homemade marshmallows have a soft, pillowy texture that just melts in your mouth—far smoother than commercial ones. You can customize every batch: add more strawberry extract for bolder flavor, use coconut oil for a tropical twist, or even add freeze-dried strawberry pieces for texture.
Looking for inspiration? Try our reeses peanut butter trifle for another way to play with dessert layers at home.
Ingredients That Make These Marshmallows Extra Special
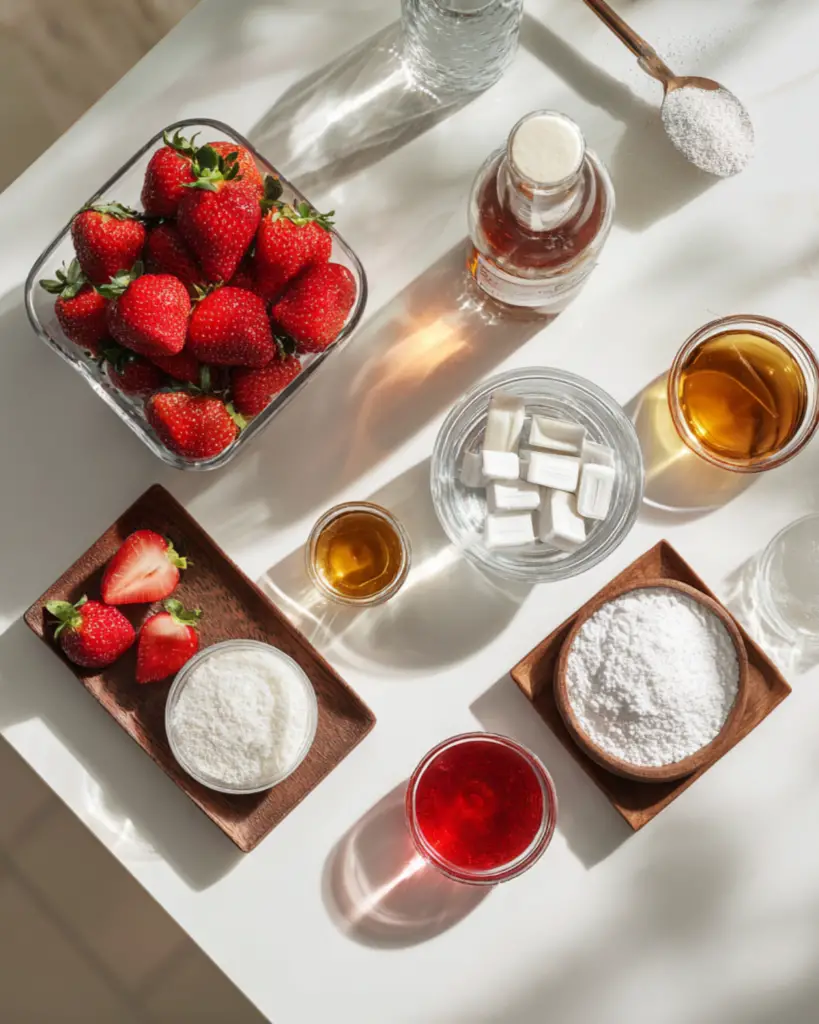
The power of fresh strawberry puree
This recipe starts with half a cup of fresh strawberry puree, blended until silky smooth. This not only gives the marshmallows their fruity aroma but also adds moisture and natural sweetness. To get the best results, use ripe, in-season strawberries. Frozen ones work too, but thaw and drain them well before blending.
Importance of quality gelatin and extracts
Three packets of unflavored gelatin provide the essential structure. You’ll sprinkle this over the strawberry base and let it bloom—this step is non-negotiable for that chewy bounce.
The double-layered flavor comes from two extracts: vanilla and strawberry. The vanilla mellows out the tang of the fruit, while the strawberry extract intensifies the aroma and creates the signature swirl.
We’ve also featured this layered flavor combo in our marshmallow rice krispies Halloween brains for a spooky twist!
Corn syrup vs honey – can you swap?
Corn syrup helps stabilize the sugar syrup and prevents crystallization. While some home bakers ask if honey can be used instead, it’s not recommended for this recipe—honey can alter the texture and overpower the strawberry flavor. Stick to light corn syrup for best results and that clean, smooth texture.
The vanilla-strawberry flavor layering
The flavor payoff comes from swirling the strawberry extract in at the end of whipping. It leaves pretty streaks throughout the marshmallow and gives each bite a burst of flavor.
Combine this with a few drops of pink natural food coloring (if you like a bolder swirl), and you’ve got a treat that’s not only mouthwatering but also Instagram-worthy.
Don’t miss our candy cane dip for another playful recipe that uses layered flavoring like a pro!
Step-by-Step Guide to Making Strawberry Swirl Marshmallows
Prepping your pan and sugar coating mix
Before mixing anything, start with your pan. Use an 8×8 inch baking dish and line it with parchment paper. Lightly coat the bottom and sides with coconut oil — this helps the marshmallows release easily.
In a small bowl, mix ¼ cup of powdered sugar with ¼ cup of cornstarch. This dusting blend prevents sticking. Sift a bit of this mixture over the oiled pan, shaking to cover all surfaces evenly. Reserve the rest for coating the marshmallows after cutting.
Making the strawberry base with gelatin
Puree ½ cup of fresh strawberries in a blender or food processor until smooth. Pour the puree into the bowl of a stand mixer. Sprinkle in 3 packets of unflavored gelatin (about 21 grams total). Let this sit for a few minutes to allow the gelatin to bloom — this is essential for the fluffy texture.
Now attach the whisk attachment to your stand mixer. You’ll come back to this in just a few steps.
Cooking the sugar syrup to precise temperature
In a medium saucepan, combine:
- ½ cup corn syrup
- 2 cups granulated sugar
- ½ cup water
- ¼ teaspoon salt
Place the pan over medium-high heat. Stir briefly, cover, and let it cook for 3 to 4 minutes. Remove the lid, clip a candy thermometer to the side, and continue boiling until the mixture reaches 240°F (soft-ball stage). This usually takes about 7–8 minutes.
Once the syrup hits the correct temperature, remove it from the heat immediately.
Whipping to the perfect marshmallow fluff
Turn your mixer (with strawberry-gelatin mixture) to low speed, and carefully stream the hot syrup down the side of the bowl. Be cautious—it’s extremely hot. Once it’s all in, increase the speed to high and whip for 10 to 15 minutes.
You’ll know it’s ready when the mixture turns light, shiny pink and becomes thick but still slightly warm. The volume should increase significantly.
Add ½ teaspoon vanilla extract during the last 2 minutes of whipping to layer in that warm, aromatic note.
Creating the strawberry swirl effect
Now comes the signature swirl: gently fold in 1 teaspoon of strawberry extract using a spatula. Don’t overmix—you want the extract to streak through the fluff for that marbled effect.
For deeper color, you can add a drop of pink or red natural food coloring, but the extract alone often does the trick.
Pour the mixture into your prepared pan, smoothing the top with a spatula coated in coconut oil. Dust with a little more of the sugar-cornstarch mix and let it set uncovered for 4 hours or overnight.
Setting, cutting, and storing like a pro
Once set, gently lift the slab of marshmallow from the pan using the parchment edges. Place it on a cutting board. Use a pizza cutter or sharp knife, dusted with the sugar mix, to cut into 1-inch squares.
Toss the marshmallows in the remaining sugar-cornstarch mixture to coat all sides. This keeps them from sticking together.
Store your strawberry swirl marshmallows in an airtight container at room temperature for up to 3 weeks. They rarely last that long, though!
Check out our no-bake chocolate chip cookie dough truffles for another sweet treat you can prep ahead and enjoy all week long.
Creative Ways to Use and Serve Strawberry Marshmallows
In s’mores, hot cocoa, and fruit platters
These strawberry swirl marshmallows are a game-changer in classic treats. Toss a couple into hot chocolate for a rich, fruity twist, or sandwich them into s’mores for a berry-chocolate combo that kids and adults will devour. Add them to a dessert charcuterie board alongside dark chocolate, graham crackers, and berries for a colorful, crowd-pleasing centerpiece.
Gifting ideas for holidays or birthdays
Homemade marshmallows make thoughtful gifts. Stack them in mason jars, wrap them in cellophane bags, or fill cute cupcake liners for party favors. Tie with a ribbon and a tag that says “Made with Love.” These pretty pink squares are especially popular for Valentine’s Day, Mother’s Day, and baby showers.
For a similar sweet gifting idea, don’t miss our caramel apple fritter bread—another crowd-pleasing homemade dessert.
Marshmallow skewers, dips, and dessert toppers
Skewer marshmallows with strawberries and brownies for fun kabobs, or serve them with melted chocolate dip. You can even toast them slightly with a kitchen torch and top cupcakes, brownies, or waffles for an upscale look.
For a festive table, try mixing in different shaped marshmallows or colors, or serve them with sprinkles or melted candy coating.
Decorating cupcakes or cakes with marshmallow chunks
Want a quick upgrade for your baked goods? Cut marshmallows into mini cubes and press them into frosting for a burst of color and texture. You can also melt them down slightly to use as a gooey filling in cakes, cupcakes, or sandwich cookies.
Looking for more creative holiday desserts? Discover great ideas like our grinch Christmas truffles—fun, festive, and easy to make with kids.
FAQs About Strawberry Swirl Marshmallows
Can I use frozen strawberries instead of fresh?
Yes, you can! Thaw them completely and drain excess liquid before pureeing. Frozen strawberries tend to release more water, which can affect the firmness of your marshmallows if not managed.
Do I need a candy thermometer?
A candy thermometer is strongly recommended. Marshmallows rely on sugar syrup reaching exactly 240°F (soft-ball stage). Without it, you risk undercooked or hardened results.
How long do homemade marshmallows last?
Stored in an airtight container at room temperature, these marshmallows will last up to 3 weeks. Avoid refrigeration—it introduces moisture that can make them sticky.
Can I skip the strawberry extract?
Technically, yes—but the flavor won’t be as intense. The extract not only boosts the taste but also helps create the swirl effect. If skipping it, consider adding a touch more vanilla and perhaps some freeze-dried strawberries for added punch.
Final Thoughts on Making Your Own Strawberry Swirl Marshmallows
There’s something magical about crafting marshmallows from scratch—especially when they’re swirled with real strawberry flavor. Whether you’re whipping up a batch for family movie night or creating elegant homemade gifts, this recipe combines stunning looks with incredible taste.
With fresh fruit, quality ingredients, and a bit of technique, you can turn everyday pantry staples into soft, luscious treats that delight everyone who tries them. Looking for inspiration? Try our cookie dough dip to pair with your marshmallows for the ultimate dessert platter.
PrintStrawberry Swirl Marshmallows

Soft, fluffy, and fruity, these homemade strawberry swirl marshmallows are made with real strawberries and layered with vanilla and strawberry extract for a rich and colorful treat perfect for gifting, s’mores, or snacking.
- Prep Time: 20 minutes
- Cook Time: 10 minutes
- Total Time: 4 hours 30 minutes (includes setting time)
- Yield: 16 large marshmallows
- Category: Dessert
- Method: No-Bake
- Cuisine: American
- Diet: Gluten Free
Ingredients
- 1/2 cup fresh strawberries, pureed
- 3 packets unflavored gelatin
- 1/2 cup water
- 1/2 cup corn syrup
- 2 cups granulated sugar
- 1/4 teaspoon salt
- 1/2 teaspoon vanilla extract
- 1 teaspoon strawberry extract
- 1/4 cup powdered sugar
- 1/4 cup cornstarch
- Coconut oil (for greasing)
Instructions
- Mix powdered sugar and cornstarch in a bowl. Prepare an 8×8-inch baking dish with parchment paper and coat with coconut oil. Dust with some of the sugar mixture and set the rest aside.
- Puree fresh strawberries until smooth. Pour into the bowl of a stand mixer. Sprinkle gelatin over the puree and let it bloom.
- In a saucepan, combine corn syrup, sugar, salt, and water. Bring to a boil over medium-high heat, cover for 3-4 minutes, then uncover and cook until it reaches 240°F.
- Slowly pour the hot syrup into the mixer while running on low speed. Once combined, whip on high for 10-15 minutes until fluffy and shiny pink.
- Add vanilla extract in the final minutes of whipping. Fold in strawberry extract gently to create the swirl effect.
- Transfer mixture to the prepared pan, smooth the top, and sprinkle with sugar mixture. Let it set uncovered for 4 hours or overnight.
- Turn marshmallow out onto a board. Cut into 1-inch squares using a dusted knife or pizza cutter. Toss in remaining sugar mixture to coat.
- Store in an airtight container at room temperature for up to 3 weeks.
Notes
- Use a candy thermometer to ensure syrup reaches the correct temperature.
- You can use frozen strawberries, but thaw and drain them first.
- Do not refrigerate the marshmallows as it introduces moisture.
- Customize with food coloring or freeze-dried fruit for added flair.
Nutrition
- Serving Size: 1 marshmallow
- Calories: 90
- Sugar: 17g
- Sodium: 25mg
- Fat: 0g
- Saturated Fat: 0g
- Unsaturated Fat: 0g
- Trans Fat: 0g
- Carbohydrates: 22g
- Fiber: 0g
- Protein: 1g
- Cholesterol: 0mg