Looking for a dessert that’s creamy, fruity, and buttery — yet unbelievably easy to make? Meet the Strawberry Cheesecake Dump Cake, a simple recipe that delivers all the indulgence of a classic cheesecake with the no-fuss charm of a dump cake. In this article, you’ll learn how to make this rich, velvety dessert from scratch, what ingredients you’ll need, expert baking tips, and the best ways to serve and store it. This is one of those desserts that impresses everyone, whether you’re hosting a family gathering or just craving something sweet on a lazy weekend.
Unlike layered cakes or baked cheesecakes that require mixing, measuring, and multiple steps, a dump cake lives up to its name — you literally “dump” the ingredients into a pan, bake, and enjoy. It’s quick, beginner-friendly, and so versatile that you can swap fillings, toppings, or even cake mixes to match any mood or season. If you’ve ever tried our Cherry Dump Cake recipe, you already know how simple and satisfying this dessert style can be. But this strawberry cheesecake version takes things to a whole new level of flavor.
JUMP TO
Table of Contents
What Is Strawberry Cheesecake Dump Cake?
A Simple Shortcut Dessert That Tastes Homemade
A Strawberry Cheesecake Dump Cake is a semi-homemade dessert that blends strawberry pie filling, creamy cheesecake filling, and a buttery cake topping into one irresistible bake. The magic lies in its simplicity — no electric mixer, no complicated crust, and no pre-baking required. You layer your pie filling at the bottom, dollop sweetened cream cheese on top, sprinkle the dry cake mix evenly, and drizzle melted butter over everything. The oven does the rest.
When it bakes, the butter seeps down into the cake mix, creating a golden, crumbly topping that contrasts perfectly with the soft, creamy filling beneath. Every bite delivers the sweetness of strawberries and the tang of cheesecake — a flavor pairing that feels indulgent but takes less than 10 minutes to assemble.
If you’ve never tried a dump cake before, think of it as the quicker, easier cousin of a cobbler or crisp. It’s got the same comforting warmth but with fewer steps and no guesswork. This recipe became especially popular among home bakers for how forgiving it is. Whether you’re an experienced cook or a total beginner, you’ll get consistent results every time.
Why It’s Called a “Dump Cake”
The name might sound odd, but it’s simply descriptive of how you make it. You “dump” your ingredients — no mixing bowls or stand mixers needed. Dump cakes gained fame in the 1960s as an easy dessert trend for busy families. Unlike traditional cakes that require careful measuring and blending, a dump cake keeps everything rustic and approachable.
This method works beautifully for fruit-based desserts because the pie filling provides the moisture and flavor base, while the dry cake mix and butter form a crisp, golden crust on top. The combination of creamy cheesecake filling and juicy strawberry layers makes this variation particularly decadent.
And the best part? It’s totally adaptable. You can make it for Valentine’s Day, Easter brunch, or any summer picnic, and it’ll be gone before you know it. For more simple dessert inspiration, check out Easy 3-Ingredient Pineapple Cake — another reader favorite that proves baking doesn’t need to be complicated.
Ingredients You’ll Need for Strawberry Cheesecake Dump Cake
When it comes to easy desserts, nothing beats the simplicity of a Strawberry Cheesecake Dump Cake. You only need a few pantry staples and a handful of fresh ingredients to create that perfect mix of creamy, tangy, and sweet flavors. The key is using quality ingredients so every layer — from the strawberries to the buttery topping — turns out rich and flavorful.
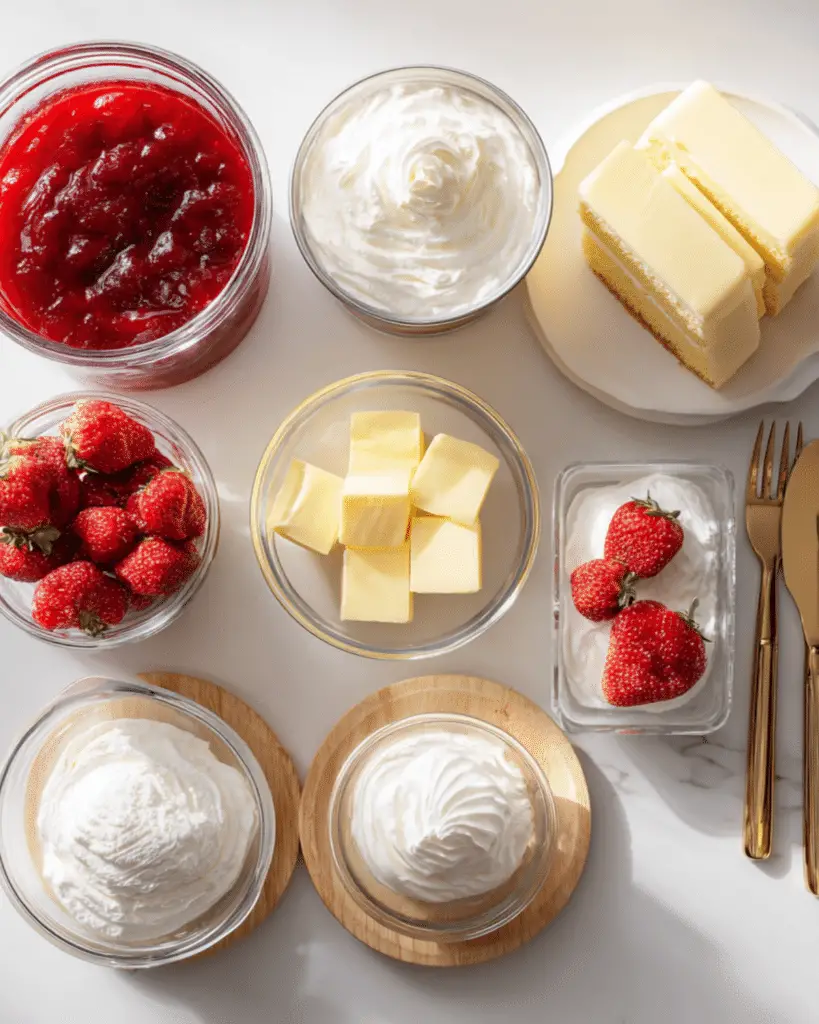
Key Ingredients Breakdown
Here’s what you’ll need for the perfect Strawberry Cheesecake Dump Cake:
| Ingredient | Quantity | Purpose |
|---|---|---|
| Strawberry pie filling | 2 cans (21 oz each) | Provides fruity, jammy sweetness |
| Cream cheese (softened) | 8 oz | Adds cheesecake flavor and creamy texture |
| Yellow or white cake mix | 1 box | Creates the buttery crumb topping |
| Unsalted butter (melted) | ¾ cup | Moistens the cake mix for even baking |
| Vanilla extract | 1 tsp | Enhances the overall flavor |
| Fresh strawberries | Optional | For garnish and extra color |
A dump cake doesn’t require eggs or milk because the fruit filling and butter provide enough liquid for baking. This makes it incredibly easy to throw together in minutes.
Ingredient Substitutions and Variations
If you’re missing something or want to add a twist, try these variations:
- Cake mix flavors: Lemon or strawberry cake mix adds extra zest.
- Cream cheese swap: Low-fat or vegan cream cheese works just as well.
- Add texture: Sprinkle chopped pecans, almonds, or shredded coconut on top.
- Gluten-free option: Use a gluten-free cake mix — it works perfectly without changing the flavor.
You can also use this same base recipe to make Blueberry Cream Cheese Dump Cake or Cherry Cheesecake Dump Cake — both equally delicious.
Step-by-Step Instructions to Make the Best Strawberry Cheesecake Dump Cake
Making this cake is as simple as layering and baking. Follow these straightforward steps for perfect results every time.
Prep Work and Baking Setup
- Preheat your oven to 350°F (175°C).
- Grease a 9×13-inch baking dish with butter or nonstick spray.
- Set out your cream cheese to soften — this ensures smooth dollops that blend perfectly into the cake.
Dump, Layer, and Bake
- Spread the strawberry pie filling evenly across the bottom of your prepared dish.
- Add spoonfuls of cream cheese on top of the filling. Try spacing them evenly so each slice gets a little bit of cheesecake flavor.
- Sprinkle the dry cake mix evenly over the cream cheese and strawberries — don’t mix!
- Drizzle melted butter over the dry mix, covering as much surface as possible. This ensures a golden, crisp topping.
- Bake for 40–45 minutes, or until the top is bubbly and golden brown.
The aroma alone will make your kitchen smell like a bakery!
Baking and Cooling
Once baked, remove the cake from the oven and let it cool for 10–15 minutes. This allows the layers to settle and the cheesecake filling to firm slightly, making it easier to serve.
You can enjoy it warm for a gooey texture or chilled for a denser cheesecake feel. Either way, it’s divine.
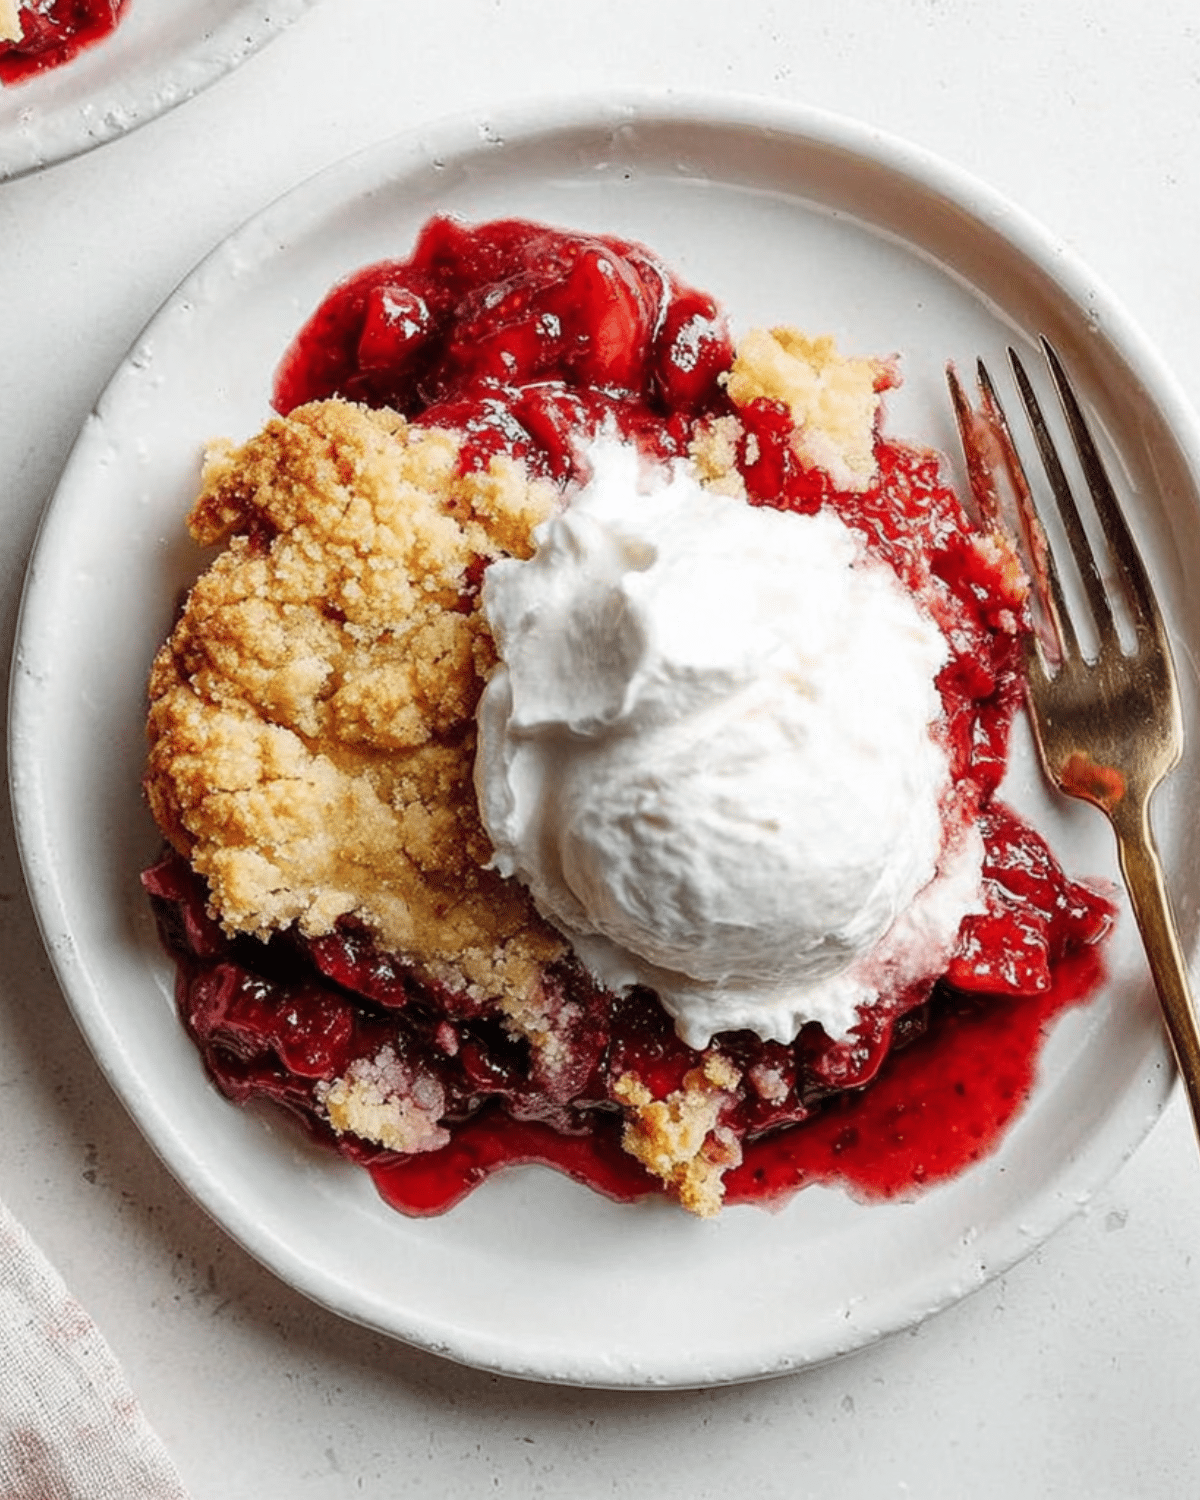
Serving Suggestions
For the ultimate treat, top each slice with:
- A scoop of vanilla ice cream
- A dollop of whipped cream
- Fresh strawberry slices for color and freshness
If you’re serving at a gathering, try adding a dusting of powdered sugar before serving. It makes the dessert look bakery-quality with almost no effort.
Expert Tips for a Perfect Strawberry Cheesecake Dump Cake
Even though this dessert is nearly foolproof, these tips will help you perfect it every time.
Texture Tips
- Use melted butter, not cold or cubed — it spreads more evenly and prevents dry spots.
- Don’t overbake — if the top starts browning too quickly, loosely cover it with foil.
- Let it rest before serving; it thickens as it cools.
Flavor Boosters
- Add a dash of almond extract for a bakery-style aroma.
- Swirl in strawberry preserves between layers for extra fruitiness.
- Sprinkle brown sugar over the top before baking for a caramelized crunch.
Baking Troubleshooting
- If your cake looks too dry, you likely used too little butter. Try adding an extra tablespoon next time.
- If it’s too gooey, bake it an extra 5 minutes or let it cool longer before cutting.
For more beginner-friendly desserts, visit Simple Peach Cobbler Recipe — another easy dump-style dessert that uses just a few ingredients.
How to Store and Reheat Strawberry Cheesecake Dump Cake
After baking this creamy and fruity masterpiece, you’ll want to keep it as fresh as possible for later indulgence. Thankfully, dump cakes store beautifully with minimal effort.
Room Temperature vs. Refrigeration
If you plan to serve your Strawberry Cheesecake Dump Cake the same day, it can sit at room temperature for up to 6 hours, covered loosely with foil or plastic wrap.
For longer storage, refrigerate it in an airtight container for up to 5 days. The cheesecake layer contains dairy, so refrigeration keeps it safe and flavorful.
Freezing and Reheating
You can also freeze dump cake slices for up to 2 months. Wrap each portion tightly in plastic wrap, then place them in a freezer-safe container.
When ready to enjoy, thaw overnight in the refrigerator, then warm in the oven at 325°F for about 10 minutes. This helps restore its gooey, buttery texture without drying it out.
If you’re planning a big dessert spread, this cake pairs perfectly with Strawberry Cream Cheese Frosting — a great topping for cupcakes, cakes, or even as a dip for fresh fruit.
Creative Variations of Strawberry Cheesecake Dump Cake
One of the best things about dump cakes is how easily you can reinvent them. Once you master the base, you can play with flavors and textures endlessly.
Seasonal Fruit Variations
- Swap strawberry filling for cherry, blueberry, or peach — any fruit pie filling works beautifully.
- Combine fruits for a mixed berry version that looks stunning at summer picnics.
Cheesecake Swirl Method
Instead of dolloping cream cheese, beat it lightly with sugar and swirl it through the pie filling before layering. This creates a marbled effect that looks fancy but takes no extra effort.
Mini Dump Cakes for Parties
Hosting a party or bake sale? Use muffin tins or small ramekins to create mini dump cakes. They bake faster and are great for portion control.
For even more inspiration, check out Strawberry Shortcake Cookies — another strawberry favorite your guests will love.
FAQ About Strawberry Cheesecake Dump Cake
Can I use fresh strawberries instead of pie filling?
Yes! You can make your own filling by cooking 4 cups of fresh strawberries with ½ cup of sugar and 2 tablespoons of cornstarch until thickened. Let it cool before layering in the pan.
Why is my dump cake gooey?
Dump cakes are meant to be a little gooey in the center — that’s what makes them so delicious. If it’s too runny, you may have underbaked it or added too much butter. Bake an extra 5–10 minutes to firm up the texture.
Do I need to refrigerate Strawberry Cheesecake Dump Cake?
Yes, since it contains cream cheese, refrigeration keeps it fresh and safe. You can leave it out for a few hours, but refrigerate after that.
Can I make dump cake ahead of time?
Absolutely! Bake the cake a day before serving, then reheat gently before serving. The flavors actually deepen as it rests.
What’s the best way to serve it — warm or cold?
Both ways are delicious! Warm gives a gooier, cobbler-like texture, while chilled offers a denser cheesecake feel.
Conclusion: Why You’ll Love This Strawberry Cheesecake Dump Cake
If you love desserts that look and taste amazing without requiring fancy techniques, the Strawberry Cheesecake Dump Cake is for you. It’s the ultimate combination of fruity, creamy, and buttery — a true comfort dessert that takes minimal effort but delivers maximum satisfaction.
Whether you’re making it for a special occasion, a family dinner, or just a lazy weekend treat, this recipe proves that you don’t need to spend hours in the kitchen to enjoy bakery-quality flavor.
PrintStrawberry Cheesecake Dump Cake

This Strawberry Cheesecake Dump Cake combines creamy cheesecake filling, sweet strawberry pie filling, and buttery cake mix topping for a quick, crowd-pleasing dessert that’s easy to make and perfect for any occasion.
- Prep Time: 10 minutes
- Cook Time: 45 minutes
- Total Time: 55 minutes
- Yield: 12 servings
- Category: Dessert
- Method: Baking
- Cuisine: American
- Diet: Vegetarian
Ingredients
- 2 cans (21 oz each) strawberry pie filling
- 8 oz cream cheese, softened
- 1 box yellow or white cake mix
- 3/4 cup unsalted butter, melted
- 1 tsp vanilla extract
- Fresh strawberries, for garnish (optional)
Instructions
- Preheat oven to 350°F (175°C) and grease a 9×13-inch baking dish.
- Spread strawberry pie filling evenly over the bottom of the dish.
- Add spoonfuls of softened cream cheese evenly over the filling.
- Sprinkle dry cake mix evenly on top of the cream cheese and filling layers without mixing.
- Drizzle melted butter evenly over the dry cake mix to cover as much as possible.
- Bake for 40–45 minutes, or until the top is golden brown and bubbling.
- Remove from oven and let cool for 10–15 minutes before serving.
- Serve warm or chilled, topped with whipped cream or vanilla ice cream if desired.
Notes
- Use melted butter for even browning and to prevent dry spots.
- To make it gluten-free, use a gluten-free cake mix.
- Add nuts or shredded coconut for extra texture.
- Refrigerate leftovers for up to 5 days in an airtight container.
- Freeze portions for up to 2 months; thaw overnight in the fridge before reheating.
Nutrition
- Serving Size: 1 piece (1/12 of recipe)
- Calories: 320
- Sugar: 28g
- Sodium: 310mg
- Fat: 15g
- Saturated Fat: 9g
- Unsaturated Fat: 5g
- Trans Fat: 0g
- Carbohydrates: 42g
- Fiber: 1g
- Protein: 4g
- Cholesterol: 40mg