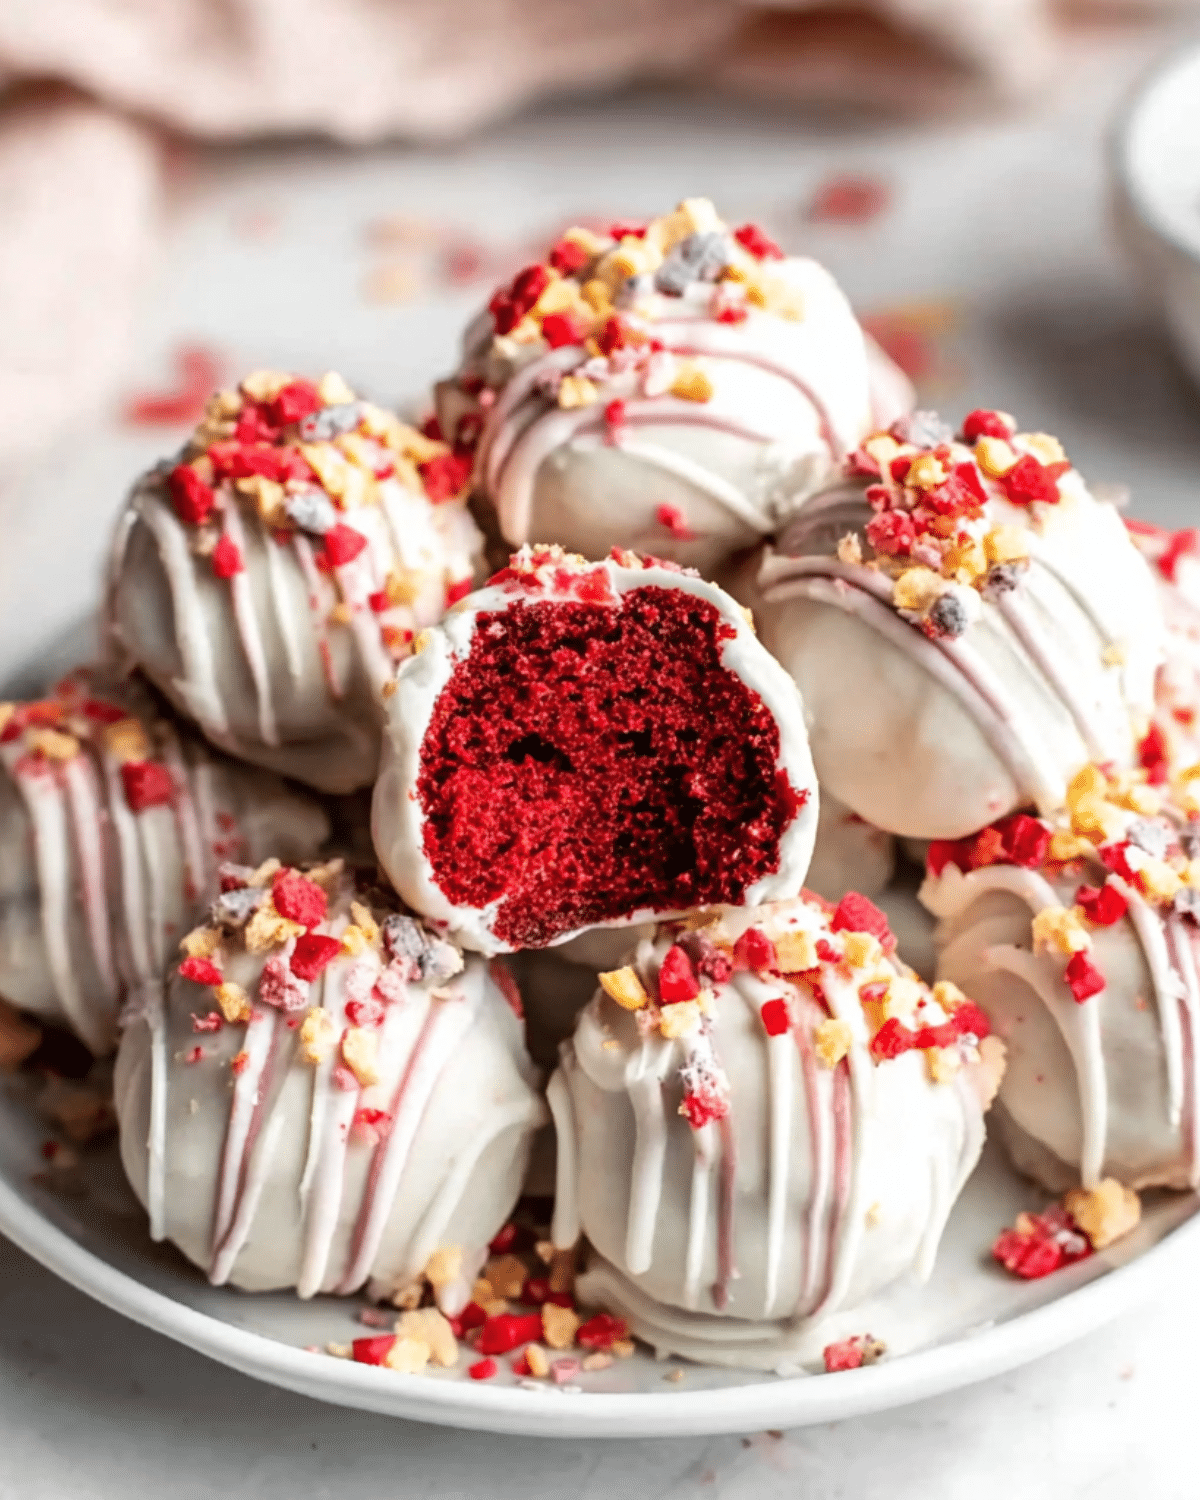
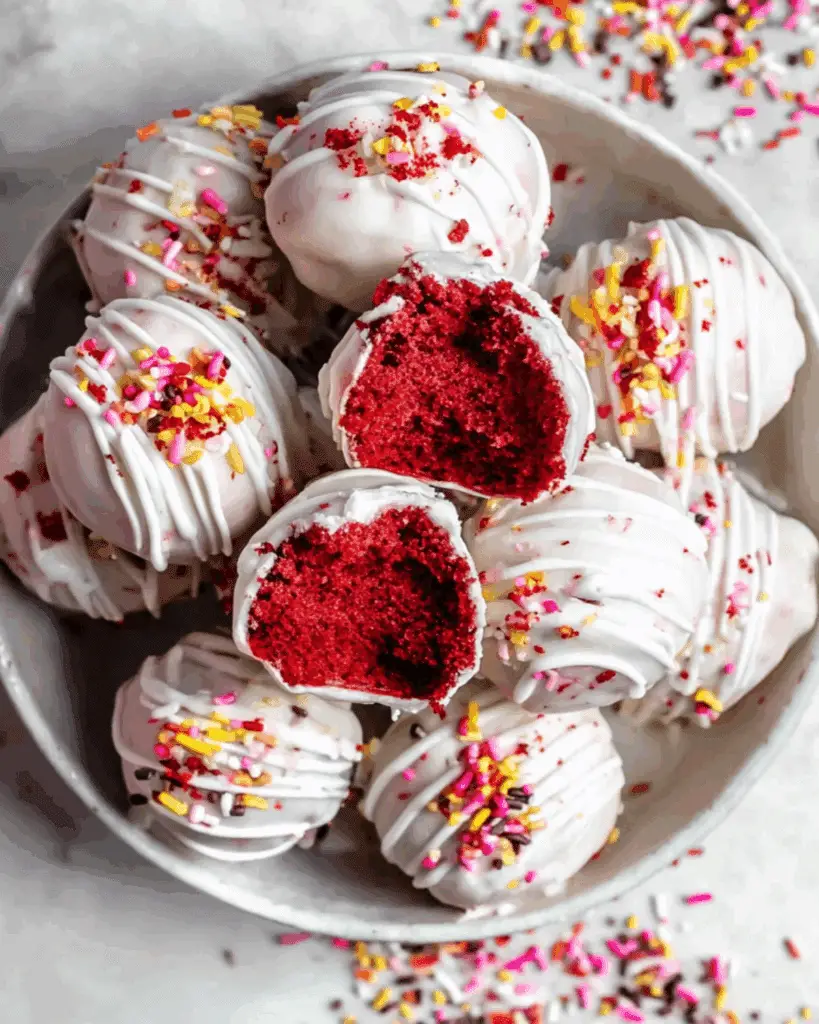
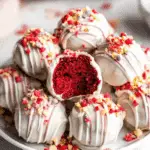
Looking for a crowd-pleasing treat that’s easy to make and even easier to love? Red velvet cake balls are bite-sized truffles that deliver big flavor in a small package. Perfect for Valentine’s Day, birthdays, holidays, or just because, these rich red velvet morsels are coated in smooth white chocolate and dressed up with festive sprinkles. Whether you’re using boxed mix or leftover cake, this recipe is incredibly versatile and great for beginner bakers too.
In this guide, you’ll learn exactly how to make red velvet cake balls from scratch or box, how to dip them without mess, fun variations to try, and how to store them long after the party’s over. Plus, we’ll answer the most common questions and link you to more delicious dessert ideas from our kitchen. Check out our easy Halloween snack mix recipe for another fun and festive crowd-pleaser: Don’t miss our easy Halloween snack mix recipe.
JUMP TO
Table of Contents
Why Red Velvet Cake Balls Are a Must-Try Treat
What Makes Red Velvet Cake Balls So Irresistible
It’s hard to beat the nostalgic flavor of red velvet—mild cocoa flavor with a touch of tang and a gorgeous crimson hue. Combine that with the creamy richness of cream cheese and the crunch of a chocolate shell, and you’ve got a dessert that’s balanced, beautiful, and unbelievably tasty. These truffles are great because:
- They’re made from simple, budget-friendly ingredients
- You don’t need any fancy equipment
- The process is perfect for kids and beginner bakers
- They’re portion-controlled (if you can stop at just one!)
And unlike traditional frosted cake, these can be made ahead, transported easily, and stored without a mess.
Ideal Occasions to Serve These Bite-Sized Desserts
Red velvet cake balls are holiday chameleons. While they shine on Valentine’s Day with red or pink sprinkles, they’re also a hit for:
- Christmas (just switch the sprinkle colors)
- Baby showers and bridal showers
- Halloween (think blood-red with black drizzle)
- Birthdays and anniversaries
- Office parties or school events
Looking for inspiration? Try these adorable eyeball brownies for Halloween to pair with your cake balls for a themed dessert spread.
Benefits of Making Cake Balls Instead of a Whole Cake
Aside from the fun factor, red velvet cake balls solve some common dessert problems:
- No plates or forks needed—perfect for potlucks and parties
- Less mess and easier storage compared to slices of cake
- Customizable presentation with sprinkles, drizzle, or cocoa powder
- Freezer-friendly, making them ideal for make-ahead dessert prep
Plus, if you ever mess up a cake or have leftovers, cake balls are the perfect way to repurpose them into a gourmet-looking treat.
Need another genius way to use leftover desserts? Check out our no-bake chocolate orange cheesecake for another make-ahead option!
Ingredients & Substitutions for Red Velvet Cake Balls
Key Ingredients You’ll Need for This Recipe
Making red velvet cake balls is refreshingly simple—you only need a handful of ingredients, most of which you may already have on hand. Here’s what goes into creating these irresistible bites:
- Red Velvet Cake Mix: A boxed mix like Betty Crocker or Duncan Hines is the fastest option. You’ll also need the ingredients it calls for—typically oil, water, and eggs.
- Cream Cheese: Use full-fat cream cheese (not the whipped or low-fat version) for the best texture and binding.
- White Chocolate Melting Wafers: These melt smoothly and coat evenly, giving that perfect shell. Brands like Ghirardelli or Wilton are great choices.
- Sprinkles: Totally optional but perfect for dressing them up for any occasion.
Here’s a quick ingredient table for reference:
| Ingredient | Quantity | Notes |
|---|---|---|
| Red velvet cake mix | 1 box (15 oz) | Any brand, plus cake ingredients |
| Eggs | 3 large | Room temperature preferred |
| Vegetable oil | ½ cup | For cake mix |
| Water | 1 cup | For cake mix |
| Cream cheese | 1 cup (8 oz) | Full-fat, softened |
| White chocolate wafers | 2 cups | Melting wafers recommended |
| Sprinkles | As needed | Optional, seasonal or themed |
Want something with the same sweet bite but citrusy? Check out our lemon brownie bars recipe for a bright alternative!
Ingredient Swaps for Dietary Needs or Taste Preferences
You can absolutely tailor this recipe to suit your needs. Here are some common substitutions:
- Gluten-Free Cake Mix: Use a certified gluten-free red velvet mix if needed.
- Vegan Options: Swap regular cake mix with a plant-based version and use vegan cream cheese. Opt for dairy-free melting chocolate.
- Low Sugar: Use a sugar-free cake mix and no-sugar-added chocolate melts. The sweetness will still shine through.
Looking for more health-conscious sweets? Don’t miss our no added sugar pumpkin banana bread—a wholesome treat for any time of day.
Choosing the Right Chocolate for Dipping
Melting chocolate is where things can go beautifully right—or terribly wrong. For best results:
- Use melting wafers or candy coating designed for dipping. They melt smoothly and harden with a nice sheen.
- Avoid regular chocolate chips—they often contain stabilizers that prevent smooth melting.
- To thin out melted chocolate, stir in a spoonful of shortening or coconut oil (not water—never add water!).
If you’re new to melting chocolate, keep the microwave at 50% power and stir every 20 seconds to avoid burning.
Want a chocolate treat with a seasonal twist? Discover great ideas like our chocolate chip pumpkin bread—a cozy, delicious loaf you’ll bake on repeat.
Step-by-Step Guide to Making Red Velvet Cake Balls
How to Make the Red Velvet Base from Boxed or Scratch
Let’s kick things off with the base—the heart of the red velvet cake ball. You can either bake the cake from scratch or use a boxed mix to save time. For most bakers, using a box like Betty Crocker Super Moist Red Velvet Cake Mix is a quick and reliable option.
Instructions:
- Prepare the cake batter as instructed on the box. This usually involves combining the cake mix, eggs, water, and oil in a mixing bowl.
- Bake in a 9×13-inch pan at 350°F (175°C) for 30–35 minutes.
- Let the cake cool completely—this step is critical to avoid melting the cream cheese during mixing.
Need more cozy cake recipes? Check out our raspberry cake with lemon buttercream for another showstopper you’ll love.
Forming the Perfect Cake Balls: Tips & Tricks
Once your red velvet cake has cooled, you’re ready to roll—literally.
Here’s how:
- Crumble the cooled cake into fine pieces. Use your hands or a fork for best control.
- Add softened cream cheese (full-fat works best) to the cake crumbles.
- Mix until fully combined—you’re aiming for a dough-like consistency.
- Use a small cookie scoop or tablespoon to portion the dough.
- Roll each portion into a smooth ball using your palms.
- Place all rolled balls on a parchment-lined baking sheet.
- Freeze for 30 minutes or until firm. This step helps them keep their shape during dipping.
Looking for more easy, freezer-friendly treats? Don’t miss our strawberry bread loaf with strawberry glaze—it’s just as vibrant and keeps well too.
Dipping, Decorating, and Setting: Final Touches
Once your cake balls are firm, it’s time to dip and decorate.
Melting the chocolate:
- Place melting wafers in a heatproof bowl.
- Microwave on 50% power, stopping to stir every 20 seconds, until smooth.
- Add a small spoonful of shortening or coconut oil to thin if needed.
Dipping process:
- Use dipping tools or two forks to dunk each cake ball in melted chocolate.
- Gently tap off excess chocolate on the side of the bowl.
- Transfer dipped balls to a fresh sheet of parchment paper.
- Immediately sprinkle with red, pink, or themed sprinkles before the coating sets.
Allow the coating to harden fully before storing. For best results, refrigerate in an airtight container for up to 7 days.
Pro Tips to Make Your Cake Balls Look & Taste Like Bakery Quality
Secrets to Smooth, Professional-Looking Coating
Getting that shiny, flawless chocolate shell isn’t just about luck—it’s all about technique and the right ingredients. Here’s how to level up your red velvet cake balls to bakery status:
- Use melting wafers, not regular chocolate chips. They’re made for coating and yield a smooth, glossy finish.
- Chill the cake balls thoroughly before dipping. This prevents crumbs from mixing into your melted chocolate.
- Keep chocolate warm while dipping. Work in small batches and reheat chocolate gently as needed.
- Add a touch of shortening or coconut oil to the chocolate to thin it out if it feels too thick.
And remember: always let the excess chocolate drip off before placing the balls back on parchment. That’s how you avoid chocolate “puddles.”
How to Avoid Common Mistakes (Cracks, Crumbles, Sticky Texture)
Even the easiest recipes have their pitfalls—but luckily, they’re easy to avoid if you know what to look for:
- Cracking shells? That usually means the cake balls were too cold, and the chocolate too hot. Let them sit at room temp for 5–10 minutes before dipping.
- Falling apart? You may need a little more cream cheese in your mix or didn’t chill long enough before dipping.
- Sticky texture? Ensure the cake is completely cooled before mixing in the cream cheese. Warm cake will melt the cheese and ruin the texture.
Expert Tips for Melting Chocolate Perfectly Every Time
Chocolate can be temperamental, but these tips will keep things smooth:
- Microwave at 50% power in 20-second bursts, stirring between each one.
- Never let even a drop of water into your chocolate bowl—it will seize instantly.
- Add 1 tablespoon of coconut oil or shortening if you want a silkier, pourable consistency.
You can also use a double boiler if you prefer stovetop control. But for most home bakers, the microwave method is fast, safe, and effective.
Fun Variations & Creative Decorating Ideas
Festive Ideas for Holidays and Special Events
One of the best things about red velvet cake balls is how easily they adapt to any theme or holiday. Simply change the sprinkles, chocolate coating, or shape to match the occasion:
- Valentine’s Day: White chocolate coating with red or pink heart-shaped sprinkles.
- Christmas: Green drizzle and red sanding sugar.
- Halloween: Dip in dark chocolate and add candy eyeballs or orange drizzle.
- 4th of July: Red velvet base with white coating and blue star sprinkles.
- Birthdays: Rainbow nonpareils for a confetti effect.
These seasonal tweaks make red velvet cake balls a go-to recipe year-round.
Turning Cake Balls into Cake Pops for Kids’ Parties
Kids love desserts on a stick—and turning your cake balls into cake pops is super simple:
- After forming and freezing the cake balls, insert a lollipop or popsicle stick about halfway through each ball.
- Dip into melted chocolate as usual, tapping off excess.
- Stand them upright in a foam block or cake pop stand until the chocolate sets.
They’re easier to serve, more fun to eat, and perfect for birthday parties or baby showers!
Flavor Twists: Try These Mix-Ins and Coatings
Want to get creative beyond red velvet and white chocolate? Try some of these variations:
- Chocolate Overload: Dip in milk or dark chocolate and drizzle with melted peanut butter.
- Cookies & Cream: Add crushed Oreos to the red velvet mixture before rolling.
- Nutty Delight: Roll dipped cake balls in chopped toasted pecans or almonds before the coating sets.
- Mocha Madness: Add 1 tsp of espresso powder to the cake mix for a richer taste.
- Spiked Truffles: Mix in a splash of Baileys or Kahlua for adult-only versions.
The beauty of cake balls is their flexibility. Start with red velvet and then build your own dessert adventure.
Make-Ahead, Storage, and Freezing Tips
How Long Red Velvet Cake Balls Last at Room Temp, Fridge & Freezer
One of the biggest advantages of making red velvet cake balls is their shelf life. Whether you’re prepping ahead or saving leftovers, these truffles store beautifully.
Here’s how long they last:
| Storage Method | Shelf Life | Notes |
|---|---|---|
| Room Temperature | 1–2 days | Only if coated in chocolate and in cool/dry conditions |
| Refrigerator | Up to 1 week | Best stored in an airtight container |
| Freezer | Up to 3 months | Freeze in a single layer first, then transfer to container |
Pro tip: To prevent “sweating” (condensation on the chocolate), defrost frozen cake balls in the fridge overnight.
Best Containers and Wrapping Methods to Keep Fresh
When it comes to storing your cake balls, air-tight containers are your best friend. Here’s what works best:
- Use a flat container with parchment paper between layers.
- Avoid stacking while the coating is still soft.
- For gifting or display, cupcake liners are a great way to keep them separate and stylish.
Hosting a party? Pre-pack them in mini treat boxes for mess-free dessert favors.
Can You Freeze Them? Yes—Here’s the Right Way
Yes, you can freeze red velvet cake balls—and they taste just as good weeks later.
Here’s how to do it right:
- Place fully dipped and set cake balls in a single layer on a baking sheet.
- Freeze uncovered for about 1 hour.
- Once firm, transfer them to a freezer-safe container or zip-top bag.
- Add parchment between layers to avoid sticking.
- Label and date them—so you don’t forget you made them!
When ready to eat, thaw in the fridge overnight. This preserves texture and avoids sticky condensation.
Want more freezer-friendly desserts? Don’t miss our pumpkin s’mores cookies recipe—chewy, gooey, and perfect right out of the freezer.
FAQ About Red Velvet Cake Balls
Can I use leftover red velvet cake to make cake balls?
Absolutely. Leftover cake works perfectly for this recipe. Just crumble it into fine pieces and mix in cream cheese until it forms a dough-like consistency. It’s a smart way to avoid waste and still get a delicious dessert.
Do I have to use white chocolate for dipping?
Not at all! While white chocolate pairs beautifully with red velvet, you can dip your cake balls in milk, dark, or even ruby chocolate. Just make sure you use melting wafers or coating chocolate for smooth results.
Why do my cake balls crack after dipping?
This usually happens when the cake balls are too cold, and the melted chocolate is too warm. Let the balls sit at room temperature for about 10 minutes before dipping, and ensure your chocolate is not overheated.
Can I make these ahead of time for a party?
Yes! You can prepare and freeze the cake balls weeks in advance. Just store them in an airtight container, and defrost in the fridge the night before serving. They’ll still look and taste fresh.
How do I get the chocolate to coat evenly?
Use dipping tools or two forks to submerge the cake balls. Tap gently to remove excess chocolate before placing them back on parchment. If the chocolate thickens, warm it slightly or add a touch of coconut oil.
Conclusion: Why This Red Velvet Cake Balls Recipe Should Be Your Go-To Dessert
Whether you’re planning for Valentine’s Day, a holiday party, or just craving something sweet, red velvet cake balls check every box. They’re easy to make, stunning to serve, and endlessly customizable. With just a few pantry staples and a little creativity, you can whip up a batch of bite-sized bliss that keeps everyone coming back for more.
Ready to expand your dessert game? Discover great ideas like our peppermint chocolate chip cookies for another seasonal favorite.
PrintRed Velvet Cake Balls
Red Velvet Cake Balls are rich, bite-sized treats made from red velvet cake and cream cheese, coated in white chocolate and perfect for holidays or parties.
- Prep Time: 10 minutes
- Cook Time: 30 minutes
- Total Time: 40 minutes
- Yield: 40 balls
- Category: Dessert
- Method: No-bake/Chilled
- Cuisine: American
- Diet: Vegetarian
Ingredients
- 1 box (15 oz) red velvet cake mix
- ½ cup vegetable oil
- 1 cup water
- 3 large eggs
- 1 cup (8 oz) full-fat cream cheese, softened
- 2 cups white chocolate melting wafers
- Sprinkles (optional)
Instructions
- Prepare red velvet cake according to package instructions using the eggs, oil, and water.
- Let the baked cake cool completely.
- Crumble the cooled cake into a large bowl.
- Add softened cream cheese and mix until a dough forms.
- Roll mixture into small balls and place on a parchment-lined baking sheet.
- Freeze the balls for 30 minutes or until firm.
- Melt white chocolate wafers in the microwave at 50% power, stirring every 20 seconds until smooth.
- Dip each cake ball into the melted chocolate and tap off excess.
- Place dipped balls on parchment paper and add sprinkles before the coating sets.
- Let the coating harden completely before serving or storing.
Notes
- Chill dough balls before dipping to maintain shape.
- Use melting wafers for a smoother chocolate coating.
- Never add water to melted chocolate to avoid seizing.
- Add shortening or coconut oil to thin chocolate if needed.
- Store in an airtight container in the fridge for up to 1 week or freeze for up to 3 months.
Nutrition
- Serving Size: 1 truffle
- Calories: 116 kcal
- Sugar: 8 g
- Sodium: 138 mg
- Fat: 7 g
- Saturated Fat: 2 g
- Unsaturated Fat: 4 g
- Trans Fat: 0.02 g
- Carbohydrates: 12 g
- Fiber: 0.3 g
- Protein: 2 g
- Cholesterol: 14 mg