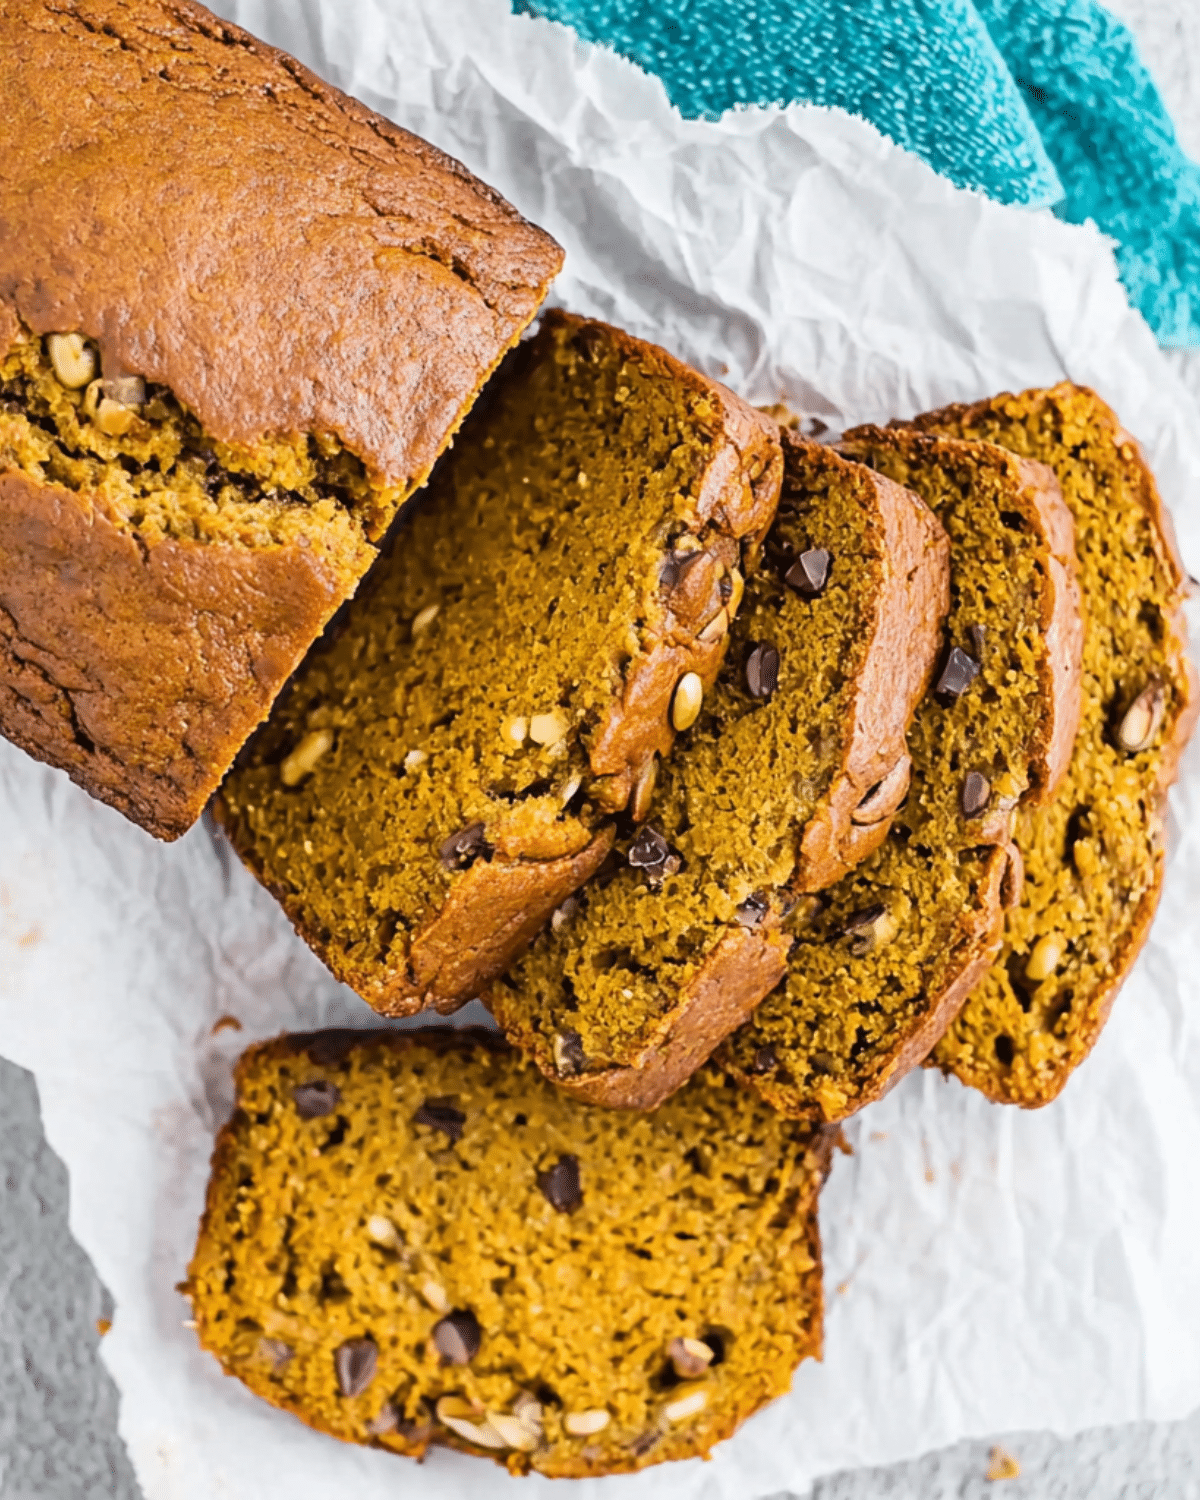
When fall rolls around, nothing satisfies quite like a loaf of freshly baked Pumpkin Banana Bread. This cozy treat combines two classic flavors—ripe bananas and earthy pumpkin—into one moist, flavorful, and ultra-satisfying quick bread. Whether you’re sipping on a latte or hosting a holiday brunch, this loaf is the ultimate go-to for warmth and comfort. If you’re already a fan of pumpkin treats, you’ll want to discover great ideas like our moist walnut pumpkin bread.
In this article, you’ll learn why pumpkin banana bread is so loved, what ingredients truly matter, how to make it step by step, and expert tips to avoid common baking fails. We’ll also share smart storage tips, creative variations, and must-know answers to popular baking questions. By the end, you’ll master a loaf that’s not just delicious—but crave-worthy.
JUMP TO
Table of Contents
Why You’ll Love This Pumpkin Banana Bread
A Perfect Fusion of Fall Flavors
What happens when you blend the creamy richness of pumpkin with the sweet depth of overripe bananas? Pure magic. Pumpkin spice adds a gentle warmth while banana brings natural sweetness, creating a soft and moist crumb that beats most bakery-style breads. This combo makes it ideal for cozy mornings, afternoon tea, or a light dessert after dinner.
Plus, pumpkin puree adds fiber, vitamins, and antioxidants—so your sweet craving actually comes with a few perks.
Healthier Than Most Quick Breads
Unlike overly processed store-bought versions, this homemade recipe uses simple pantry ingredients and lets you control the sugar and fat content. Bananas act as a natural sweetener, while pumpkin keeps the loaf tender without needing excess oil or butter. You can even use whole wheat flour or swap sugar for honey if you’re leaning into a healthier fall baking routine.
Looking for something even lighter? Check out this no added sugar pumpkin banana bread variation.
Ideal for Breakfast, Snack, or Dessert
This versatile bread is not only easy to bake, but also incredibly flexible. Serve it slightly warm with a pat of butter for breakfast, enjoy a slice as a midday snack, or toast it with cinnamon honey for dessert. Leftovers store beautifully, and you can even freeze individual slices to enjoy throughout the season.
Not sure how to serve it creatively? Don’t miss our guide to pairing pumpkin desserts like this cheesecake dip.
Key Ingredients for Pumpkin Banana Bread
Why Ripe Bananas Matter
The secret to deep banana flavor lies in the ripeness. You want bananas that are mostly brown with soft, sweet flesh. Not only do they mash easily, but they infuse the batter with natural sugars and a distinct banana aroma that complements pumpkin perfectly.
Tip: If your bananas aren’t ripe yet, you can roast them in the oven at 300°F for about 30 minutes to bring out their natural sweetness.
Choosing the Right Pumpkin Puree
Be sure to use 100% canned pumpkin puree—not pumpkin pie filling, which contains added sugar and spices. Pumpkin puree keeps the loaf ultra moist while enhancing the natural flavor. If you have fresh pumpkin on hand, roast and mash it for a richer, homemade taste.
Also, since this recipe uses only 1 cup of puree, you’ll have leftovers. Looking for inspiration? Try this roasted pumpkin agnolotti recipe to use it up deliciously.
Optional Add-Ins to Elevate Your Loaf
This base recipe is perfect as-is, but don’t be afraid to mix in:
- ½ cup chopped walnuts or pecans for crunch
- Mini chocolate chips for a touch of indulgence
- Dried cranberries or apricots for a tart-sweet twist
- A swirl of cream cheese or nut butter before baking
If you like creative combinations, you’ll love our pumpkin pie cookie sandwiches that take things to the next level.
How to Make Pumpkin Banana Bread Step-by-Step
Making this loaf is easier than you think. With a handful of pantry staples and a little know-how, you’ll be baking like a pro in no time. Let’s walk through the method, one step at a time.
Prep the Ingredients Like a Pro
Before you begin, preheat your oven to 350°F (175°C). Grease and flour a 9×5-inch loaf pan or line it with parchment paper for easy removal.
Here’s what you’ll need:
| Ingredient | Quantity |
|---|---|
| All-purpose flour | 2 cups |
| Pumpkin pie spice | 2 tsp |
| Ground cinnamon | ½ tsp |
| Baking soda | 1 tsp |
| Baking powder | ½ tsp |
| Salt | ¼ tsp |
| Vegetable oil | ½ cup |
| Granulated sugar | ½ cup |
| Brown sugar | ½ cup |
| Large eggs | 2 |
| Vanilla extract | 2 tsp |
| Mashed ripe bananas | 2 medium |
| Pumpkin puree | 1 cup |
| Chopped walnuts (optional) | ½ cup |
Tip: Let the eggs sit at room temperature for about 15 minutes. This helps them blend better with other ingredients.
Mix Using the Muffin Method for Better Texture
The “muffin method” is crucial here: mix dry and wet ingredients separately, then gently combine them.
- Dry Mix: In a medium bowl, whisk together the flour, pumpkin pie spice, cinnamon, baking soda, baking powder, and salt.
- Wet Mix: In a large bowl, whisk together the oil, granulated sugar, brown sugar, eggs, and vanilla until smooth and well-combined.
- Add Fruits: Stir in mashed bananas and pumpkin puree until evenly incorporated.
- Combine Carefully: Gently fold the dry mixture into the wet mixture using a spatula. Stir only until the batter is just combined. Don’t overmix—it can lead to dense bread.
- Add Texture: Fold in chopped nuts, chocolate chips, or dried fruit if desired.
Baking Tips to Avoid Soggy or Dry Results
Pour the batter into the prepared loaf pan and smooth the top. Bake for 50–60 minutes, or until a toothpick inserted in the center comes out clean. The top should be firm and golden brown.
Here’s how to avoid the most common baking mishaps:
- Soggy center? Your oven might run cool. Use an oven thermometer to ensure it’s properly heated.
- Dry sides? Use a light-colored metal loaf pan. Dark pans absorb more heat and can overcook the edges.
- Over-browning? Tent foil over the loaf halfway through baking if the top darkens too quickly.
Want more pumpkin-spiced goodness? Check out this easy pumpkin bread with crumb topping for a delicious alternative.
Pro Tips for the Perfect Pumpkin Banana Loaf
Even if you’ve baked banana bread before, combining it with pumpkin changes the game. These tips ensure your loaf bakes up just right—every single time.
Preventing Over-Browning
Because this bread bakes for nearly an hour, the edges may brown faster than the center sets. Shield the top with a loose sheet of foil if it starts to darken around the 40-minute mark. Also, avoid placing the loaf pan too close to the top heating element.
How to Fix Soggy or Undercooked Centers
- Check your pan size: Always use a 9×5-inch pan. Smaller pans overflow or underbake in the middle.
- Let it rest: After baking, allow the bread to cool in the pan for 10–15 minutes before transferring it to a wire rack. This helps finish setting the crumb without becoming gummy.
How to Make Mini Loaves or Muffins
Want to gift these or freeze single portions? You can easily adapt the recipe:
| Type | Pan Size | Bake Time |
|---|---|---|
| Mini loaves | 5¾ x 3-inch | 25–30 mins |
| Muffins | Standard tin | 18–20 mins |
Mini versions bake faster, so start checking early to prevent overbaking.
Bonus: These freeze beautifully. Slice, wrap, and store them individually for grab-and-go breakfasts!
Hungry for more fall classics? Don’t miss our chocolate chip pumpkin bread—it’s another moist masterpiece worth baking.
Storage, Freezing, and Reheating Instructions
Pumpkin banana bread is one of those bakes that just gets better by the day. Here’s how to store it like a pro.
Best Way to Store for Freshness
Once your bread has completely cooled, wrap it tightly in plastic wrap or store it in an airtight container at room temperature for up to 3 days. Keeping it sealed prevents it from drying out and preserves its soft, moist texture.
If your kitchen is warm or humid, move it to the fridge after 2 days for maximum freshness.
How to Freeze for Up to 3 Months
This bread freezes beautifully. Here’s how to do it:
- Slice the cooled loaf
- Wrap each slice in parchment or wax paper
- Place slices in a freezer-safe ziplock or container
To serve, just thaw at room temperature or microwave for 15–20 seconds. You’ll have a fresh, moist slice on demand.
Need more freezer-friendly ideas? Check out our pumpkin scones—perfect for batch baking and saving.
Fun Serving Suggestions
While this bread is great on its own, here are a few ways to take it up a notch:
- Warm it and spread with salted butter or cinnamon butter
- Add a spoonful of peanut butter or almond butter
- Toast and drizzle with maple syrup or honey
- Top with whipped cream cheese for dessert-like flair
Want a little more indulgence? Try pairing a slice with pumpkin spice coffee cake for the ultimate fall brunch board.

FAQs About Pumpkin Banana Bread
Why did my pumpkin banana bread crack on top?
That beautiful split down the middle is actually a good sign! Quick breads rise rapidly in the oven, and the crust hardens before the center finishes expanding. The crack shows that your loaf rose properly.
What kind of banana is best for baking?
Use very ripe bananas—they should be soft with brown spots or streaks. The riper, the sweeter and more flavorful your bread will be.
Can I make this gluten-free or vegan?
Yes! Substitute the all-purpose flour with a 1:1 gluten-free baking blend. To make it vegan, use flax eggs (1 tbsp ground flax + 2.5 tbsp water per egg), and replace the eggs and sugars with your preferred plant-based alternatives.
Why is my pumpkin banana bread soggy in the middle?
This often means it was underbaked. Make sure to test with a toothpick deep in the center. Also, using too much banana or pumpkin puree can result in excess moisture.
Can I turn this into muffins or mini loaves?
Absolutely! Just adjust the baking time (muffins: 18–20 mins, mini loaves: 25–30 mins) and use greased pans or liners.
Conclusion: The Ultimate Fall Treat is Just One Bake Away
Whether you’re hosting a gathering or just craving something warm and cozy, this pumpkin banana bread recipe delivers every single time. It’s simple to make, customizable, and guaranteed to please even the pickiest eaters. Plus, with its freezer-friendly nature, it’s a treat you can enjoy long after fall ends.
Discover more fall baking inspiration like our pumpkin pie bread pudding and bring the flavors of the season to your kitchen every week.
PrintPumpkin Banana Bread
This moist and flavorful Pumpkin Banana Bread blends ripe bananas and pumpkin puree with warm spices for the perfect fall loaf. It’s easy to make, freezer-friendly, and ideal for breakfast, snacks, or dessert.
- Prep Time: 15 minutes
- Cook Time: 55 minutes
- Total Time: 1 hour 10 minutes
- Yield: 1 loaf (8–10 slices)
- Category: Bread
- Method: Baking
- Cuisine: American
- Diet: Vegetarian
Ingredients
- 2 cups all-purpose flour
- 2 teaspoons pumpkin pie spice
- 1/2 teaspoon ground cinnamon
- 1 teaspoon baking soda
- 1/2 teaspoon baking powder
- 1/4 teaspoon salt
- 1/2 cup vegetable oil
- 1/2 cup granulated sugar
- 1/2 cup brown sugar
- 2 large eggs
- 2 teaspoons vanilla extract
- 2 medium ripe bananas, mashed
- 1 cup canned pumpkin puree (not pumpkin pie filling)
- 1/2 cup chopped walnuts (optional)
Instructions
- Preheat the oven to 350°F (175°C). Grease and flour a 9×5-inch loaf pan.
- In a medium bowl, whisk together the flour, pumpkin pie spice, cinnamon, baking soda, baking powder, and salt.
- In a large bowl, whisk together the oil, granulated sugar, brown sugar, eggs, and vanilla until smooth.
- Stir in the mashed bananas and pumpkin puree.
- Gently fold the dry mixture into the wet mixture using a spatula, mixing just until combined.
- Fold in chopped walnuts, chocolate chips, or dried fruit if desired.
- Pour the batter into the prepared loaf pan and smooth the top.
- Bake for 50–60 minutes, or until a toothpick inserted into the center comes out clean and the top is firm.
- Let the bread cool in the pan for 10–15 minutes, then transfer to a wire rack to cool completely.
Notes
- Use very ripe bananas for the best flavor and sweetness.
- Make sure to use 100% pumpkin puree, not pumpkin pie filling.
- Tent foil over the loaf if the top begins to brown too quickly.
- This recipe can be made into muffins or mini loaves with adjusted baking times.
- Freeze individual slices for up to 3 months for easy grab-and-go breakfasts.
Nutrition
- Serving Size: 1 slice
- Calories: 356 kcal
- Sugar: 24 g
- Sodium: 187 mg
- Fat: 16 g
- Saturated Fat: 1 g
- Unsaturated Fat: 14 g
- Trans Fat: 0 g
- Carbohydrates: 48 g
- Fiber: 2 g
- Protein: 5 g
- Cholesterol: 37 mg