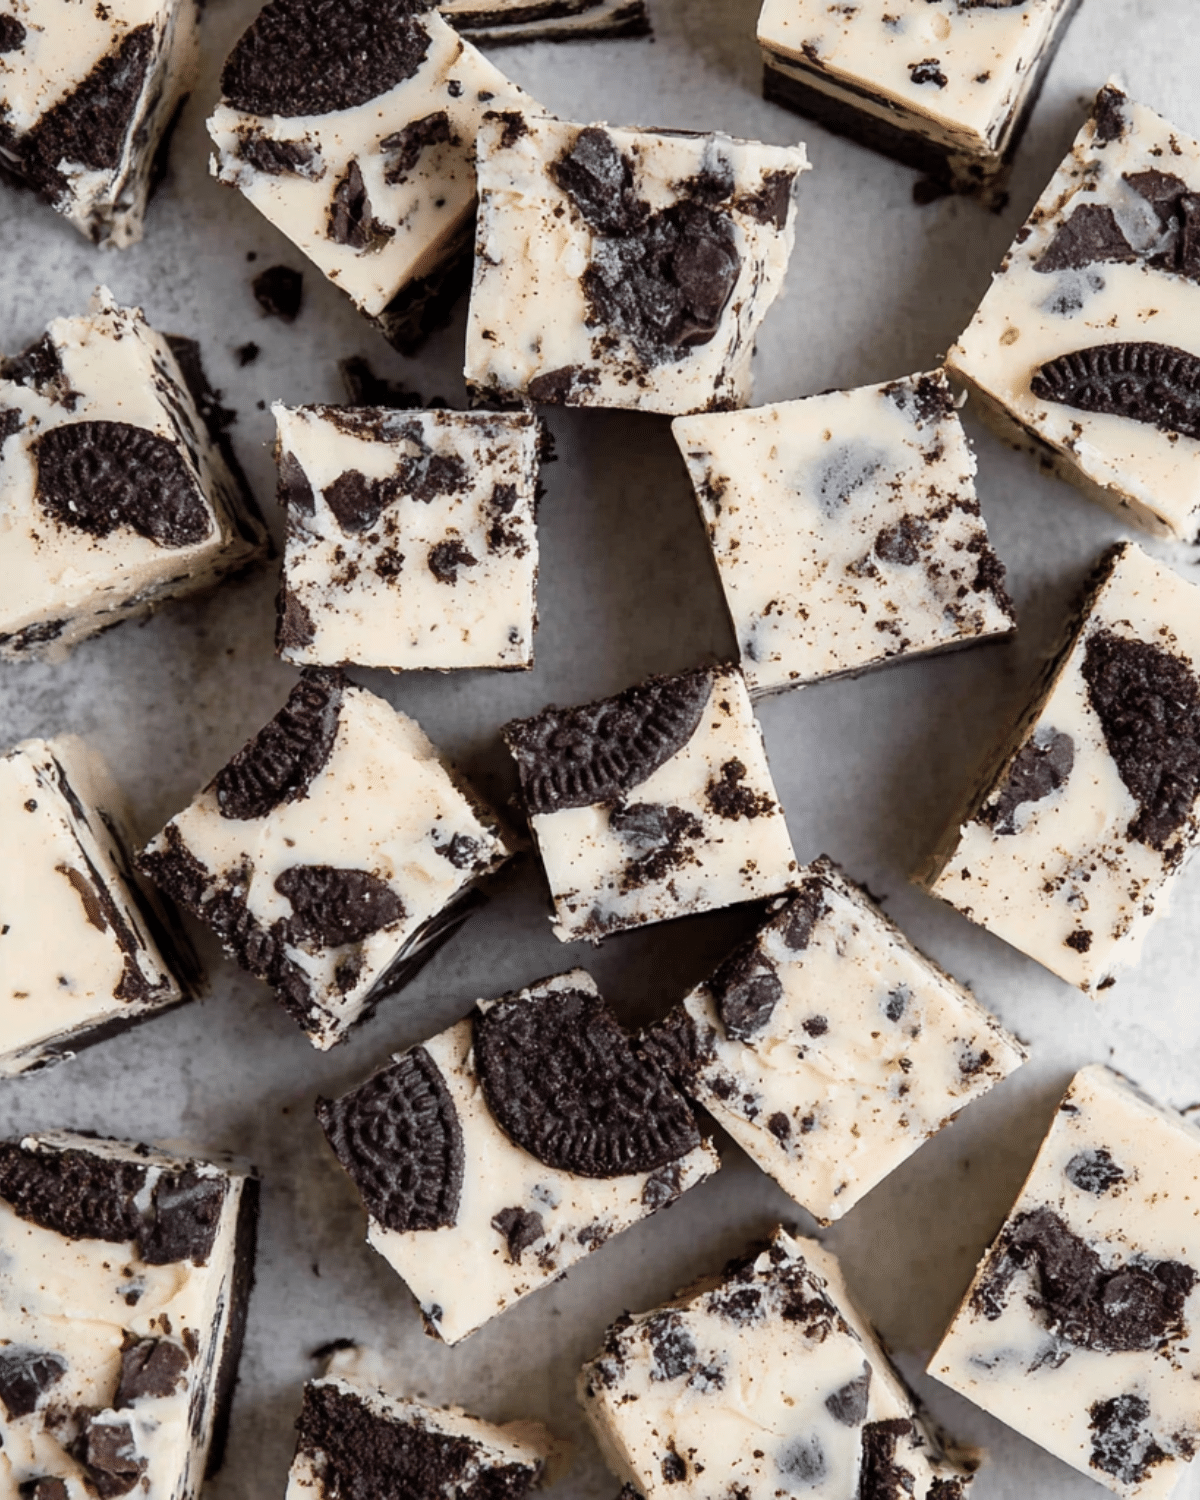
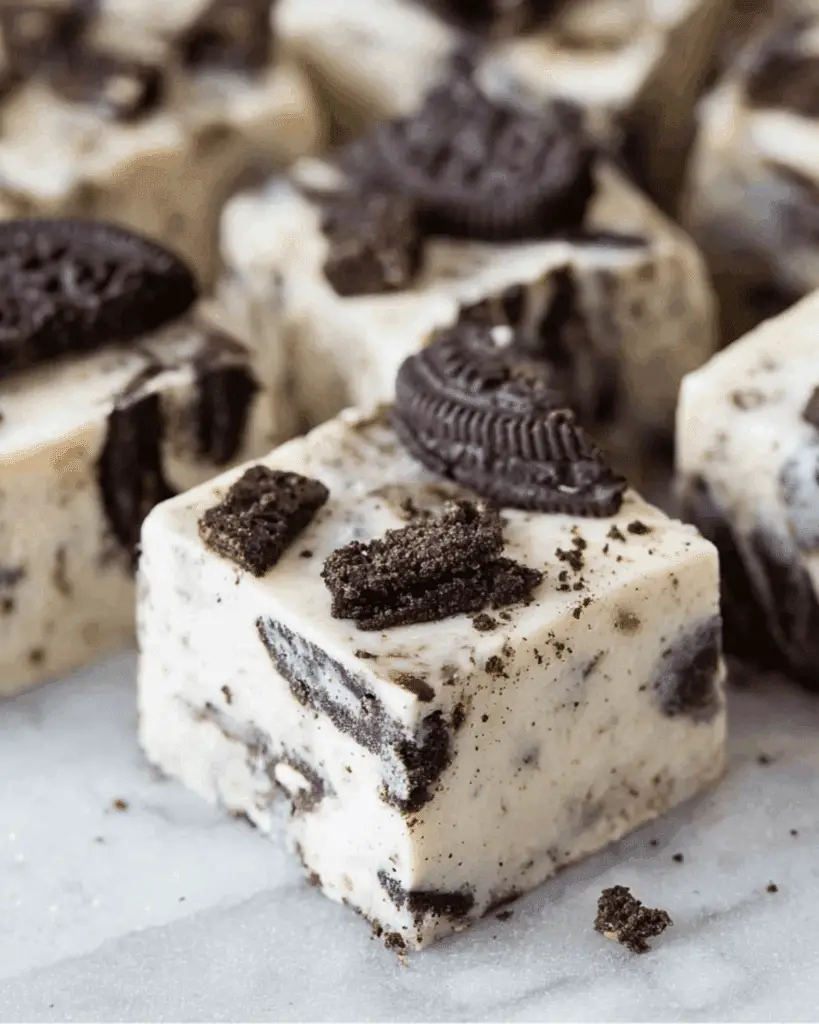
There’s something magical about Oreo Fudge—a dessert so easy, rich, and indulgent, it quickly becomes a favorite at every holiday table or casual get-together. Whether you’re filling cookie tins for Christmas, looking for a no-bake microwave dessert, or simply obsessed with Oreos, this cookies and cream-style fudge delivers a satisfying mix of creamy and crunchy textures. What makes it even better? It takes just 5 ingredients and under 10 minutes to prepare. Looking for inspiration? Try our easy Halloween snack mix recipe for another simple, crowd-pleasing treat.
Let’s dive into everything you need to know—from choosing the right ingredients to storage and fun flavor twists—to make Oreo Fudge your new signature sweet.
JUMP TO
Table of Contents
What Makes Oreo Fudge So Irresistible?
A Perfect Blend of Creamy and Crunchy
The appeal of Oreo Fudge starts with its texture. Imagine a smooth, creamy white chocolate base that melts in your mouth, paired with chunks of chocolate cookie that provide just the right amount of crunch. It’s a combo that mimics cookies and cream ice cream but in rich, bite-sized squares you can enjoy without utensils or cleanup.
Why It’s a Favorite for Holidays and All-Year Snacking
Sure, fudge might be a holiday tradition, but Oreo Fudge defies seasonal boundaries. Thanks to its easy prep and short ingredient list, it’s ideal for last-minute parties, potlucks, school treats, or that 8 PM chocolate craving. Plus, it makes a great addition to Christmas cookie tins or DIY gift boxes—just wrap it in wax paper and tie it with string.
The Rise of No-Bake Microwave Fudge Recipes
Gone are the days of candy thermometers and boiling sugar. Today’s home bakers are loving the simplicity of microwave fudge recipes, and Oreo Fudge leads the pack. With no stove needed, minimal cleanup, and nearly foolproof steps, it’s perfect for beginners or busy families.
Essential Ingredients for the Ultimate Oreo Fudge
Choosing the Best White Chocolate for Melting
Not all white chocolate chips are created equal. To get that smooth, melt-in-your-mouth texture, quality matters. Brands like Ghirardelli or Guittard offer a richer cocoa butter content, which melts more evenly and gives your fudge that glossy finish. Avoid generic or overly sweet white chips that may harden or seize up when microwaved.
| White Chocolate Brand | Melting Quality | Taste |
|---|---|---|
| Ghirardelli | Excellent | Rich, balanced |
| Nestlé Toll House | Good | Slightly sweet |
| Generic Store Brand | Poor | Too sugary or waxy |
Why Sweetened Condensed Milk Is Key to Creaminess
The secret to Oreo Fudge’s creaminess is sweetened condensed milk. It’s thick, sugary, and binds everything together without the need for added butter or cream. This ingredient eliminates the guesswork and gives the fudge its signature texture—dense yet creamy, firm yet soft.
Picking the Perfect Oreo-to-Fudge Ratio
Too many Oreos, and the fudge crumbles. Too few, and it loses that cookies-and-cream magic. The sweet spot? Roughly 10–12 regular Oreos for every 2 ¾ cups of white chocolate chips. Chop them coarsely so you get a mix of big chunks and tiny crumbs, creating contrast in every bite.
Step-by-Step Guide: How to Make Oreo Fudge in 5 Minutes
Prep Your Tools and Pan Like a Pro
Before you even open your can of sweetened condensed milk, line an 8×8 or 9×9 baking dish with foil or parchment. Let the edges overhang so you can lift the fudge out easily once it sets. Also, grab a sturdy spatula and a microwave-safe glass bowl.
Microwave Technique for Perfect Texture
This step can make or break your fudge. Combine your white chocolate chips and condensed milk in the bowl and microwave for just 1 minute. It may look only half-melted—don’t worry. Stir it slowly and watch the chocolate finish melting. Overheating is the #1 reason microwave fudge turns dry or grainy.
Pro Tip: If you see white chocolate burning at the edges, it’s been microwaved too long. Start over with a fresh batch.
Folding in Oreos Without Crushing Them
Once your base is smooth, add the salt, vanilla extract, and chopped Oreos. Fold gently—pressing too hard will turn the cookies into mush. Spread the mixture evenly into the prepared pan, then top with a few extra Oreo pieces for presentation.
Don’t miss our stained glass cookies recipe for another festive no-fuss baking idea.
Tips to Avoid Crumbly or Grainy Fudge
The #1 Microwave Mistake That Ruins Fudge
Let’s be real: microwave fudge is amazing—unless you overdo it. One extra 30-second blast can mean the difference between silky-smooth and chalky-dry. The sweetened condensed milk needs gentle heat. Stick to just one minute, then stir until all the white chocolate chips are melted. Even if they look unmelted, resist the urge to reheat. The carry-over heat will finish the job.
Best Cooling Practices for Smooth Results
Cooling fudge might seem like the easiest part, but it’s often overlooked. For the smoothest, creamiest texture, let the fudge set at room temperature for 4 hours (or overnight). Speeding things up in the fridge might sound smart, but it causes rapid sugar crystallization, which gives the fudge a gritty texture.
If you’re planning ahead for the holidays, check out our cherry snowball cookies recipe—they pair beautifully with fudge in cookie tins!
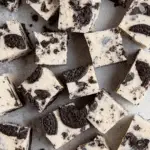
Storing and Slicing Without Crumbling
Once your fudge is firm, lift it from the pan using the foil or parchment. Use a sharp, hot knife for clean cuts. Wipe the blade between slices. Store the squares in an airtight container at room temperature for up to two weeks. Keep it cool and dry—humidity is fudge’s worst enemy.
Fun Variations to Customize Your Oreo Fudge
Mint Oreo Twist for a Refreshing Bite
A splash of peppermint or mint extract (just ¼ teaspoon) instantly transforms basic Oreo fudge into a winter wonderland treat. Want it to look the part too? Add a drop of green gel food coloring and top with crushed Mint Oreos. It’s a favorite among peppermint lovers and perfect for themed parties.
Adding Peanut Butter for a Creamy Upgrade
Want a nuttier, richer taste? Stir ¼ cup peanut butter into the white chocolate and condensed milk mixture before microwaving. The result is a creamy, salty-sweet flavor that plays beautifully with the Oreo crunch. Think of it as Reese’s meets cookies and cream.
Discover great ideas like our peppermint chocolate chip cookies if you love this mint + chocolate fusion.
Christmas Colors, Sprinkles, and Toppings
Oreo fudge can be dressed up for the holidays in so many ways. Use red and green food coloring, stir in Christmas sprinkles, or top with white chocolate drizzle. Swap classic Oreos for holiday-themed flavors like peppermint bark or gingerbread for festive flair.
Don’t miss our Christmas sugar cookies recipe if you’re planning a full dessert table.
How to Store and Freeze Oreo Fudge for Later
Room Temp vs Fridge vs Freezer: Which Is Best?
If you’re enjoying fudge within 7–10 days, room temperature is best. The flavor stays truer and the texture softer. For longer storage, wrap the fudge in wax or parchment paper and place in a sealed container in the fridge. It’ll keep for up to 3 weeks.
Planning months ahead? Fudge freezes beautifully. Wrap in plastic wrap, place in a freezer-safe zip bag, and freeze for up to 3 months.
Wrapping Techniques to Preserve Freshness
Layer pieces with wax paper to avoid sticking. If freezing, double wrap: first in plastic, then foil or a freezer bag. This prevents freezer burn and maintains flavor. When you’re ready to eat, thaw in the fridge for 24 hours—don’t thaw at room temp or it might sweat and get sticky.
Check out our easy strawberry Santa treats for another adorable freezer-friendly dessert idea.
How Long Does Oreo Fudge Actually Last?
At room temp: 1–2 weeks
In the fridge: up to 3 weeks
In the freezer: up to 3 months
Keep it in a cool spot and always use an airtight container. If the texture changes or it starts smelling off, it’s time to toss it. But odds are, it’ll be long gone before that.
Oreo Fudge FAQ
Can I make Oreo fudge without condensed milk?
Technically, yes—but it won’t be the same. Sweetened condensed milk is what gives Oreo Fudge its ultra-smooth texture and rich sweetness. If you’re avoiding it, you can try using a combination of heavy cream and white chocolate, but the result may be softer and less stable. It’s not the ideal swap for a no-fail fudge.
Why is my Oreo fudge not setting properly?
If your fudge won’t firm up, one of two things likely happened:
-You overheated the chocolate (causing it to seize and break structure), or
-You didn’t let it cool long enough at room temperature.
Make sure to follow the timing exactly and allow 4–6 hours minimum for proper setting.
Do I need to refrigerate Oreo fudge before cutting?
Nope! In fact, refrigerating too early can cause the sugar to crystallize and result in grainy fudge. Always allow it to set at room temperature, uncovered or lightly covered. Refrigeration is only necessary for long-term storage after the fudge is fully set and sliced.
Can I double the recipe?
Absolutely! Just use a 9×13 pan instead of an 8×8 or 9×9. Double all ingredients evenly, and remember to gently stir to avoid crushing the Oreo pieces. You may also need a slightly longer setting time due to increased thickness.
Conclusion: Why Oreo Fudge Should Be Your Go-To Treat
There’s no denying the appeal of Oreo Fudge—it’s quick, low-effort, and endlessly customizable. Whether you’re looking to fill a cookie box, make a last-minute dessert, or treat yourself with a rich square of no-bake bliss, this fudge has your back.
Plus, with a prep time under 10 minutes and no baking required, even the busiest home cook can master it. Don’t miss our chocolate chip pumpkin bread if you’re looking for another cozy, make-ahead dessert.
From holiday trays to freezer stash, Oreo Fudge is the sweet solution you didn’t know you needed.
PrintOreo Fudge
This Oreo Fudge is a 5-ingredient, 5-minute no-bake dessert that combines creamy white chocolate with crunchy Oreo cookies. Perfect for holidays or anytime you crave a sweet treat, it’s simple to make and stores beautifully for gifting or snacking.
- Prep Time: 5 minutes
- Cook Time: 0 minutes
- Total Time: 5 minutes (plus 4 hours setting time)
- Yield: 25 pieces
- Category: Dessert
- Method: No Bake
- Cuisine: American
- Diet: Vegetarian
Ingredients
- 1 can sweetened condensed milk (14 oz)
- 2 3/4 cups white chocolate chips
- 10 Oreos, chopped (plus a few extra for topping)
- 1/2 tsp vanilla extract
- 1/8 tsp salt
Instructions
- Line an 8×8 or 9×9 baking pan with foil or parchment paper, allowing it to hang over the sides for easy removal.
- In a microwave-safe glass bowl, combine sweetened condensed milk and white chocolate chips. Stir until mixed.
- Microwave the mixture on full power for 1 minute. Do not overheat.
- Stir the mixture until the white chocolate chips are fully melted and the mixture is smooth.
- Gently fold in chopped Oreos, vanilla extract, and salt until well combined.
- Pour the fudge mixture into the prepared pan and spread it evenly. Top with extra Oreo pieces if desired.
- Let it sit at room temperature for at least 4 hours, or overnight, until fully set.
- Once set, lift the fudge out of the pan using the parchment or foil and cut into squares.
Notes
- Do not microwave for longer than 1 minute; the mixture will finish melting as you stir.
- Use high-quality white chocolate chips for the smoothest texture.
- Store at room temperature in an airtight container for 1–2 weeks.
- Fudge can be frozen for up to 3 months.
- Cool at room temperature, not in the fridge, to avoid grainy texture.
Nutrition
- Serving Size: 1 piece
- Calories: 130
- Sugar: 16g
- Sodium: 45mg
- Fat: 6g
- Saturated Fat: 3.5g
- Unsaturated Fat: 2g
- Trans Fat: 0g
- Carbohydrates: 18g
- Fiber: 0g
- Protein: 1g
- Cholesterol: 5mg