Mulberry Pie is one of those timeless desserts that instantly brings back memories of summer afternoons and homemade baking. With its deep purple filling, perfectly balanced sweetness, and flaky golden crust, Mulberry Pie delivers rustic charm in every slice. If you’ve never baked with mulberries before, you’re in for a treat.
Unlike more common berry pies, Mulberry Pie has a unique flavor. It’s sweet but slightly tart, rich yet delicate. Because mulberries release beautiful natural juices while baking, the filling becomes thick, glossy, and intensely flavorful.
In this guide, you’ll learn how to make the perfect Mulberry Pie from scratch, including tips for choosing berries, preventing a soggy crust, and achieving that ideal thick filling.
JUMP TO
Table of Contents
Why Mulberry Pie Is So Special
A Hidden Gem Among Berry Pies
While blueberry and cherry pies are popular, Mulberry Pie remains a hidden treasure. Mulberries have a softer texture and a wine-like sweetness that sets them apart.
Because mulberries are naturally juicy, they create a vibrant filling without requiring complicated preparation.
Sweet and Slightly Tart Flavor Balance
The flavor of These Pie is often described as a mix between blackberries and figs. However, mulberries are generally less tart than blackberries.
That balance makes Mulberry Pie appealing to both kids and adults.
Seasonal and Nostalgic
Mulberries are typically harvested in late spring to early summer. Because they’re not widely available in grocery stores, baking Mulberry Pie often feels special and nostalgic.
Ingredients for the Perfect Result
To make a classic Mulberry Pie, gather:

For the Filling
- 4 cups fresh mulberries (washed and stems removed)
- ¾ cup granulated sugar
- 2 tablespoons cornstarch
- 1 tablespoon lemon juice
- ½ teaspoon ground cinnamon
- ¼ teaspoon salt
For the Crust
- 2½ cups all-purpose flour
- 1 teaspoon salt
- 1 tablespoon sugar
- 1 cup cold unsalted butter, cubed
- 6–8 tablespoons ice water
Optional:
- 1 egg (for egg wash)
- 1 tablespoon coarse sugar (for topping)
Each ingredient plays an important role. Cornstarch thickens the filling, lemon juice brightens the flavor, and cinnamon enhances the natural sweetness of the mulberries.
Choosing the Best Mulberries for Mulberry Pie
Fresh vs Frozen Mulberries
Fresh mulberries are ideal for these pie. However, frozen mulberries work just as well if thawed and drained properly.
Because mulberries are delicate, handle them gently to avoid crushing.
How to Prepare Mulberries
Rinse carefully under cool water.
Remove small stems.
Pat dry before mixing with sugar.
Because excess moisture can make the filling too runny, drying the berries helps maintain proper texture.
How to Make Homemade Pie Crust
Why Homemade Crust Makes a Difference
A flaky crust elevates Mulberry Pie from good to unforgettable.
According to baking experts at Bon Appétit, keeping butter cold is essential for achieving flaky layers.
Step-by-Step Crust Preparation
- In a bowl, combine flour, sugar, and salt.
- Cut in cold butter until mixture resembles coarse crumbs.
- Add ice water gradually, mixing just until dough forms.
- Divide into two disks and refrigerate for at least 30 minutes.
Because cold dough is easier to roll, chilling prevents shrinking during baking.
Preparing the Mulberry Filling
In a large bowl, gently toss mulberries with sugar, cornstarch, lemon juice, cinnamon, and salt.
Let the mixture sit for 10–15 minutes.
Because sugar draws out juices, this resting step helps thicken the filling during baking.
How to Assemble Pie Step by Step
Now that your crust is chilled and your filling is ready, it’s time to assemble your Mulberry Pie. Because proper assembly affects texture and structure, follow these steps carefully.
Step 1: Roll Out the Bottom Crust
Lightly flour your work surface.
Roll one chilled dough disk into a 12-inch circle.
Gently transfer it into a 9-inch pie pan, pressing it lightly into the bottom and sides.
Trim excess dough, leaving about a 1-inch overhang.
Because cold dough prevents shrinking, work quickly to keep it cool.
Step 2: Add the Mulberry Filling
Pour the prepared mulberry mixture into the crust.
Spread evenly.
If excess juice has pooled in the bowl, avoid pouring too much liquid into the crust. This helps prevent a soggy bottom.
Step 3: Add the Top Crust
Roll out the second dough disk.
You may either:
- Place it whole over the top and cut slits for ventilation
- Create a lattice crust for a decorative finish
Because Mulberry Pie filling bubbles as it bakes, ventilation is essential to release steam.
Fold the edges under and crimp to seal.
Step 4: Apply Egg Wash
Brush the top crust lightly with beaten egg.
Sprinkle coarse sugar on top for extra crunch and sparkle.
Baking Mulberry Pie to Perfection
Ideal Baking Temperature
Preheat oven to 400°F (200°C).
Bake for 20 minutes.
Then reduce temperature to 375°F (190°C) and continue baking for 30–35 minutes.
Because the filling needs time to thicken, avoid removing the pie too early.
Signs Your Mulberry Pie Is Done
- Crust is golden brown
- Filling is bubbling in the center
- Edges are crisp
If crust browns too quickly, cover edges with foil.
How to Prevent a Soggy Bottom Crust
One common issue with berry pies is excess moisture. Fortunately, you can prevent this.
Tips for Success
- Use cornstarch to thicken properly
- Avoid overfilling with extra juice
- Bake on the lower oven rack
- Preheat the oven fully
Because Mulberry Pie contains juicy berries, proper thickening is essential.
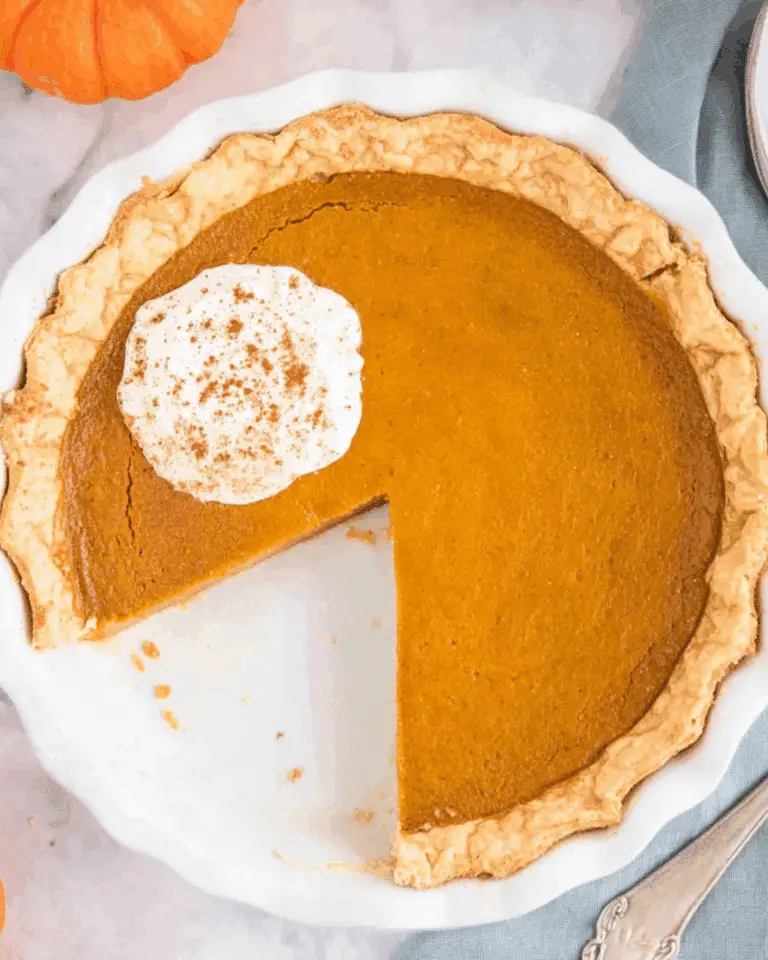
Cooling and Serving Mulberry Pie
After baking, allow the pie to cool for at least 2–3 hours.
Because the filling continues to set while cooling, slicing too early can cause runny filling.
For clean slices:
- Use a sharp knife
- Wipe blade between cuts
Mulberry Pie tastes delicious on its own, but it pairs beautifully with:
- Vanilla ice cream
- Whipped cream
- A light dusting of powdered sugar
Delicious Variations of Mulberry Pie
Mulberry and Apple Pie
Add thinly sliced apples to balance sweetness and add texture.
Mulberry Crumble Pie
Replace the top crust with a buttery crumble topping.
Gluten-Free Mulberry Pie
Use a gluten-free pie crust blend.
Less Sugar Option
Reduce sugar slightly if your mulberries are very sweet.
Because mulberries vary in sweetness, taste before adjusting sugar levels.
Frequently Asked Questions About Mulberry Pie
Can I Use Frozen Mulberries?
Yes. Thaw and drain thoroughly before using.
Why Is My Mulberry Pie Runny?
The filling may need more cornstarch or longer baking time.
How Long Does Mulberry Pie Last?
Store covered at room temperature for 1 day or refrigerate for up to 4 days.
Can I Freeze Mulberry Pie?
Yes. Wrap tightly and freeze for up to 3 months.
Conclusion: Why Mulberry Pie Is Worth Baking
Mulberry Pie is a beautiful, old-fashioned dessert that deserves more attention. With its deep purple filling, balanced sweetness, and flaky crust, it delivers comfort in every bite.
Because mulberries are seasonal and special, baking Mulberry Pie feels like celebrating summer itself. Whether you serve it warm with ice cream or chilled the next day, this pie brings rustic charm and unforgettable flavor to your table.
Once you try homemade Mulberry Pie, you’ll understand why it remains a treasured family recipe.
PrintMulberry Pie – Best Old-Fashioned Recipe

Mulberry Pie is a classic old-fashioned dessert made with juicy fresh mulberries, balanced sweetness, and a flaky homemade crust. This summer pie is rich, slightly tart, and perfect for any gathering.
- Prep Time: 30 minutes
- Cook Time: 55 minutes
- Total Time: 1 hour 25 minutes
- Yield: 8 servings
Ingredients
- 4 cups fresh mulberries, washed and stems removed
- 3/4 cup granulated sugar
- 2 tablespoons cornstarch
- 1 tablespoon lemon juice
- 1/2 teaspoon ground cinnamon
- 1/4 teaspoon salt
- 2 1/2 cups all-purpose flour
- 1 teaspoon salt (for crust)
- 1 tablespoon sugar (for crust)
- 1 cup cold unsalted butter, cubed
- 6–8 tablespoons ice water
- 1 egg (optional, for egg wash)
- 1 tablespoon coarse sugar (optional, for topping)
Instructions
- In a large bowl, gently toss mulberries with sugar, cornstarch, lemon juice, cinnamon, and salt. Let sit for 10–15 minutes.
- In another bowl, mix flour, sugar, and salt for the crust. Cut in cold butter until mixture resembles coarse crumbs.
- Add ice water gradually and mix just until dough forms. Divide into two disks, wrap, and refrigerate for 30 minutes.
- Preheat oven to 400°F (200°C).
- Roll out one dough disk and place into a 9-inch pie pan. Trim edges.
- Pour mulberry filling evenly into the crust.
- Roll out second dough disk and place over filling. Cut slits or create a lattice top. Crimp edges to seal.
- Brush with egg wash and sprinkle with coarse sugar if desired.
- Bake at 400°F for 20 minutes, then reduce temperature to 375°F (190°C) and bake for 30–35 minutes until crust is golden and filling bubbles.
- Cool for at least 2–3 hours before slicing to allow filling to set.
Notes
- Use fresh mulberries for best flavor, but frozen can work if thawed and drained well.
- Keep butter cold when making crust to ensure flakiness.
- Allow pie to cool completely before slicing to prevent runny filling.
- If crust browns too quickly, cover edges with foil.
- Store covered at room temperature for 1 day or refrigerate up to 4 days.
Nutrition
- Serving Size: 1 slice
- Calories: 380 kcal
- Sugar: 24 g
- Sodium: 210 mg
- Fat: 20 g
- Saturated Fat: 12 g
- Unsaturated Fat: 7 g
- Trans Fat: 0 g
- Carbohydrates: 48 g
- Fiber: 3 g
- Protein: 4 g
- Cholesterol: 55 mg