Looking for a festive and easy holiday treat that doubles as a kid-friendly activity? These Ice Cream Cone Christmas Trees are the perfect no-bake dessert to bring joy, creativity, and color to your celebrations. Made with simple ingredients like sugar cones, frosting, and sprinkles, this holiday craft is a must-try for parents, teachers, and anyone hosting a Christmas gathering. In this guide, we’ll walk you through how to make them, creative decorating ideas, storage and gifting tips, and answer some of the most frequently asked questions. Don’t miss our Christmas Tree Deviled Eggs if you’re looking to complete your festive table!
JUMP TO
Table of Contents
How to Make an Ice Cream Cone Christmas Tree at Home
This edible Christmas craft is easy enough for kids but fun for all ages. Whether you’re planning a classroom activity, a party station, or just a cozy afternoon at home, this section shows you exactly how to make it happen.
What You’ll Need: Ingredients and Tools
Creating your edible Christmas tree doesn’t require any baking, just a few basic ingredients and a creative spirit. Here’s what you need to get started:
| Ingredient/Tool | Purpose |
|---|---|
| Sugar ice cream cones | Acts as the Christmas tree base |
| Green frosting | Mimics pine tree branches |
| Sprinkles & candy | Used for ornaments and decorations |
| Star candy topper | Creates the classic Christmas tree star |
| Piping bag & tip | Helps apply frosting cleanly |
| Sugar cookies (optional) | Forms a base to stand the cone on |
| Mini candies (optional) | Adds surprise fillings inside the cone |
Tip: You can also use a plastic knife or offset spatula if you don’t have a piping bag. Ready-made green frosting tubes are a great shortcut for younger kids.
Step-by-Step Instructions
Once everything is prepped, it’s time to assemble your Christmas trees. Here’s how:
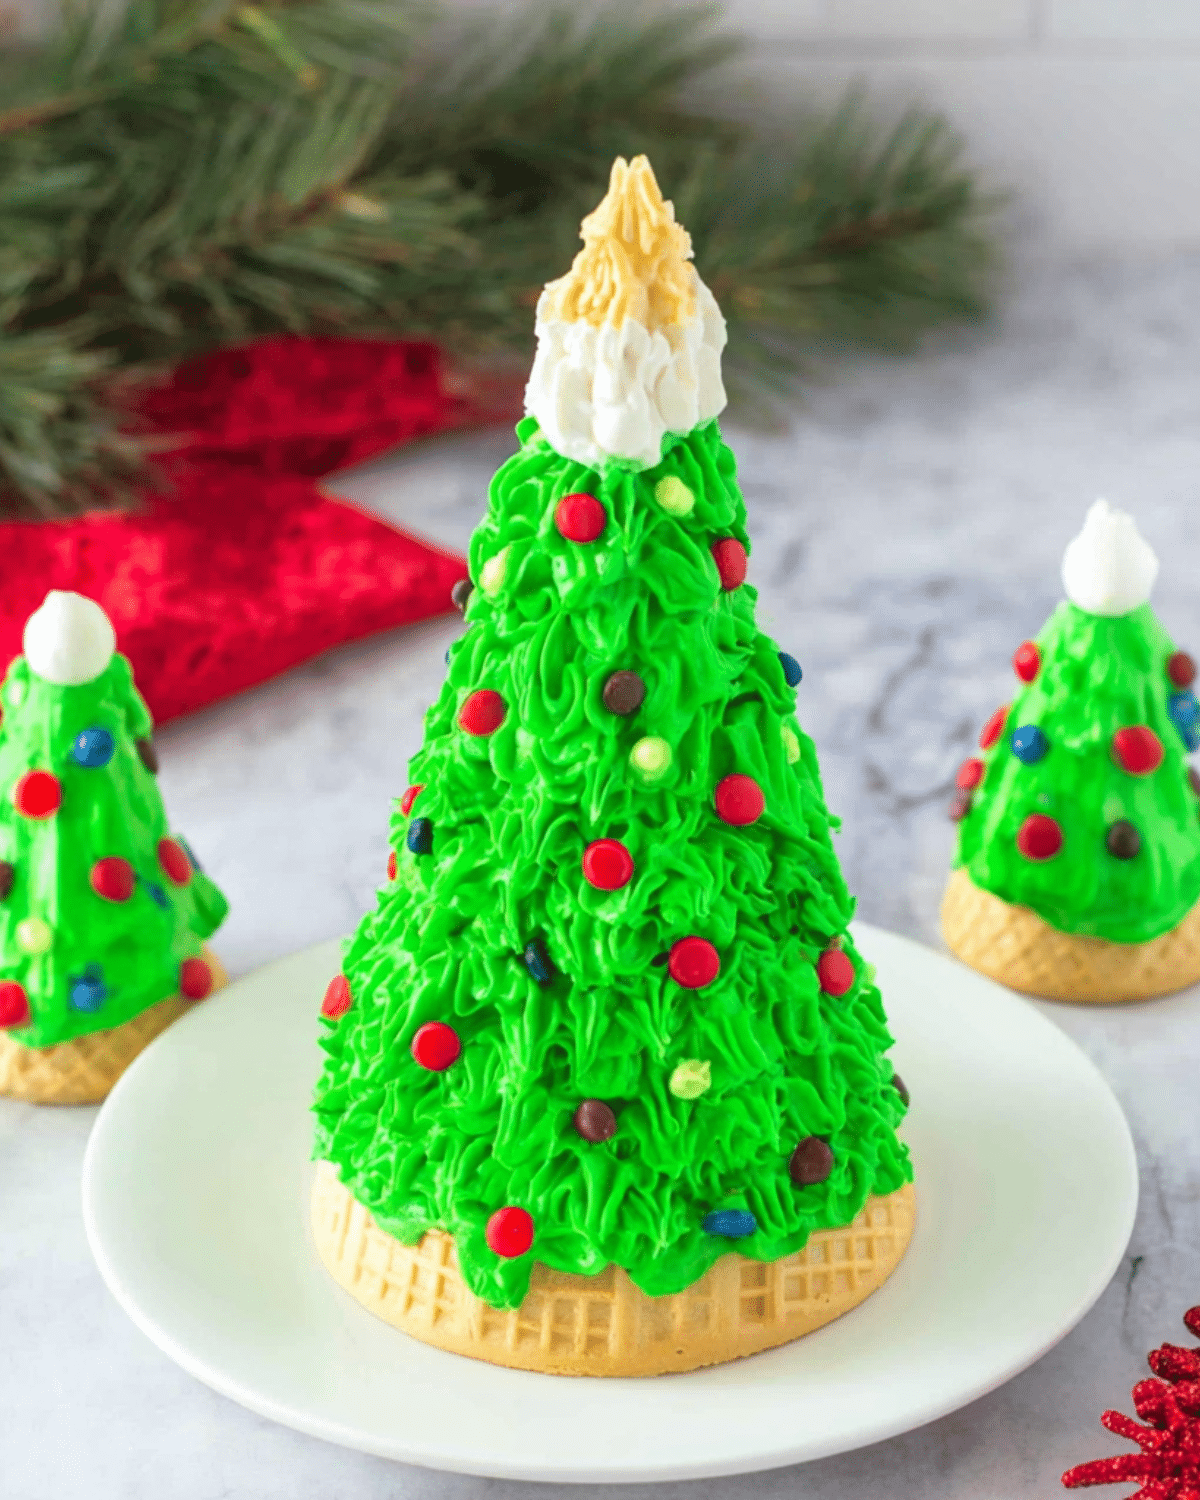
- Prepare the base: Place a sugar cookie on a plate and position the cone upside down on top. This creates a stable base.
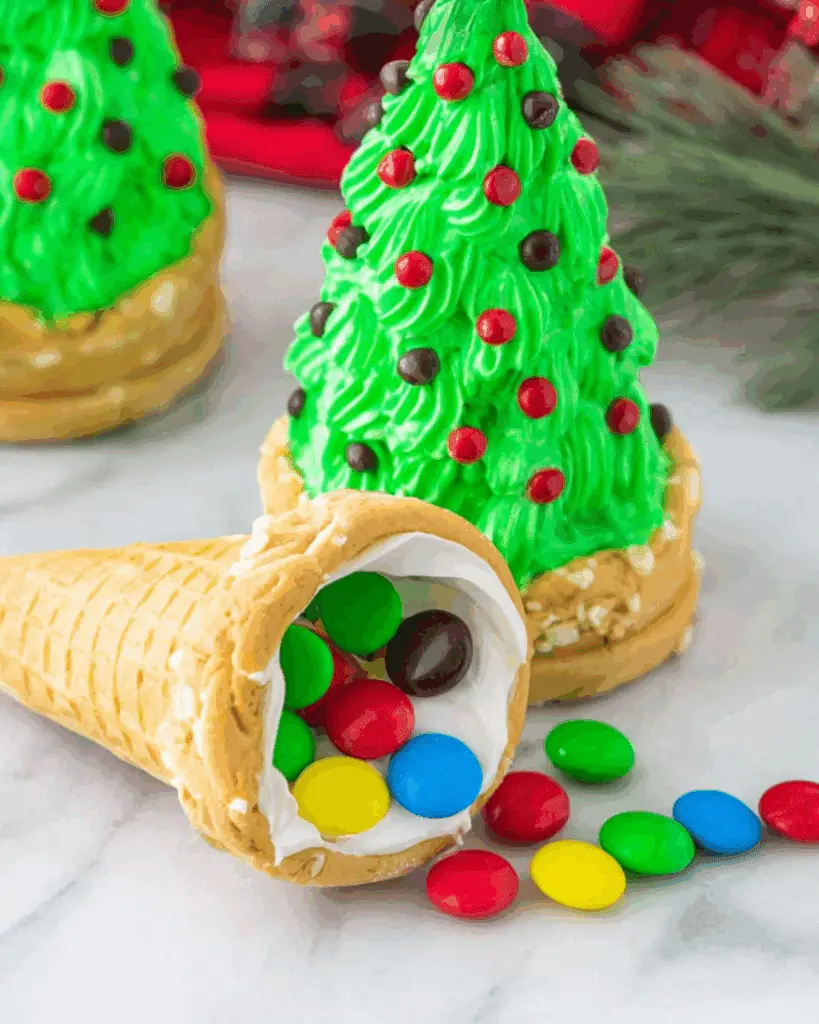
- Add surprise candy (optional): Fill the inside of the cone with mini candies like Skittles or M&Ms for a fun twist.
- Frost the cone: Use green frosting to cover the entire cone, either with a piping tip (for tree-like texture) or by spreading it with a spatula.
- Decorate your tree: Add sprinkles, mini candy ornaments, edible pearls, or even crushed candy canes.
- Top it off: Finish with a star-shaped candy or fondant star on the peak of the cone.
Looking for inspiration? Try our Easy Strawberry Santa Treats for a sweet sidekick to your trees!
Easy Tips to Keep It Kid-Friendly
Crafting with kids can be magical—but messy. Here’s how to keep the fun high and the stress low:
- Use squeezable frosting tubes for easy grip and less mess.
- Pre-fill piping bags with small amounts of frosting for kids to handle easily.
- Lay out toppings in muffin tins so children can choose their decorations quickly.
- Cover the workspace with parchment paper or a disposable tablecloth for faster cleanup.
- Encourage creativity! There’s no wrong way to decorate—some kids may want a pink tree, and that’s perfectly festive too.
Don’t miss our Spooky Fun Mummy Dogs Recipe for other seasonal hands-on recipes you can make with little ones.
Creative Decorating Ideas for Ice Cream Cone Christmas Trees
Once you’ve mastered the basics, it’s time to get creative. Decorating your Ice Cream Cone Christmas Tree is where the real fun begins. Whether you’re going for traditional charm or whimsical themes, this section explores festive and imaginative ways to make each cone unique.
Classic Christmas Tree Styles
If you’re going for timeless, cozy, and unmistakably Christmas, these classic designs are the way to go.
- Traditional Red, Green, and Gold: Stick with time-honored holiday hues using red hots, gold sugar pearls, and green frosting. These colors pop against the cone and evoke a nostalgic feel.
- Miniature Ornaments: Use small candies like mini M&Ms or Sixlets to mimic real ornaments. Place them evenly to simulate a well-trimmed tree.
- Fondant or Candy Stars: Cap your trees with star-shaped fondant cutouts or use yellow gumdrops flattened into stars. Edible gold leaf also makes a glamorous topper.
To complete the look, place your cones on a tray dusted with powdered sugar to resemble snow.
Discover great ideas like our Christmas Tree Focaccia Recipe if you love playing with festive shapes in food.
Themed Cone Trees for Parties
Want to match your holiday party theme or wow your guests? Try these creative spins on the edible tree:
- Frozen-Themed Trees: Use white and blue sprinkles, silver dragees, and pale frosting to recreate an Elsa-inspired look. Add snowflake candies for extra magic.
- Grinch Trees: Go bright green with a single red heart sprinkle on each tree. Add a twisty topper using a curled candy cane.
- Rustic Vibes: Dust your cones with shredded coconut “snow,” and stick mini pretzels for a wooden, earthy style. These look great on kraft paper trays.
Hosting a theme party? Set up a decorating contest with a small prize for the most original tree!
Don’t miss our Coconut Red Curry Drip Beef Recipe for a savory dish that complements your sweet creations at festive gatherings.
Make It a DIY Party Activity
Planning a holiday get-together? Make your cone trees the centerpiece of a decorating station. It’s a fun, interactive activity that keeps kids and adults entertained.
Here’s how to set it up:
- Pre-prep cones: Frost some of them ahead so guests can focus on decorating.
- Offer a variety of toppings: Include chocolate chips, crushed peppermint, colored sugar, and holiday-themed candies.
- Color-coded frosting: Fill small cups or bags with different frosting colors. Label them clearly so decorators can mix and match.
Check out our Christmas Cranberry Roll-Ups Recipe to pair these trees with quick savory finger food.
By turning cone decorating into an activity, you’re creating memories—not just desserts.
Storing, Serving & Gifting Edible Christmas Trees
After decorating your adorable edible trees, you’ll want to keep them fresh, display them beautifully, or share them with loved ones. This section covers it all—how to store them properly, serve them for wow-factor, and wrap them up as delightful edible gifts.
How to Store Ice Cream Cone Christmas Trees
To keep your Christmas cone trees looking great and tasting fresh, follow these smart storage tips:
- Room Temperature: Store the decorated cones in a cool, dry place. Keep them uncovered for the first hour to allow the frosting to set, then lightly cover with a large container or tented foil.
- Avoid Refrigeration: The fridge can cause the cones to absorb moisture and turn soft. If your frosting is homemade and perishable (like cream cheese), consider frosting them closer to serving time.
- Short-Term Shelf Life: These treats are best consumed within 2-3 days. After that, the cones may lose their crunch.
If you’re preparing for a party, make them the day before for best results.
Check out our Christmas Apple Cranberry Spritzer to serve alongside these edible trees for a festive drink pairing!
Serving Suggestions for Holiday Gatherings
Ready to wow your guests? Presenting your cone trees thoughtfully can turn your dessert table into a winter wonderland.
- Edible Centerpiece: Arrange your trees in a circle around a cake stand with powdered sugar “snow” and candy cane borders.
- Name Tag Trees: Insert small toothpick flags into the top of each cone for personalized place cards.
- Dessert Buffets: Add them to a dessert tray with sugar cookies, gingerbread, and candy bark for a crowd-pleasing spread.
Hosting a party with kids? Let them take their tree home in a decorated cup or clear bag as a party favor.
Looking for inspiration? Try our Melting Snowman Mocktail Recipe** for another playful, seasonal treat!
DIY Edible Gifts: Packaging Ideas
Turn your Ice Cream Cone Christmas Trees into thoughtful, handmade gifts that friends, neighbors, and coworkers will adore.
- Cellophane Bags: Place each tree in a tall clear treat bag and tie with a ribbon. Add a handmade tag for a personal touch.
- Mini Boxes: Line small bakery boxes with parchment paper and gently insert the cone tree. Add tissue paper for cushioning.
- Tree Kits: Package undecorated cones with a small tub of frosting and a sprinkle mix for a DIY gift idea.
If you’re shipping these, wrap them tightly with bubble wrap and insert into a snug box. It’s best to gift them locally for less risk of damage.
Frequently Asked Questions (FAQs)
Can I make Ice Cream Cone Christmas Trees ahead of time?
Yes! You can prepare and decorate them up to 2 days in advance. Just store them in a cool, dry place and avoid refrigerating to keep the cones crisp.
What kind of frosting works best for these trees?
A thick, pipeable frosting like buttercream holds shape the best. Canned frosting also works well for quick decorating.
Are these safe for toddlers to help decorate?
Absolutely. With adult supervision and safe, non-chokable decorations, toddlers can enjoy decorating with squeezable frosting and larger sprinkles.
Do the cones get soggy with frosting?
If left too long or stored improperly, yes. That’s why it’s important to let the frosting set and keep the cones away from moisture or refrigeration.
Can I use homemade cones instead of store-bought?
Sure! Homemade sugar cones work perfectly as long as they are fully cooled and crisp. Just keep them narrow enough to stand upright when flipped.
Conclusion: Why These Cone Trees Are the Perfect Holiday Treat
The Ice Cream Cone Christmas Tree is more than a sweet snack—it’s an experience. From crafting with kids to impressing guests with themed designs, this no-bake dessert combines creativity, joy, and deliciousness in every bite. Whether you’re throwing a holiday party, preparing gift boxes, or planning a fun kitchen activity, this edible craft is a perfect fit for the season.
Looking for more fun ideas? Don’t miss our Wonderland Chocolate Chip Christmas Cookies to go with your edible trees!
PrintIce Cream Cone Christmas Tree

Ice Cream Cone Christmas Trees are a fun, no-bake edible holiday craft perfect for kids and families. Made with sugar cones, green frosting, and colorful decorations, these festive treats double as creative desserts and holiday gifts.
- Prep Time: 20 minutes
- Cook Time: 0 minutes
- Total Time: 20 minutes
- Yield: 6 decorated cones
- Category: Dessert, Holiday Craft
- Method: No-Bake
- Cuisine: American
- Diet: Vegetarian
Ingredients
- 6 sugar ice cream cones
- 1 cup green frosting (store-bought or homemade buttercream)
- 1/4 cup assorted sprinkles
- 6 sugar cookies (optional, for base)
- 1/2 cup mini candies (M&Ms, Skittles, etc., optional for inside filling)
- 6 star-shaped candies or fondant stars (for tree toppers)
- Piping bag with star tip or spatula (for frosting application)
Instructions
- Place a sugar cookie on a flat surface and position an ice cream cone upside down on top to act as the tree base.
- (Optional) Fill the inside of the cone with mini candies for a fun surprise when eaten.
- Using a piping bag or spatula, cover the entire cone with green frosting to mimic pine tree branches.
- Decorate the frosted cone with assorted sprinkles, candy ornaments, or edible pearls to resemble a Christmas tree.
- Place a star-shaped candy or fondant piece at the top of each cone as a tree topper.
- Allow the frosting to set at room temperature before serving or packaging.
Notes
- Let frosting set for 1 hour before covering or storing.
- Avoid refrigeration to keep the cones crisp.
- Perfect for a DIY decorating party station.
- Can be made 1–2 days in advance and stored at room temperature.
- Use parchment paper or disposable tablecloths for easier cleanup when decorating with kids.
Nutrition
- Serving Size: 1 cone
- Calories: 210
- Sugar: 24g
- Sodium: 65mg
- Fat: 9g
- Saturated Fat: 4g
- Unsaturated Fat: 4g
- Trans Fat: 0g
- Carbohydrates: 32g
- Fiber: 1g
- Protein: 1g
- Cholesterol: 10mg