If you’re looking for a way to preserve the flavors of ripe summer tomatoes while enjoying a zesty snack all year long, this homemade salsa for canning is the perfect solution. Whether you’re new to water bath canning or already love stocking your pantry with homemade goods, this guide walks you through each step to make safe, flavorful, and shelf-stable salsa. You’ll learn what makes this recipe special, how to prepare and cook it, and how to can it safely—plus plenty of tips to help you get the best results every time.
Check out how to preserve pickled onions perfectly for another beginner-friendly canning project.
JUMP TO
Table of Contents
The Perfect Homemade Salsa for Canning: What You Need to Know
Why canning salsa at home is worth it
Homemade canned salsa isn’t just about preserving tomatoes—it’s about preserving flavor, freshness, and a bit of summer in every bite. Compared to store-bought jars, which often include thickeners, preservatives, and excessive salt, homemade salsa offers a clean taste, customizable spice levels, and superior texture. It’s ideal for serving with chips, topping grilled meats, or spicing up tacos. Plus, having jars on hand makes meal prep faster and adds a personal touch to dinner.
Is it safe to can your own salsa?
Safety is critical when it comes to canning salsa, especially because tomatoes sit on the borderline between low and high acid. This means balancing the added low-acid ingredients (onions, peppers, garlic) with a sufficient amount of vinegar is crucial. The recipe we’ll follow has been tested for safe canning using a boiling water bath method. The use of apple cider vinegar ensures that the acid level stays safe for long-term storage. Don’t adjust the core ingredient amounts or ratios—doing so can affect the pH and increase the risk of spoilage.
What sets this homemade salsa recipe apart
What makes this particular homemade salsa for canning stand out is the careful balance of flavor and simplicity. It includes jalapeños for gentle heat, cumin for warmth, fresh coriander for brightness, and a touch of sugar to bring out the sweetness in tomatoes—though that part’s optional. A stick blender is used before bottling to achieve a smooth, scoopable consistency that’s perfect for dipping. This makes the final product not just safe and shelf-stable, but truly delicious.
Discover great ideas like how to can garden tomato sauce easily, especially if you have more tomatoes to preserve.
How to Make Homemade Salsa for Canning (Step-by-Step)
Ingredients for a classic, balanced salsa
Here’s what you’ll need for about 5–6 pint jars:
| Ingredient | Quantity |
|---|---|
| Peeled, chopped tomatoes | 5 cups |
| Chopped onion | 1 ½ cups (about 1½ onions) |
| Chopped red or green pepper | ¾ cup (1 medium pepper) |
| Jalapeños, finely chopped | 2 (remove seeds for mild) |
| Garlic, minced | 3 cloves |
| Ground cumin | 1¼ teaspoons |
| Coarse black pepper | 1¼ teaspoons |
| Pickling or canning salt | 1¼ tablespoons |
| Fresh coriander, chopped | 3 tablespoons |
| Sugar (optional) | 2 tablespoons |
| Apple cider vinegar | ½ cup + 2 tablespoons |
| Tomato puree | ¾ cup |
These ingredients work in harmony to create a zesty, savory salsa that balances sweet, spicy, and tangy notes perfectly.
Looking for inspiration? Try our simple guide to canning banana peppers.
Preparing tomatoes: blanching vs grilling
Peeling tomatoes is the most time-consuming part of the process, but it makes all the difference in texture.
- Blanch and peel method:
Bring a large pot of water to a boil. Score an “X” on the bottom of each tomato and plunge into boiling water for 30–60 seconds. Transfer to an ice bath. Once cooled, the skins will slip off easily. - Grilling method (adds a slight smoky taste):
Cut tomatoes in half, place skin-side up on a lined tray, and grill on high until skins blister. Let cool, then peel. This method is less watery and adds complexity to the flavor.
After peeling, core and roughly chop the tomatoes. Place them in a colander over a bowl and let them drain for about 30 minutes. This step helps avoid watery salsa.
Chopping and blending for the perfect texture
You can chop onions, peppers, and jalapeños by hand, but using a food processor saves time and gives a consistent texture. Once everything is chopped and measured, add it all to a large pot with the tomato puree and vinegar.
Optional: If you prefer a smoother salsa, run a stick blender through the mixture after simmering. This makes it easier to scoop and more spreadable—ideal for chips, sandwiches, or even pouring over grilled chicken.
Don’t miss our step-by-step tutorial on how to can apple butter, another smooth and flavorful pantry staple.
The Canning Process Made Simple
Prepping jars and equipment safely
Before you even think about pouring that delicious homemade salsa into jars, cleanliness is key. Start by thoroughly washing your jars, lids, and rings with hot soapy water. Then, sterilize the jars by placing them in a pot of simmering water for at least 10 minutes or running them through a hot dishwasher cycle with a heated dry setting. Keep the jars hot until you’re ready to fill them—this helps prevent cracking when hot salsa goes in.
Lids should be washed and left in warm (not boiling) water. This softens the sealing compound. Don’t reuse lids for canning; they’re designed for single use to ensure a reliable seal.
Learn more about Rotel Ranch Dip.
Water bath canning: step-by-step instructions
The boiling water bath method is ideal for high-acid foods like salsa, especially when vinegar is added. Here’s how to safely can your salsa:
- Prepare the canner: Fill it with enough water to cover the jars by at least 1 inch and bring it to a low boil with the lid on. This can take 20–30 minutes, so start early.
- Fill the jars: Ladle hot salsa into the hot jars, leaving ½ inch of headspace at the top. This allows for proper vacuum sealing.
- Remove air bubbles: Use a non-metallic spatula or chopstick to stir the inside of the jar gently. This releases any trapped air pockets.
- Clean the rims: Wipe the jar rims with a damp cloth to ensure a tight seal.
- Seal the jars: Place lids and screw on bands until finger-tight—don’t over-tighten.
- Process in canner: Carefully lower the jars into the boiling water using a jar lifter. Cover with a lid and process for 15 minutes (adjust time for altitude if necessary).
- Cool and check seals: After removing jars, let them sit on a towel-lined surface overnight. The next day, press down on each lid. If it doesn’t move, it’s sealed. If it clicks, refrigerate or reprocess the jar.
Common mistakes to avoid when canning salsa
Even with a solid recipe, small missteps can ruin your salsa or even make it unsafe. Here are the biggest pitfalls:
- Skipping the vinegar or reducing it: Never alter the acidity. Doing so compromises safety.
- Overfilling jars: Leave proper headspace to avoid poor seals or bubbling.
- Not adjusting for altitude: If you’re above 1,000 feet, increase processing time.
- Using iodized salt: Stick with canning or pickling salt to prevent cloudiness.
- Over-blending: If you love chunky salsa, skip the stick blender.
With these steps and tips, you’ll be sealing jars like a pro in no time.
Check out our full guide on how to can crushed tomatoes to expand your pantry preserves.
Tips for Best Flavor and Texture
Adjusting for sweetness and spice safely
This recipe is flavorful as-is, but you can adjust it slightly within safe bounds. If your tomatoes are especially sweet, skip the optional sugar. Want it spicier? Leave in the jalapeño seeds and membranes—or even swap in a hotter pepper, but keep the overall volume of peppers the same. Do not reduce the vinegar or increase low-acid ingredients like onions or garlic. Flavor tweaks are fine—but keep the acidity level safe for canning.
Using a stick blender: yay or nay?
A stick blender gives your salsa a smoother, restaurant-style finish that’s easier to scoop and spread. If you prefer a chunky salsa, just skip this step. Some canners also blend half the batch and mix it back with the chunky half for a best-of-both-worlds texture.
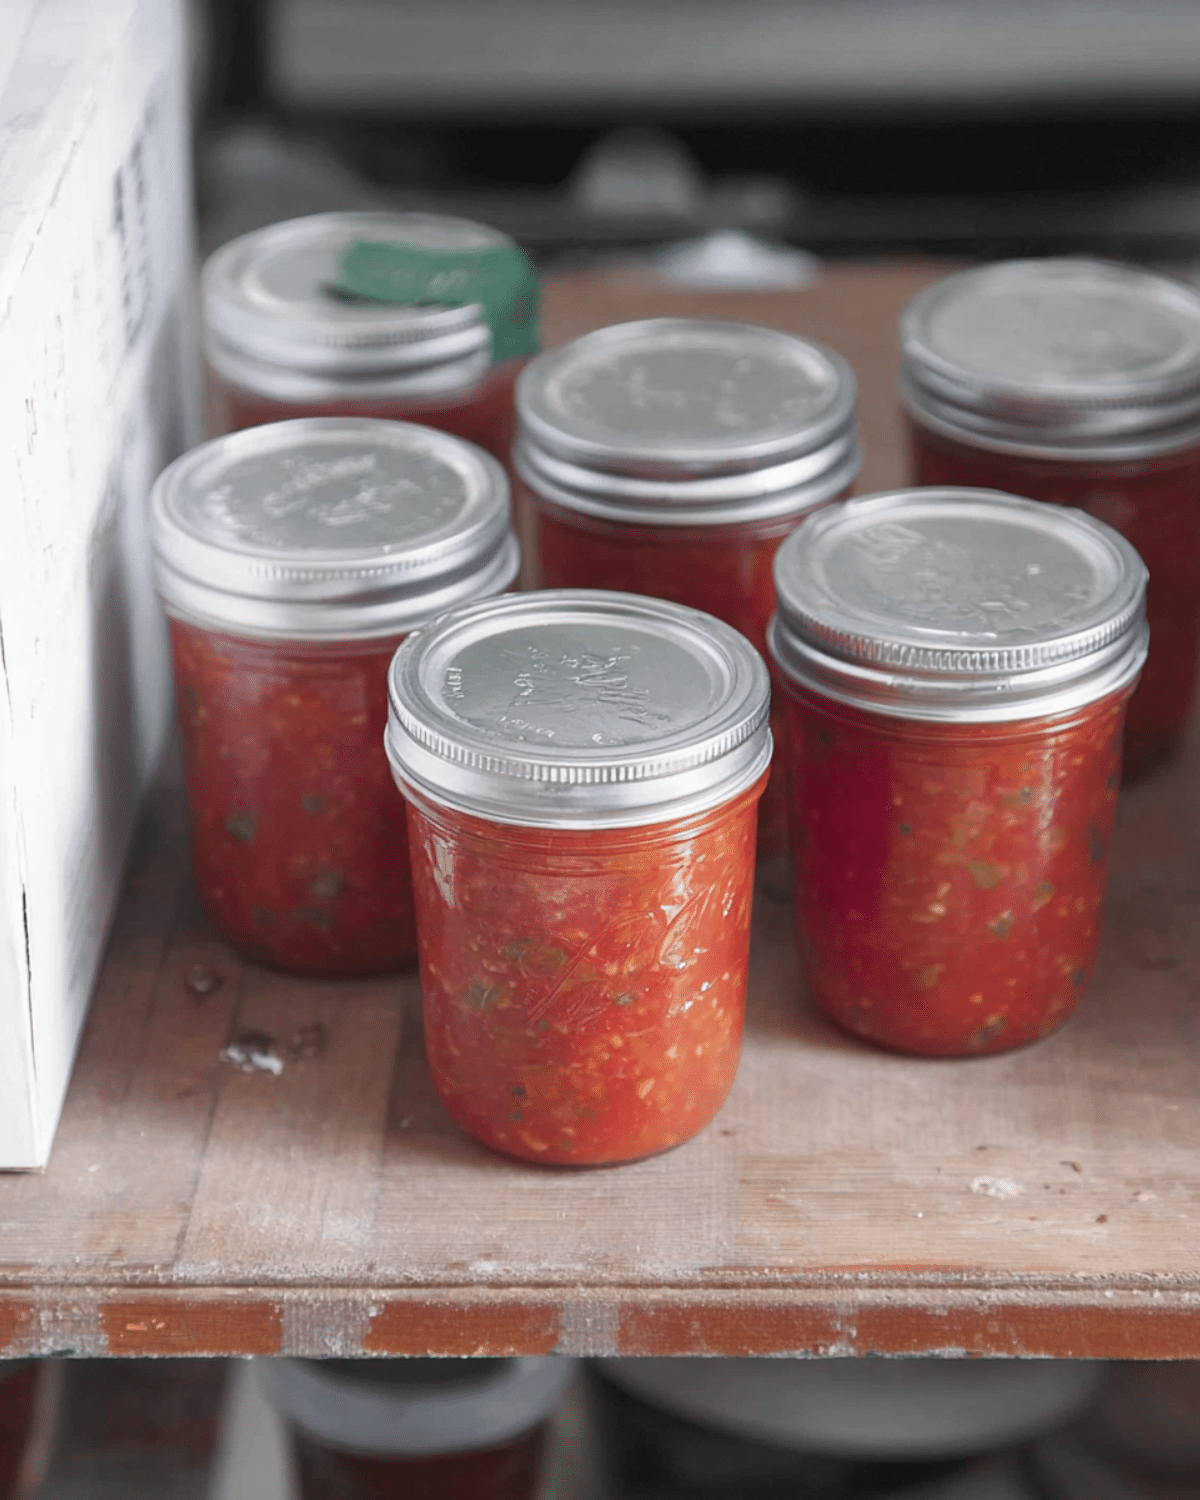
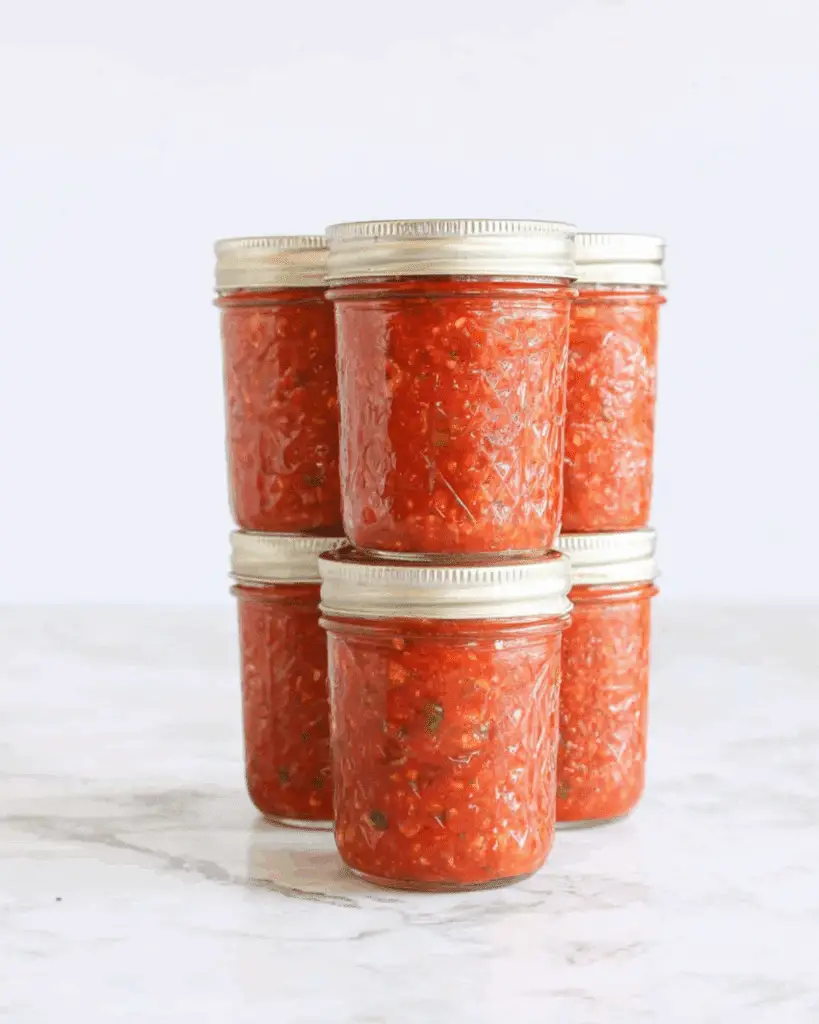
Storage and shelf life of home-canned salsa
When processed and sealed properly, this homemade salsa can be safely stored at room temperature for up to 12–18 months. Store in a cool, dark place like a pantry or cupboard. Once opened, refrigerate and use within 7–10 days. Always inspect jars before eating: if the lid is bulging, the seal has broken, or there’s any off smell—discard immediately.
Creative Ways to Use Your Homemade Salsa
Beyond chips: 5 great meal ideas
Canned salsa isn’t just for tortilla chips. Use it to:
- Smother grilled chicken or steak
- Add kick to scrambled eggs or omelets
- Mix into taco meat for extra flavor
- Spoon over baked potatoes or nachos
- Stir into chili or soup for added zest
How to incorporate salsa into cooking
Try simmering salsa with shredded chicken for quick tacos, or add it to slow-cooker pork for a juicy carnitas-style dish. A jar of salsa also makes a perfect start for spicy rice, burrito bowls, or even homemade enchiladas.
Gifting homemade salsa: presentation tips
Looking for a thoughtful homemade gift? Decorate your sealed jars with a square of fabric under the lid, add a rustic label with the date, and tie it off with twine. Paired with a bag of tortilla chips or a DIY taco kit, it’s a delicious way to share the love.
Frequently Asked Questions
Can I reduce the vinegar in the recipe?
No. Vinegar ensures safe acidity levels. Reducing it could make the salsa unsafe for shelf storage. If you want a less vinegary taste, consider adding a touch more sugar—but never reduce the vinegar itself.
How long will homemade canned salsa last?
Properly sealed jars can last 12–18 months in a cool, dark pantry. Once opened, refrigerate and use within 7–10 days.
What happens if my jars didn’t seal?
Unsealed jars should be refrigerated and used within a week or reprocessed within 24 hours. To reprocess, replace the lid and re-boil for the full canning time.
Can I freeze this salsa instead of canning?
Yes! Let the salsa cool, pour into freezer-safe containers (leaving space for expansion), and freeze for up to 3 months. Freezing is a great alternative if you don’t want to can.
Conclusion
Making your own homemade salsa for canning is a delicious way to capture the bold flavors of summer and enjoy them year-round. With the right steps and safety guidelines, you can create jars of flavorful salsa that are ready to serve, gift, or stash for later meals. Whether you love it chunky or smooth, spicy or mild, this recipe delivers every time. So grab those tomatoes while they’re fresh, and let’s get canning!
Looking for more home preserving tips? Check out our pickled jalapeños canning guide here.
PrintHomemade Salsa for Canning
A safe and flavorful homemade salsa for canning using fresh tomatoes, peppers, and spices. Perfect for chips, tacos, and more with a shelf life of up to 18 months.
- Prep Time: 45 minutes
- Cook Time: 25 minutes
- Total Time: 1 hour 10 minutes
- Yield: 5–6 pint jars
- Category: Preserves
- Method: Water Bath Canning
- Cuisine: Mexican-American
- Diet: Vegan
Ingredients
- 5 cups peeled, chopped, and drained tomatoes
- 1 ½ cups chopped onion (about 1½ medium onions)
- ¾ cup chopped red or green pepper (about 1 medium pepper)
- 2 jalapeños, finely chopped (seeds and membranes removed for less heat)
- 3 cloves garlic, finely minced
- 1 ¼ teaspoons ground cumin
- 1 ¼ teaspoons coarsely ground black pepper
- 1 ¼ tablespoons canning or pickling salt
- 3 tablespoons chopped fresh coriander
- 2 tablespoons sugar (optional, depending on tomato sweetness)
- ½ cup + 2 tablespoons apple cider vinegar
- ¾ cup tomato puree
Instructions
- Peel tomatoes using blanching or grilling method, then core and roughly chop.
- Place chopped tomatoes in a colander and drain for about 30 minutes.
- Chop onions, peppers, and jalapeños by hand or using a food processor.
- Add tomatoes, chopped vegetables, garlic, cumin, pepper, salt, coriander, sugar (if using), vinegar, and tomato puree to a large pot.
- Bring the mixture to a boil, then reduce heat and simmer for 10 minutes, stirring often.
- Optional: use a stick blender to blend the salsa to your preferred consistency.
- Fill hot, sterilized jars with hot salsa, leaving ½ inch headspace.
- Remove air bubbles with a spatula or chopstick, wipe jar rims, and seal with lids and bands.
- Process jars in a boiling water bath for 15 minutes.
- Remove jars and let cool overnight. Check seals the next day. Store sealed jars in a cool, dark place.
Notes
- Do not reduce vinegar or increase low-acid ingredients for safety.
- Sterilize jars before filling and keep hot until use.
- Unsealed jars must be refrigerated or reprocessed within 24 hours.
- Use pickling salt to avoid cloudy salsa.
- Adjust spice level by keeping or removing jalapeño seeds.
Nutrition
- Serving Size: 2 tablespoons
- Calories: 15
- Sugar: 2g
- Sodium: 150mg
- Fat: 0g
- Saturated Fat: 0g
- Unsaturated Fat: 0g
- Trans Fat: 0g
- Carbohydrates: 3g
- Fiber: 1g
- Protein: 0g
- Cholesterol: 0mg