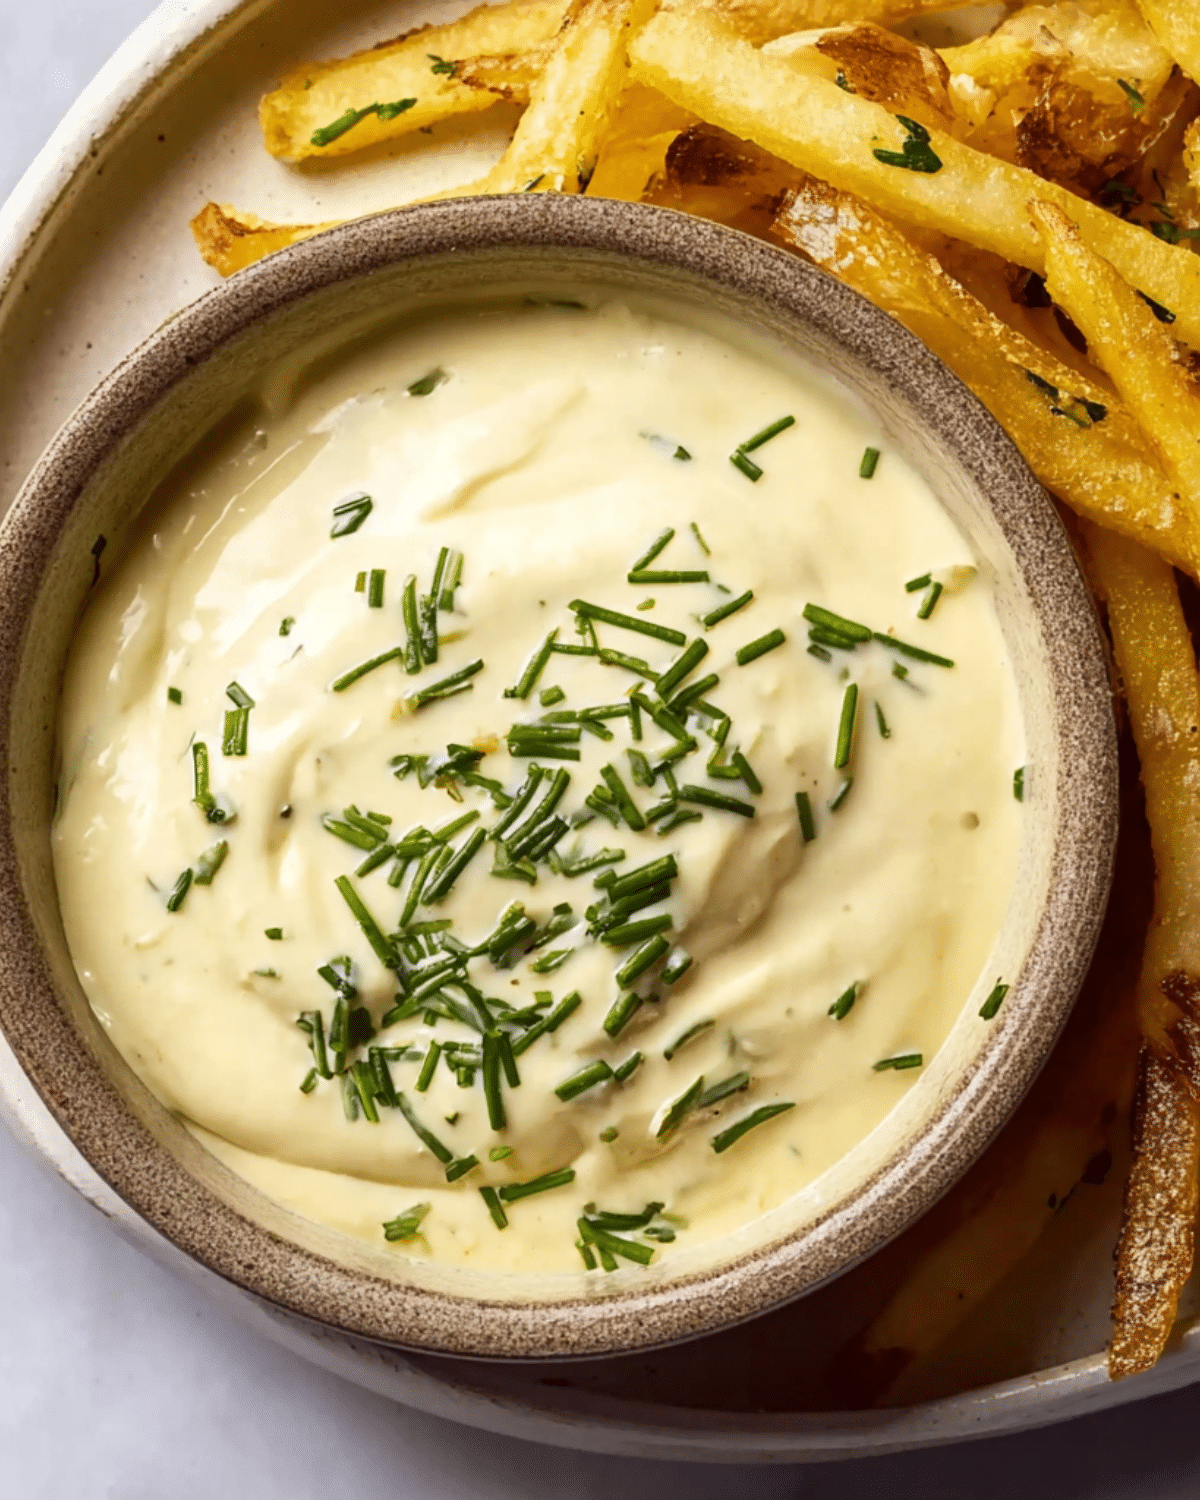
Creamy, garlicky, and surprisingly easy to whip up—homemade garlic aioli is that flavor-packed condiment you didn’t know your meals were missing. Unlike store-bought sauces filled with preservatives, this classic Mediterranean creation offers bold taste using just a handful of fresh ingredients. In this guide, you’ll learn how to make garlic aioli from scratch, the best ingredients to use, step-by-step instructions, tips to fix a broken sauce, and smart ways to store and use it.
Want to elevate your condiments game? Don’t miss our Turkey Sliders .
JUMP TO
Table of Contents
What Is Garlic Aioli and Why You’ll Love It
Origin and Evolution of Aioli
The word aioli stems from the Mediterranean regions of France and Spain, traditionally referring to a garlic and olive oil emulsion made entirely by hand using a mortar and pestle. In its purest form, it didn’t include eggs or lemon juice. But as the recipe traveled and evolved, modern versions started to include egg yolks to stabilize the emulsion and improve texture, giving rise to the creamy aioli we love today.
Over time, garlic aioli has become a staple in gourmet kitchens and casual home cooking alike—thanks to its powerful flavor, rich texture, and versatility.
Garlic Aioli vs. Mayonnaise – What’s the Difference?
Although many people confuse the two, garlic aioli and mayonnaise are not quite the same. While both are emulsified sauces, mayonnaise is typically made with eggs, oil, and vinegar or lemon, while aioli starts with fresh garlic, olive oil, and often egg yolk, giving it a punchier, garlickier taste.
Here’s a simple comparison table:
| Feature | Garlic Aioli | Mayonnaise |
|---|---|---|
| Base ingredients | Garlic, oil, egg yolk, lemon juice | Oil, egg yolk, vinegar or lemon |
| Flavor | Bold, garlicky, slightly spicy | Mild, creamy |
| Origin | Mediterranean (Spain/France) | France |
| Texture | Thicker, silkier | Light, smooth |
So while some restaurants serve garlic-flavored mayo and call it aioli, real garlic aioli is its own delicious beast—richer, stronger, and more satisfying.
Why Homemade Aioli Is Better Than Store-Bought
Store-bought aioli often contains stabilizers, preservatives, and artificial flavors. Plus, most commercial “garlic aiolis” are just mayonnaise with garlic powder—lacking the depth and freshness of homemade versions.
Here’s why making it at home is worth it:
- Fresher taste from real garlic and quality oil
- Customizable with herbs, spices, or citrus
- No added preservatives or thickeners
- Budget-friendly, using pantry staples
Looking for inspiration? Try our homemade chipotle sauce to spice up your condiments collection.
Ingredients You Need to Make Homemade Garlic Aioli
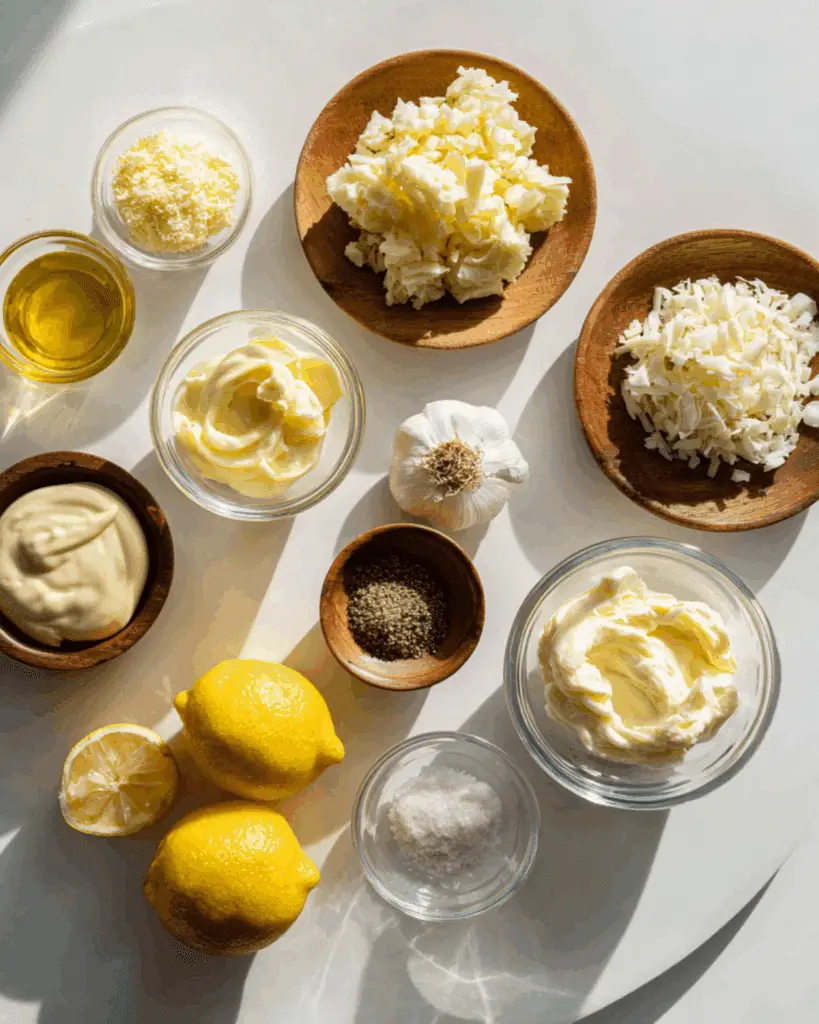
Fresh Garlic – Roasted or Raw?
Garlic is the soul of aioli. You can go bold with raw garlic cloves (for a spicy kick), or roast them to mellow the flavor and add a hint of sweetness. Roasted garlic blends smoothly and is easier on sensitive stomachs.
Pro tip: Mash the garlic with a pinch of salt to help release its oils and form a paste before mixing.
Choosing the Right Oil
The choice of oil determines both flavor and texture. Traditional recipes use extra virgin olive oil, but it can be too strong for some. For a milder taste, try a neutral oil like grapeseed, sunflower, or light olive oil—or blend both for balance.
| Oil Type | Flavor Profile | Best For |
|---|---|---|
| Extra Virgin Olive | Strong, fruity, bold | Traditional aioli lovers |
| Light Olive Oil | Mild, slightly nutty | Balanced taste |
| Avocado Oil | Smooth, buttery | Paleo & keto recipes |
| Canola or Grapeseed | Very mild | Store-bought-style aioli |
Egg Yolks and Emulsification Explained
Egg yolks are essential for creating that rich, stable emulsion. They act as a binder, allowing oil and water-based ingredients to combine smoothly. Always use room-temperature egg yolks to encourage emulsification.
Concerned about raw eggs? You can use pasteurized eggs or try an egg-free version (we’ll cover that later in the FAQs).
Discover great ideas like our creamy ranch dressing from scratch that also rely on emulsification.
Optional Flavor Variations (Lemon, Mustard, Herbs)
Want to level up your garlic aioli? Try adding:
- Fresh lemon juice – brightens flavor and aids emulsification
- Dijon mustard – adds tang and strengthens the emulsion
- Fresh herbs like parsley, dill, or chives
- Smoked paprika or cayenne – for a spicy twist
Each variation can help you tailor aioli to different dishes—from grilled seafood to crispy fries.
Check out our take on spicy mayo sauce for another easy twist on a classic.
Step-by-Step Guide to Making Garlic Aioli at Home
Making aioli may sound fancy, but it’s actually quick and easy once you understand the process. Whether you’re a traditionalist with a mortar and pestle or a modern cook with a blender, these methods will help you create a creamy, flavorful garlic aioli every time.
Classic Pestle and Mortar Method
This is the traditional Mediterranean method, where aioli gets its name and authenticity.
What you need:
- 3 garlic cloves
- Pinch of kosher salt
- 1 egg yolk
- 1 cup extra virgin olive oil
- 1 tsp lemon juice or vinegar
Instructions:
- Smash garlic and salt into a smooth paste in the mortar.
- Add egg yolk and mix until blended.
- Start adding oil drop by drop, mixing continuously.
- Once the mixture thickens, increase oil to a slow stream while stirring.
- Add lemon juice at the end to brighten the flavor.
This hands-on process takes a little patience, but the payoff is unbeatable—a thick, velvety aioli with bold garlic flavor.
Looking for inspiration? Try pairing your homemade aioli with our crispy oven-baked potato wedges for the perfect dip.
Blender or Food Processor Shortcut
Short on time? You can make aioli in under 5 minutes with modern tools like a blender, immersion blender, or food processor.
Quick Blender Method:
- Add garlic, egg yolk, lemon juice, and salt to the blender.
- Blend for 10–15 seconds.
- With the motor running, slowly drizzle in oil.
- Blend until thick and smooth.
Immersion blenders are especially effective—you can make aioli right in a mason jar. Just be sure to pour the oil on top, let it settle, and blend from the bottom up.
Fixing Broken Aioli (Common Mistakes and Solutions)
Even seasoned cooks sometimes break their aioli—meaning the oil separates and refuses to emulsify. Here’s why that happens and how to fix it:
Common causes:
- Adding oil too quickly
- Ingredients too cold
- Overmixing in a food processor
- Using the wrong type of oil
How to fix it:
- Start with a new bowl and one egg yolk
- Slowly whisk in the broken aioli mixture
- It should come together smoothly as you incorporate it
Still not working? Try adding a spoonful of warm water to jumpstart emulsification or use mustard to stabilize the mixture.
Don’t miss our expert tips in how to fix broken hollandaise sauce—many apply to aioli too.
Best Ways to Use Garlic Aioli in Your Cooking
Garlic aioli is incredibly versatile—this creamy sauce can elevate everything from appetizers to entrées. Here are some of the best ways to use it:
As a Dip – Fries, Veggies, and Wings
Swap your ketchup for aioli next time you’re having fries—it’s a game-changer. It also pairs beautifully with:
- Sweet potato fries
- Roasted carrots or zucchini
- Chicken wings or tenders
- Fried pickles or mozzarella sticks
Hosting a party? Make a platter with aioli, tzatziki, and hummus to impress your guests.
As a Spread – Burgers, Sandwiches, Wraps
Aioli adds a flavorful punch to anything between two slices of bread. Use it to replace mayo on:
- Smash burgers
- Grilled chicken sandwiches
- Turkey and avocado wraps
- Veggie paninis or BLTs
Try our easy grilled chicken sandwich recipe with a slather of garlic aioli—you won’t regret it.
As a Sauce – Grilled Meat, Seafood, and More
Looking for something to drizzle over steak or fish? Garlic aioli is perfect for:
- Grilled shrimp skewers
- Roasted salmon
- Sliced flank steak
- Roasted lamb or vegetables
Because it’s rich and savory, aioli balances well with charred, smoky, or spicy flavors.
How to Store Garlic Aioli and Keep It Fresh
Once you’ve made a batch of homemade garlic aioli, proper storage is essential to preserve its freshness and safety—especially since it contains raw egg.
Refrigeration and Shelf Life
Homemade garlic aioli should always be stored in an airtight container in the fridge. Ideally, use a glass jar with a tight-fitting lid to avoid contamination or odor absorption.
Shelf life:
- Typically lasts 3 to 5 days in the fridge
- Always refrigerate immediately after making
- Label the container with the preparation date
Avoid leaving aioli at room temperature for extended periods—it’s highly perishable.
How to Tell if It’s Gone Bad
Spoiled aioli may look fine at first glance, but pay attention to subtle warning signs:
- Sour or off smell
- Change in texture (separation or curdling)
- Darkening color or spots of mold
When in doubt, throw it out.
Can You Freeze Garlic Aioli?
Technically, yes—but it’s not recommended. Freezing can cause the emulsion to break, resulting in a watery, grainy texture when thawed.
If you must freeze:
- Use an airtight container
- Freeze in small portions
- Thaw in the refrigerator, then re-emulsify by whisking
For best quality and food safety, it’s best to make fresh aioli in small batches as needed.
FAQs About Homemade Garlic Aioli
Is garlic aioli just garlic mayonnaise?
Not quite. While they’re similar, true garlic aioli is an emulsion of garlic and oil, sometimes with egg yolk and lemon juice. Mayo is milder and typically doesn’t have garlic.
Is it safe to eat raw egg yolk in aioli?
Yes, if you use pasteurized eggs and refrigerate the aioli properly. Pregnant women, young children, and those with compromised immune systems should avoid raw eggs or use alternatives.
How do you make aioli without eggs?
You can create an egg-free version using aquafaba (the liquid from canned chickpeas). It emulsifies similarly and is ideal for vegans.
Why did my aioli break and how do I fix it?
It usually breaks when the oil is added too fast. To fix it, start a new yolk and slowly whisk in the broken batch until smooth.
Final Thoughts on Making Homemade Garlic Aioli
Whether you’re dipping fries, dressing burgers, or adding flair to roasted veggies, homemade garlic aioli is a flavor powerhouse that beats store-bought every time. It’s rich, garlicky, and endlessly customizable.
Don’t be afraid to experiment—try roasted garlic, add herbs, or even blend in chipotle for a smoky twist. Just remember: go slow with the oil, keep it fresh, and use quality ingredients.
Looking for inspiration? Try our creamy garlic mashed potatoes to pair perfectly with your aioli!
PrintHomemade Garlic Aioli
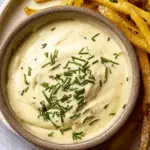
This Homemade Garlic Aioli is a creamy, garlicky condiment made with simple ingredients like garlic, oil, egg yolk, and lemon juice. It’s perfect as a dip, spread, or sauce and comes together in just minutes using either traditional or modern methods.
- Prep Time: 10 mins
- Cook Time: 0 mins
- Total Time: 10 mins
- Yield: 1 cup
- Category: Condiment
- Method: Emulsifying
- Cuisine: Mediterranean
- Diet: Vegetarian
Ingredients
- 3 garlic cloves
- 1 pinch kosher salt
- 1 egg yolk (room temperature)
- 1 cup olive oil (extra virgin or light)
- 1 teaspoon lemon juice or vinegar
Instructions
- Mash garlic with salt into a paste using a mortar and pestle or the flat side of a knife.
- Whisk in the egg yolk until combined.
- Slowly add oil drop by drop while whisking vigorously to form an emulsion.
- As the mixture thickens, continue to drizzle oil slowly while whisking continuously.
- Whisk in lemon juice or vinegar at the end and adjust seasoning to taste.
Notes
- Use room temperature ingredients to prevent the aioli from breaking.
- For milder flavor, roast the garlic before use.
- You can substitute part of the olive oil with a neutral oil for a lighter taste.
- Store in an airtight container in the fridge for up to 5 days.
- To fix broken aioli, whisk a new egg yolk in a bowl and slowly add the broken mixture while whisking.
Nutrition
- Serving Size: 1 tablespoon
- Calories: 90
- Sugar: 0g
- Sodium: 50mg
- Fat: 10g
- Saturated Fat: 1.5g
- Unsaturated Fat: 8g
- Trans Fat: 0g
- Carbohydrates: 0g
- Fiber: 0g
- Protein: 0.2g
- Cholesterol: 15mg