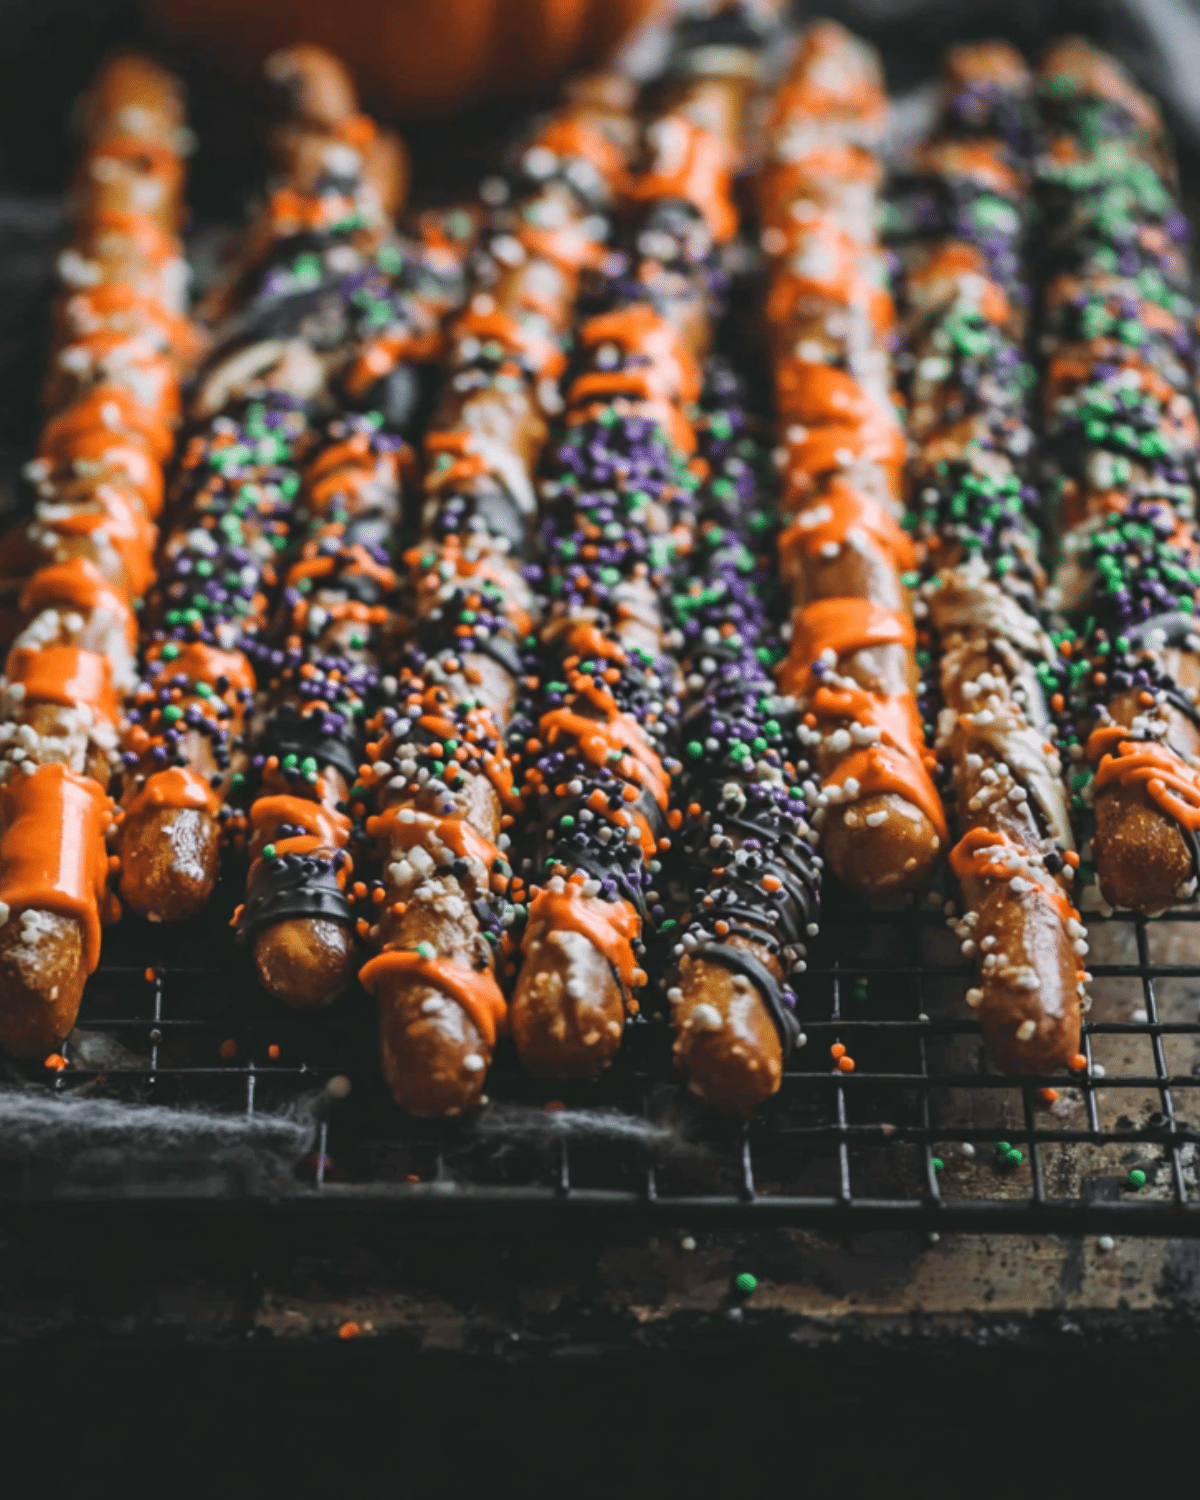
Looking for a spooky-sweet snack that’s easy to make, wildly fun to decorate, and totally irresistible? Halloween Pretzel Rods might just become your go-to fall favorite. These chocolate-dipped delights are the perfect no-bake treat for parties, school lunches, or just a cozy night at home with the kids. Whether you want a snack station centerpiece or a last-minute dessert idea, this guide covers everything from ingredients to decorating tips, all tailored to the Halloween spirit.
Don’t miss our Easy Halloween Snack Mix Recipe for another fun and festive bite-sized treat that pairs perfectly with pretzel rods.
JUMP TO
Table of Contents
Why Halloween Pretzel Rods Are the Ultimate Spooky Snack
A No-Bake Treat That’s Kid-Friendly and Stress-Free
Halloween can be hectic. From costumes to candy runs, the last thing you need is a complicated dessert. Enter Halloween pretzel rods—simple, quick, and no oven required. These treats use just a few ingredients, and kids absolutely love helping out. From dipping to decorating, it’s a hands-on activity that turns your kitchen into a creative (and slightly messy) Halloween workshop. Plus, cleanup is a breeze, especially if you prep your surface with wax paper.
Even better? These treats don’t require any baking skills. You can make them with your kids, your friends, or even solo while catching up on Halloween movies. Just melt, dip, sprinkle, and set. Done.
Perfect for Parties, School Events, and Trick-or-Treat Nights
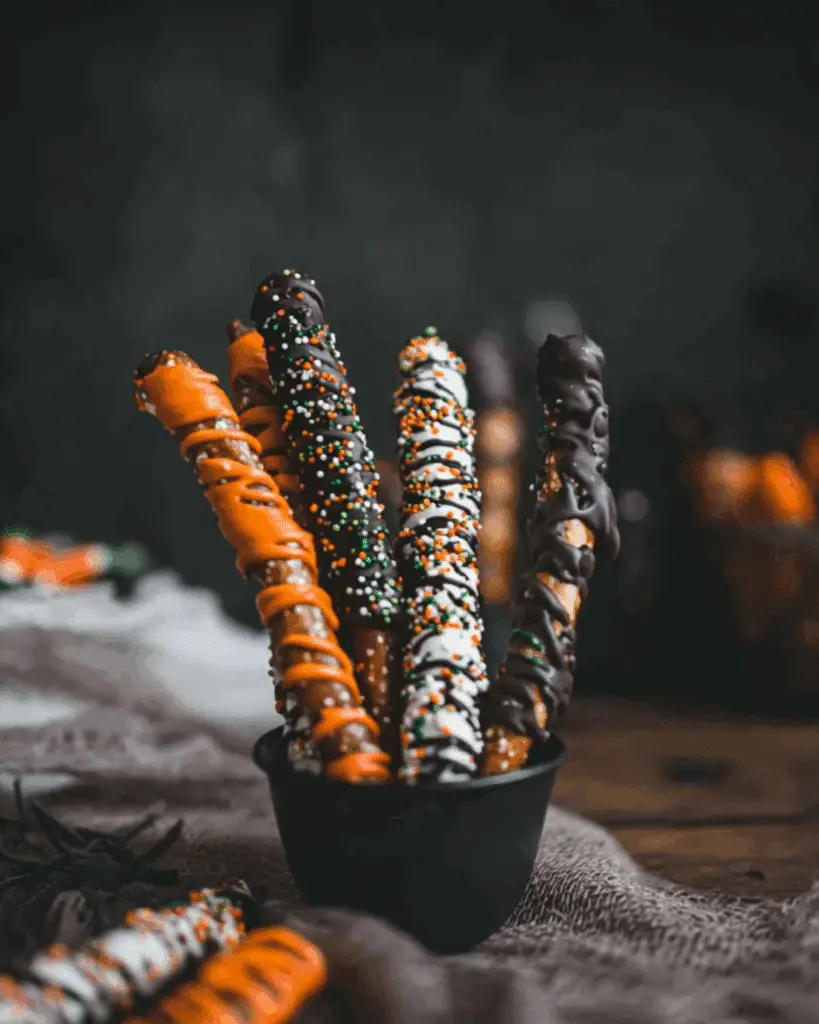
Halloween pretzel rods are the definition of versatile. Hosting a monster bash? Stack them in a jar for a spooky centerpiece. Packing lunch for your little ones? Wrap them in treat bags for a school-safe dessert. Handing out goodies to trick-or-treaters? Pretzel rods travel well and make unique alternatives to store-bought candy.
They’re also a hit on dessert tables. Combine them with spooky fun mummy dogs or creepy deviled eggs to create a themed spread that screams Halloween without stressing you out.
Customizable Colors, Toppings, and Themes
No two Halloween pretzel rods need to look the same—and that’s the fun of it. Choose candy melts in orange, black, green, or purple for seasonal vibes. Add edible googly eyes, themed sprinkles, and even drizzle contrasting colors for layered effects. You can go full glam with gold accents or keep it classic with just black and orange.
Discover great ideas like eyeball brownies if you want to complement your pretzel rods with other creepy-cute treats on the table.
These treats are adaptable for any Halloween mood—from cute ghosts for preschoolers to gory zombie rods for teens. Best of all, you control the sugar content and allergen safety by choosing your ingredients.
Ingredients You’ll Need to Make Halloween Pretzel Rods
Making Halloween pretzel rods couldn’t be simpler, and yet the results can be wildly impressive. The magic lies in using the right ingredients—not just for flavor, but also for that Halloween “wow” factor. Let’s break down exactly what you’ll need to get started.
Types of Pretzels to Use for Best Results
When making chocolate-dipped Halloween pretzel rods, the base matters. You want long, sturdy pretzel rods—the kind that won’t snap while dipping or decorating. These rods hold their shape, give you plenty of space for decoration, and add that salty crunch that perfectly balances the sweet chocolate coating.
Avoid thin or mini sticks—they’re harder to decorate and may not provide that satisfying texture contrast. Jumbo pretzel rods? Go for it. Just be sure to adjust the amount of chocolate and toppings accordingly.
Choosing Between White Chocolate, Candy Melts, and Food Coloring
When it comes to coating, you’ve got options—each with its pros and quirks.
| Type | Best For | Pros | Cons |
|---|---|---|---|
| White Chocolate | Mummy/Ghost designs | Rich flavor, smooth texture | Can seize easily, trickier to color |
| Candy Melts | Bright colors (orange, green) | Pre-colored, easy to melt, kid-friendly | Less flavorful than real chocolate |
| Chocolate Chips | Basic coating | Easy to find, affordable | Not ideal for fancy decorating |
| Oil-Based Colors | Customizing your palette | Can tint white chocolate creatively | Must match temp or it will cause seizing |
If you’re planning vibrant designs (like Frankenstein green or spooky purple), candy melts are your best bet. They’re easy to melt and come in dozens of Halloween shades. But if flavor is a priority, you may prefer high-quality white chocolate and use oil-based food coloring (never water-based—it will seize).
Pro Tip: If your chocolate seizes, don’t panic. Stir in a bit of warm heavy cream. It softens the texture and saves your batch, turning it into a ganache-style coating.
Must-Have Halloween Sprinkles and Edible Decorations
Here’s where the real fun begins. From creepy to cute, sprinkles and edible toppers turn your pretzels into Halloween masterpieces. Consider this your ultimate checklist:
- Edible googly eyes – For mummy or monster faces
- Bat and ghost-shaped sprinkles – Adds instant theme
- Black and orange jimmies – The Halloween classic
- Purple sugar crystals – Adds shimmer and texture
- Crushed Oreo “dirt” – Great for tombstone-themed rods
- Candy bones or eyeballs – For extra-creepy vibes
- Mini M&Ms or Skittles – Colorful, kid-friendly addition
- White drizzle – Create spider webs or mummy wraps
Want to keep things low-effort? Just dip, sprinkle, and let them set. Feeling extra? Try multi-layered drizzles or characters like ghosts and zombies. These work especially well with coordinating Halloween snacks like the Pizza Skulls recipe that bring your whole treat table together.
If you’re prepping a whole snack board, check out these Halloween pretzels recipe ideas for even more inspiration.
Step-by-Step: How to Make Halloween Pretzel Rods at Home
If you’ve got your ingredients ready, it’s time to melt, dip, and decorate! Making Halloween Pretzel Rods is a straightforward process that can be completed in under 45 minutes—prep, decorate, and all. Here’s your foolproof guide.
Melting Chocolate Safely: Microwave vs. Double Boiler
Before you dip those rods, the chocolate (or candy melts) needs to be perfectly smooth. Choose the method that works best for your setup:
Microwave Method (Quick & Easy):
- Place your chocolate or candy melts in a microwave-safe bowl.
- Microwave in 10-second intervals, stirring thoroughly between each round.
- Continue until completely melted and lump-free.
Double Boiler Method (Best for White Chocolate):
- Fill a saucepan with 1 to 1½ inches of water.
- Set a heat-safe bowl over the pot (water should not touch the bowl).
- Bring water to a low simmer and stir chocolate until melted.
Pro Tip: White chocolate is finicky. If you’re using it, the double boiler offers more control and less risk of seizing.
Dipping, Drizzling, and Decorating Like a Pro
Now comes the part where creativity meets flavor. Here’s the workflow:
- Lay out parchment or wax paper on a baking tray or countertop.
- Dip each pretzel rod into the melted chocolate, using a spoon to help coat it evenly.
- Gently shake or spin to let excess chocolate drip off.
- Decorate immediately:
- Add sprinkles while chocolate is wet.
- Stick on edible eyes, bones, or themed candies.
- Let the base layer set, then drizzle contrasting chocolate for extra flair.
Looking for inspiration? Try Creepy Deviled Eggs alongside your rods for a spooky snack spread.
Want color contrast? Dip in white chocolate, let it harden, then drizzle with black or orange. Layering works well and adds dimension to each treat.
Drying, Storing, and Packaging Tips
Once dipped and decorated, your pretzel rods need to set. Here’s how to do it efficiently:
- Place on parchment or wax paper and let sit at room temperature for 15–20 minutes.
- If you’re in a rush, pop them in the fridge for 10 minutes—but avoid over-chilling or they may crack.
- Once set, store in an airtight container at room temperature for up to one week.
Packaging Ideas for Gifting:
- Cellophane treat bags with Halloween ribbon
- Plastic cups wrapped in spiderweb netting
- Mini mason jars with lids tied in orange twine
These make adorable party favors or classroom giveaways—especially when paired with Eyeball Brownies for the ultimate Halloween dessert duo.
Halloween Pretzel Rod Decorating Ideas to Wow Your Guests
One of the best things about Halloween pretzel rods is the creative freedom they offer. Whether you’re aiming for cute, creepy, or outright terrifying, there’s no shortage of design inspiration. These rods can be as simple or elaborate as you like—and still taste delicious.
Mummy, Ghost, and Monster Designs
Want to make your Halloween pretzel rods stand out on the snack table? Try these character-inspired themes:
- Mummy Pretzels: Dip pretzel rods in white chocolate, then drizzle with more white chocolate in thin lines to mimic wrapped bandages. Top with two edible candy eyes before the coating sets.
- Ghost Pretzels: Coat the rod completely in white chocolate. Use black candy melts or black icing to draw oval eyes and a spooky open mouth. Minimal effort, maximum Halloween vibes.
- Frankenstein or Zombie Pretzels: Use green candy melts for the base, add two eyes, and drizzle with black chocolate to mimic hair or stitches. Bonus points if you use mini marshmallows as bolts on the sides!
These designs aren’t just festive—they’re easy enough for kids to join in, too.
Color Combos That Pop (Orange, Black, Purple)
When it comes to Halloween, color is everything. Stick to the classic trio: orange, black, and purple for instant spooky appeal. Here’s how to make it work:
- Dip in one base color (e.g., black), let it set, then drizzle alternating colors (orange, purple) for a layered effect.
- Use contrasting sprinkles to make colors stand out—like white eyes on a black base or neon green drizzle over purple.
- Try split-dip designs: half the pretzel orange, the other half black—great visual effect when displayed upright in jars or cups.
Don’t miss our Halloween Pretzels Recipe for more style variations and seasonal ideas that keep guests reaching for more.
Easy Designs for Kids to Try on Their Own
If you’ve got little hands in the kitchen, let them lead the decorating! Here are some kid-approved (and mess-friendly) ideas:
- Sprinkle overload: Let kids dip rods in melted chocolate, then roll in a bowl of mixed Halloween sprinkles.
- Monster mash: Offer pre-cut candy eyes, colored chocolate, and marshmallows—then let them invent their own creatures.
- Drizzle zone: Use plastic spoons or piping bags to drizzle stripes in different colors.
Need more kid-friendly snacks? Check out Spooky Fun Mummy Dogs, which go hand-in-hand with DIY pretzel rods on any Halloween table.
Troubleshooting Common Problems When Making Chocolate Pretzels
Even though Halloween pretzel rods are easy to make, sometimes things don’t go quite as planned. From chocolate that seizes to coatings that crack, here’s how to troubleshoot your way to perfect spooky treats every time.
What to Do If Chocolate Seizes
One of the most frustrating things is when your chocolate suddenly turns thick, grainy, or lumpy. That’s what’s known as “seizing,” and it happens when moisture or overheating messes with the chocolate’s fat content.
How to fix it:
- Add a small amount of warm heavy cream or vegetable oil, and stir constantly until it becomes smooth again.
- Avoid adding water or cold liquids—they’ll make it worse.
- If you’re using food coloring, only use oil-based colors and ensure they’re the same temperature as your chocolate.
Pro tip: Always dry your bowls and utensils thoroughly before using, and keep humidity low in your kitchen if possible.
Preventing Clumps, Cracks, or Soggy Pretzels
Clumpy chocolate coating? You might be stirring too slowly or letting it cool down mid-dip. Keep the chocolate warm and fluid, and stir gently but consistently while dipping.
Cracked chocolate after drying? That’s usually a sign of rapid chilling or over-dipping. Let the rods air dry at room temperature if you can. If you’re in a hurry, chill for 10 minutes max—then remove.
Soggy pretzels? That means moisture got to them before dipping, or you stored them in a humid spot. Always keep pretzels sealed in a dry container before and after decorating.
How to Fix Overheating or Burning Issues
If your chocolate turns thick, smells burnt, or has dark specks, it’s likely overheated. Here’s how to avoid that:
- Microwave in small bursts (10–15 seconds max), and stir in between.
- Avoid boiling water in a double boiler—keep it to a gentle simmer.
- Use a candy thermometer if you want to stay in total control. Keep white chocolate under 110°F and milk/dark chocolate under 120°F.
If your chocolate is beyond repair, it’s better to start over with a new batch than to risk bad flavor or texture.
FAQ – Halloween Pretzel Rods
Can I make Halloween pretzel rods ahead of time?
Absolutely. Halloween pretzel rods can be made up to 5–7 days in advance. Just be sure they’re fully cooled and stored in an airtight container at room temperature to keep the pretzels crisp.
What’s the best way to store chocolate-covered pretzel rods?
Store them in a cool, dry place in an airtight container with parchment paper between layers. Avoid the fridge if possible—chocolate may sweat and lose its shine.
Can I use almond bark instead of chocolate?
Yes, almond bark is a great alternative. It melts easily and hardens quickly, making it perfect for dipping and drizzling. It’s also more stable and less likely to seize than real chocolate.
How long do pretzel rods stay fresh after decorating?
They stay fresh and crunchy for up to one week, depending on storage. For best results, keep them sealed in a dry place away from heat or humidity.
Are Halloween pretzel rods safe for nut-free schools?
They can be! Just make sure the chocolate or candy melts you use are certified nut-free and manufactured in allergy-safe facilities. Always check labels to be sure.
Final Thoughts: Why You Should Try Halloween Pretzel Rods This Season
Halloween pretzel rods are the kind of treat that check all the boxes—they’re fast, festive, customizable, and wildly fun to make. Whether you’re throwing a haunted house party, sending snacks to school, or just creating edible crafts with your kids, these treats bring the Halloween spirit to life in just a few easy steps.
The best part? You don’t have to be a pro baker to pull these off. With a few simple ingredients and a dash of creativity, anyone can whip up a spooky snack that’s both Instagram-worthy and totally delicious.
Looking for inspiration? Try our Easy Halloween Snack Mix or Eyeball Brownies for even more fun additions to your spooky table.
PrintHalloween Pretzel Rods
Halloween Pretzel Rods are an easy, no-bake treat perfect for parties, school events, or festive family fun. Dip pretzel rods in melted chocolate or candy melts, decorate with spooky toppings, and enjoy a sweet and salty snack everyone will love.
- Prep Time: 15 minutes
- Cook Time: 8 minutes
- Total Time: 38 minutes
- Yield: 36 pretzel rods
- Category: Dessert
- Method: No-Bake
- Cuisine: American
- Diet: Vegetarian
Ingredients
- 1 (12-ounce) bag pretzel rods
- 4 cups white chocolate chips or colored candy melts
- 1 cup assorted Halloween sprinkles
- Optional: edible candy eyes, food-safe coloring (oil-based), black and orange icing
- Parchment or wax paper
Instructions
- Prepare your workspace with parchment or wax paper.
- Melt the chocolate or candy melts using a double boiler or microwave. Stir until smooth.
- Dip each pretzel rod into the melted chocolate, covering about two-thirds of the rod.
- Gently shake off excess chocolate and immediately decorate with Halloween sprinkles and edible toppers.
- Place decorated pretzels on parchment paper and let them set at room temperature for 15–20 minutes, or chill in the fridge for 10 minutes.
- Once fully set, store in an airtight container at room temperature for up to one week.
Notes
- If chocolate seizes, add a small amount of warm heavy cream and stir until smooth.
- Use oil-based food coloring only—avoid water-based colors.
- Layer colors by letting each drizzle set before adding another.
- Avoid refrigerating for long periods to prevent chocolate from cracking or sweating.
- Fun for kids—use different toppings and let them create monster or mummy designs.
Nutrition
- Serving Size: 1 pretzel rod
- Calories: 127
- Sugar: 16g
- Sodium: 18mg
- Fat: 7g
- Saturated Fat: 4g
- Unsaturated Fat: 3g
- Trans Fat: 0g
- Carbohydrates: 16g
- Fiber: 1g
- Protein: 1g
- Cholesterol: 4mg