When it comes to quick and fun desserts, nothing beats the simplicity of cookie cups. These little edible dessert bowls combine the chewy goodness of cookies with the creamy delight of your favorite frosting or filling. Whether you’re baking for a party, family night, or just craving something sweet without a long prep time, cookie cups are the answer. With only three simple ingredients—cookie dough, frosting, and sprinkles—this recipe delivers a big payoff for minimal effort.
These bite-sized treats are also a perfect introduction to baking for beginners or kids. They don’t require fancy tools or expert skills, and you can easily customize them with different doughs or toppings. Plus, they look impressive on any dessert table while being easy enough to make on a lazy weekend afternoon.
JUMP TO
Table of Contents
What Are Cookie Cups?
The Simple Joy of a Cookie Turned Cup
Cookie cups are exactly what they sound like—cookies baked in muffin tins that form tiny cups, ready to hold your favorite fillings. Imagine the buttery flavor of your favorite cookie, shaped into a golden cup, and filled with creamy frosting, caramel, or even ice cream. The concept is as simple as it is genius.
Unlike traditional cookies that flatten out, cookie cups rise and form sturdy walls, creating the perfect vessel for sweet fillings. They blend the best of both worlds: the crispness of cookies with the indulgence of cupcakes.
You can use almost any cookie dough to make them—from classic sugar cookie dough to chocolate chip or even peanut butter. For an easy version, most bakers prefer pre-made cookie dough for its convenience and consistent results.
Popular Fillings for Cookie Cups
There’s no shortage of creative ways to fill your cookie cups. Some favorites include:
- Chocolate frosting for a rich and creamy texture.
- Peanut butter for a salty-sweet balance.
- Caramel or Dulce de Leche for a decadent twist.
- Lemon buttercream for a zesty burst of flavor.
- Whipped cream or pudding for a lighter dessert option.
You can also experiment with seasonal flavors—think peppermint frosting in December or strawberry filling for Valentine’s Day. The customization possibilities are endless, making cookie cups one of the most versatile desserts out there.
For more ideas on creative fillings, check out the Peanut Butter Blossoms Recipe, which uses similar ingredients and techniques.
Ingredients and Equipment Needed for Easy Cookie Cups
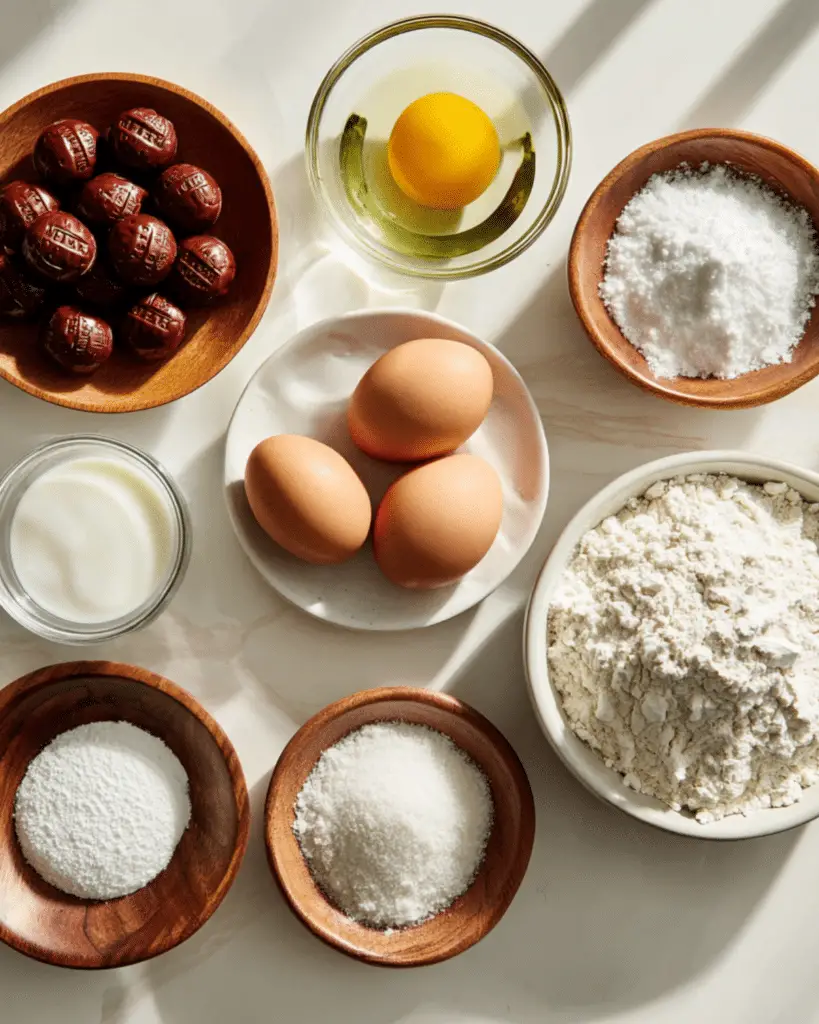
Essential 3 Ingredients
The beauty of this easy cookie cups recipe lies in its simplicity. You only need:
| Ingredient | Quantity | Notes |
|---|---|---|
| Pre-made cookie dough | 16 oz | Sugar cookie dough works best, but chocolate chip or peanut butter also work great. |
| Frosting | 2 cans | Store-bought chocolate frosting is classic, but any flavor can be used. |
| Sprinkles | Optional | Adds color and crunch for a festive finish. |
If you’re feeling ambitious, you can substitute homemade dough or frosting, but pre-made options keep it quick and convenient.
Tools and Bakeware
Before you start, gather a few basic kitchen tools:
- 12-count muffin tin – This shapes the cookie cups perfectly.
- Non-stick cooking spray (with flour) – Helps release the cups easily.
- Teaspoon or tart shaper – For pressing down the center after baking.
- Cooling rack – To help your cookie cups cool evenly.
Pro Tip: Using a mini muffin tin instead of a regular one makes adorable bite-sized cookie cups—great for parties or snack boxes!
How to Make Cookie Cups Step-by-Step
The magic of cookie cups lies in their simplicity. Even if you’re new to baking, you’ll find this process effortless and fun. The best part? You only need one bowl, one pan, and 30 minutes to get these bite-sized delights ready to serve.
Step 1: Prepare the Dough
Start by preheating your oven to 350°F (175°C). Take your pre-made cookie dough (about 16 ounces) and divide it evenly into 12 pieces. Roll each piece into a ball—roughly the size of a golf ball. Place one ball into each cup of your muffin tin.
Pro Tip: Don’t flatten them. They’ll naturally take shape as they bake.
If you prefer smaller treats, you can use a mini muffin tin and divide the dough into 24 smaller portions. These bite-sized cookie cups bake faster and are perfect for parties or holiday dessert trays.
Step 2: Bake Until Golden
Place your tin in the preheated oven and bake for 15–17 minutes or until the edges are lightly golden. Once baked, remove from the oven and immediately use a small spoon or teaspoon to press the center of each cookie down to form a well.
Quick Tip: Press gently! If the dough cracks, let it cool for 30 seconds before shaping again.
Step 3: Cool and Decorate
Let the cookie cups cool in the pan for 5–10 minutes before transferring them to a cooling rack. Once they’re completely cool, fill each cup with your favorite frosting, whipped cream, or even caramel. Top with colorful sprinkles, nuts, or chocolate chips for a finished look.
If you’re making holiday cookie cups, use themed toppings—red and green for Christmas, or pastel sprinkles for Easter.
Optional Add-Ins
Here’s how you can make your cookie cups recipe even more exciting:
| Variation | Filling Idea | Flavor Tip |
|---|---|---|
| Peanut Butter Cookie Cups | Chocolate frosting | Add crushed peanuts for crunch |
| Sugar Cookie Cups | Lemon buttercream | Perfect for spring desserts |
| Chocolate Chip Cookie Cups | Vanilla frosting | Drizzle with melted chocolate |
| Chocolate Cookie Cups | Whipped cream | Top with cocoa powder |
For an extra twist, pair this recipe with our Homemade Caramel Sauce—it’s an amazing filling option that adds a gooey contrast to the crispy edges.
Flavor Variations and Creative Twists
Cookie cups are a blank canvas for your imagination. You can easily adapt them for different occasions, dietary needs, or personal tastes.
Classic Flavors to Try
- Chocolate Chip Cookie Cups with Vanilla Cream: A fan favorite! Soft and chewy cookie cups filled with sweet vanilla buttercream.
- Peanut Butter Cookie Cups with Chocolate Ganache: A flavor match made in heaven—rich and nutty with a silky chocolate finish.
- Sugar Cookie Cups with Lemon Frosting: Bright, zesty, and perfect for summer gatherings.
For more citrus-based desserts, check out our Lemon Buttercream Frosting Recipe, which pairs beautifully with sugar cookie dough.
Fun Ideas for Kids and Holidays
- Birthday Cookie Cups: Fill with colorful frosting and rainbow sprinkles.
- Christmas Cookie Cups: Use peppermint frosting or crushed candy canes.
- Easter Cookie Nests: Fill with coconut shreds and mini chocolate eggs.
- Halloween Cookie Cups: Add orange and black decorations for a spooky touch.
Want something even more kid-friendly? Try serving these with a scoop of ice cream in the center—it turns your cookie cups into an edible sundae bowl!
Pro Baking Tips and Tricks for Perfect Cookie Cups
- Always spray your muffin tin with non-stick spray (preferably with flour) for easy removal.
- If the center looks raw after pressing down, pop them back into the oven for 2–3 more minutes.
- Let them cool only slightly before removing—too cold, and they’ll stick.
- The frosting ratio matters: for 12 cookie cups, two cans of frosting give you the perfect creamy texture.
- For best results, store your cookie cups in an airtight container at room temperature for up to three days.
If you enjoy baking with your family, you’ll also love our Soft Sugar Cookies Recipe—another easy, family-friendly dessert that pairs perfectly with this one.
FAQs About Cookie Cups
Can I make cookie cups ahead of time?
Yes! You can prepare and bake your cookie cups in advance. Once cooled, store them in an airtight container at room temperature for up to three days. If you want to make them further ahead, freeze the unfrosted cups for up to two months, then thaw and decorate before serving.
Can I use homemade cookie dough instead of store-bought?
Absolutely. Homemade cookie dough works just as well. Just ensure your dough isn’t too soft, or the cups may lose shape during baking. Check out our Classic Sugar Cookie Dough Recipe for a simple base that holds perfectly.
Why did my cookie cups collapse in the center?
If your cookie cups sink or break, they may be underbaked or removed from the tin too soon. Always allow them to cool for a few minutes before transferring to a wire rack. For more tips on perfect texture, read our Ultimate Guide to Baking Cookies.
Can I make mini versions of cookie cups?
Yes! Use a mini muffin tin and reduce your baking time to 10–12 minutes. Mini cookie cups are great for parties, snack boxes, or portion-controlled treats.
What fillings can I use besides frosting?
You can fill cookie cups with pudding, Nutella, whipped cream, caramel, or fruit compote. For a summer twist, try chilled cookie cups filled with vanilla ice cream or mousse—perfect for warm days!
Conclusion
In the world of easy desserts, cookie cups stand out for their charm, versatility, and simplicity. They’re perfect for kids, party spreads, or a last-minute treat when you don’t want to spend hours in the kitchen. With just three ingredients—cookie dough, frosting, and sprinkles—you can create a dessert that looks bakery-level but takes less than 30 minutes to make.
Beyond their delicious taste, cookie cups are a canvas for creativity. You can experiment with dough types, fillings, and toppings, adapting them for holidays or personal preferences. Whether you stick with the classic sugar cookie version or venture into peanut butter or chocolate territory, the results are always satisfying.
PrintCookie Cups

These Easy Cookie Cups are a fun 3-ingredient dessert made with pre-made cookie dough, frosting, and sprinkles. They’re soft, chewy, and perfect for any occasion — from parties to family nights. Ready in under 30 minutes, this recipe is ideal for beginner bakers.
- Prep Time: 5 minutes
- Cook Time: 17 minutes
- Total Time: 25 minutes
- Yield: 12 cookie cups
- Category: Dessert
- Method: Baking
- Cuisine: American
- Diet: Vegetarian
Ingredients
- 16 oz pre-made sugar cookie dough
- 2 cans chocolate frosting (or flavor of choice)
- 1/4 cup sprinkles (optional)
- Non-stick cooking spray (with flour)
Instructions
- Preheat oven to 350°F (175°C).
- Divide cookie dough into 12 equal portions and roll each into a ball.
- Place one ball into each well of a greased 12-count muffin tin.
- Bake for 15–17 minutes, or until edges are golden brown.
- Remove from oven and immediately press the center of each cookie with a teaspoon to form a cup shape.
- Allow cookie cups to cool in the pan for 5–10 minutes, then transfer to a wire rack to cool completely.
- Once cool, fill each cup with frosting and top with sprinkles or your favorite toppings.
Notes
- Use a mini muffin tin for bite-sized cookie cups; bake 10–12 minutes.
- Ensure centers are fully cooked before removing from the oven.
- Let cookie cups cool slightly before removing to prevent breakage.
- Store in an airtight container for up to 3 days at room temperature.
- Freeze unfrosted cookie cups for up to 2 months.
Nutrition
- Serving Size: 1 cookie cup
- Calories: 465
- Sugar: 57g
- Sodium: 248mg
- Fat: 21g
- Saturated Fat: 6g
- Unsaturated Fat: 13g
- Trans Fat: 0g
- Carbohydrates: 71g
- Fiber: 1g
- Protein: 2g
- Cholesterol: 4mg