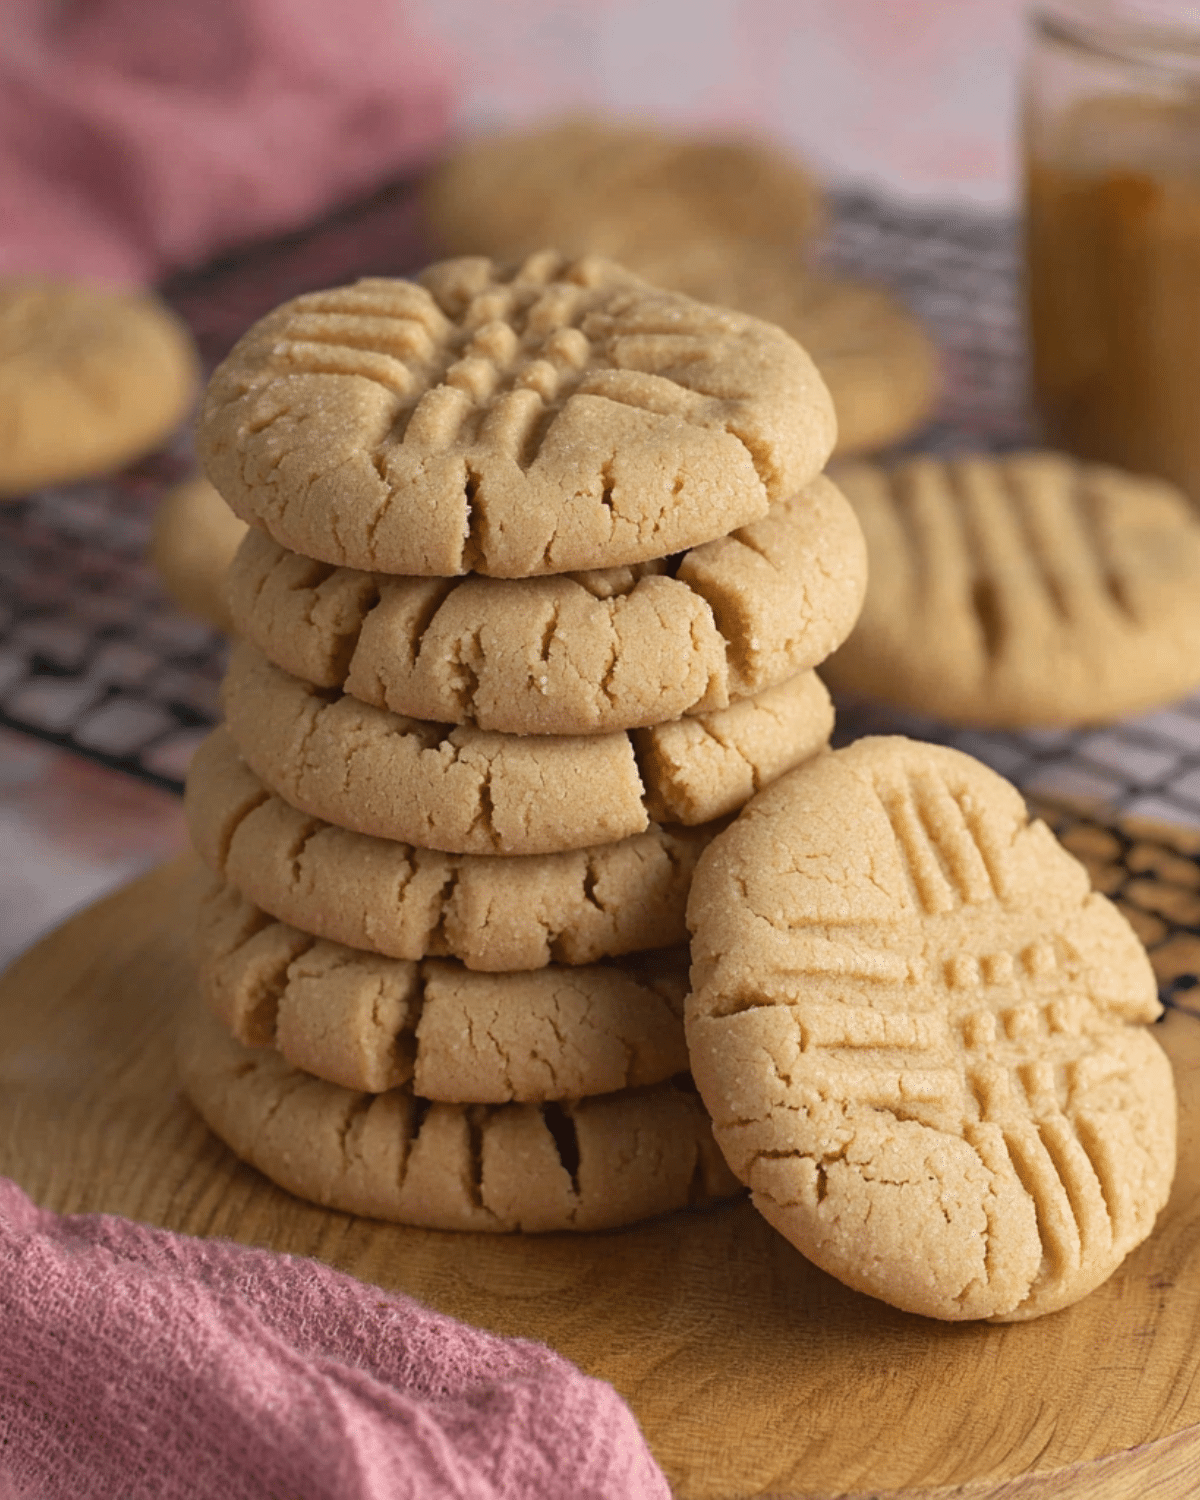
If there’s one cookie that never goes out of style, it’s the classic peanut butter cookie. With its rich nutty flavor, soft texture, and those iconic crisscross fork marks, this all-time favorite is as nostalgic as it is satisfying. Whether you grew up with them in grandma’s kitchen or just discovered the magic of peanut butter in baking, these cookies offer the perfect balance of sweet and salty in every bite. In this article, you’ll learn what makes them so beloved, how to make them from scratch with expert tips, and even some fun variations to spice things up.
Looking for inspiration? Try our Chewy Pumpkin Cookies Recipe to bring even more cozy flavors to your cookie jar.
JUMP TO
Table of Contents
Why Classic Peanut Butter Cookies Are Everyone’s Favorite
A nostalgic treat with timeless flavor
Few cookies capture the warmth of home like classic peanut butter cookies. They date back to the 1930s and have remained a household staple for generations. One reason for their long-standing appeal? Simplicity. With basic pantry staples and a quick prep time, they’re a go-to for both beginner bakers and seasoned pros. The moment you smell that warm, toasty aroma filling your kitchen, it’s easy to see why people keep coming back to this recipe.
The perfect balance of salty and sweet
What makes these cookies truly addictive is their perfect flavor contrast. The saltiness of peanut butter cuts through the sweetness of sugar, creating a balanced taste that lingers with each bite. If you’re using a salted peanut butter, it naturally enhances the overall flavor. Prefer it less salty? No problem—just opt for unsalted butter and adjust with a pinch of sea salt. Either way, the sweet-savory combo is what makes this cookie unforgettable.
What makes a peanut butter cookie “classic”?
It’s more than just the ingredients. A classic peanut butter cookie is defined by its:
- Soft yet chewy texture
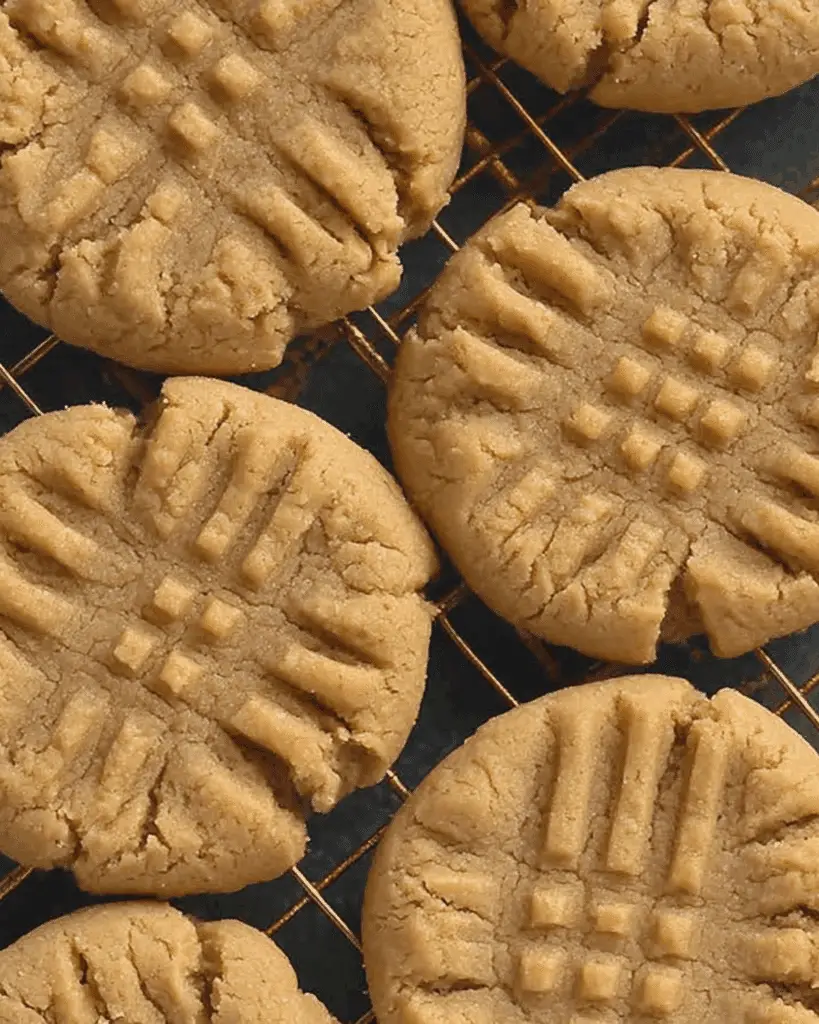
- Signature crisscross fork marks
- Rich peanut flavor without being overpowering
These markers distinguish it from the chewy oatmeal peanut butter hybrids or flourless versions that dominate social media today. While modern spins are great, the original recipe holds its charm because it’s uncomplicated, reliable, and universally loved.
Ingredients That Make a Difference
Choosing the best peanut butter: creamy vs. chunky vs. natural
The type of peanut butter you use changes everything. Creamy peanut butter delivers that smooth melt-in-your-mouth texture most people expect. Chunky adds a bit of crunch, which can be fun if you’re into texture contrasts. But natural peanut butter (the kind that separates in the jar) can be tricky. It often creates overly soft cookies if not stirred properly. If you go the natural route, mix it thoroughly to avoid oily or runny dough.
Pro Tip: For a classic texture, stick with commercial smooth peanut butter (like Jif or Skippy).
The role of brown sugar in cookie softness
Brown sugar isn’t just about sweetness—it adds moisture and depth. That molasses-rich flavor also contributes to the cookie’s signature chewiness. Some bakers prefer dark brown sugar for a slightly caramelized edge, while others use light brown sugar for a subtler taste. Whichever you choose, don’t skip it—white sugar alone won’t give you that soft interior that makes these cookies so irresistible.
Optional add-ins for flavor or crunch
Want to put your own spin on the classic peanut butter cookie? Try folding in:
- Chocolate chips or mini peanut butter cups
- Crushed pretzels for a salty bite
- A dash of cinnamon for warmth
- Chopped peanuts for added texture
Don’t miss our Pumpkin Oatmeal Chocolate Chip Cookies for a fun flavor twist that also uses pantry staples.
Keep add-ins light—no more than ½ cup total—so you don’t overpower the base dough.
Step-by-Step Guide to the Perfect Peanut Butter Cookie
Prepping the dough with precision
Start by creaming together softened unsalted butter, white sugar, and brown sugar. Add peanut butter, a large egg, and vanilla extract until smooth. In a separate bowl, whisk together all-purpose flour and baking powder, then slowly mix it into the wet ingredients. The result? A dough that’s soft but moldable—ideal for shaping into perfect cookie balls.
Shaping & crisscross pattern tips
Once your dough is ready, roll it into 1-inch balls and place them on a parchment-lined baking sheet. Then comes the iconic step: the fork marks. Gently press a fork onto each ball in one direction, then again in the opposite direction to form a crisscross. This isn’t just for looks—it helps the cookies bake evenly and flatten just the right amount.
Want cleaner lines? Try using wooden skewers instead of a fork. Check out our tip in this Candy Cane Cookies Recipe for more holiday cookie tricks.
Baking times and cooling for optimal texture
Bake at 350°F (175°C) for 8 to 10 minutes. The edges should be just starting to turn golden. Don’t wait for them to look fully baked—they’ll continue cooking on the hot sheet after you take them out. Let them cool completely on the tray before transferring to a wire rack. This helps them firm up without falling apart.
Discover great ideas like our Christmas Sugar Cookies if you’re planning a cookie platter.
Common Mistakes and How to Avoid Them
Overbaking vs. underbaking – why timing matters
One of the most common pitfalls with classic peanut butter cookies is overbaking. Because of their light color, it’s hard to tell when they’re done. Wait too long, and you’ll end up with dry, crumbly cookies. The key is to pull them out just as the edges begin to brown. The center may still look soft—that’s perfect. They’ll finish baking from residual heat.
On the flip side, if you underbake them too much, they may collapse or become greasy. Stick with 8–10 minutes at 350°F and let the cookies cool on the baking sheet. This cooling process helps set the shape and enhances the chewy texture.
Measuring flour the right way
Too much flour = dense, dry cookies. Most people scoop directly from the bag or container, which packs more flour than needed. Instead, use the spoon-and-level method: fluff the flour, spoon it into the measuring cup, and level it off with a knife. Or better yet, use a kitchen scale for consistency.
Discover great ideas like our Raspberry Cake with Lemon Buttercream where accurate measurements make all the difference in baking.
The #1 mistake with natural peanut butter
Natural peanut butter separates—oil on top, solids on bottom. If you scoop straight from the top, your cookie dough will be too oily. From the bottom? Too dry and crumbly. Either way, your cookies won’t hold together. The fix? Stir the jar thoroughly until it’s a uniform consistency. If you’re still unsure, stick with a shelf-stable brand for predictable results.
Expert Tips for Peanut Butter Cookie Success
Do you need to chill the dough?
Nope! That’s one of the beauties of this recipe. You can go from mixing bowl to baking sheet in minutes. However, if your kitchen is warm or your dough feels sticky, a 10- to 15-minute chill in the fridge can help firm things up. It’s also great if you want to prep the dough ahead of time—just cover and chill for up to 48 hours.
Using skewers for picture-perfect fork marks
Want your cookies to look straight out of a magazine? Ditch the fork and grab wooden skewers. Snap them in half, line up 4 or 5, and gently press down in both directions. This gives you clean, even lines without dragging. Just be sure to twist the skewers away instead of pulling straight up to avoid tearing the dough.
Don’t miss our Pumpkin S’mores Cookies Recipe where we share more creative shaping tips.
Storage tips to keep cookies soft for days
Once cooled, store your peanut butter cookies in an airtight container at room temperature. Add a slice of white bread to the container to help retain moisture—it sounds odd, but it works like magic. They’ll stay soft for up to a week. Want to freeze? Stack the cookies with parchment between layers in a freezer-safe bag. You can also freeze the dough and bake directly from frozen—just add a minute or two to the baking time.
Fun Variations on Classic Peanut Butter Cookies
Chocolate-dipped peanut butter cookies
Take your classic cookies to the next level by dipping half in melted dark chocolate. Let them set on parchment paper until firm. This not only adds a beautiful visual contrast but also brings richness to every bite.
Don’t miss our Christmas Candy Cane Cookies for more dipped-cookie decorating inspiration.
Peanut butter and jelly thumbprints
Craving a PB&J twist? After rolling the dough into balls, press a small indentation into the center of each and fill with your favorite jam—grape, strawberry, or raspberry. Bake as usual. It’s a delicious throwback that kids especially love.
Turning them into ice cream sandwiches
Got leftovers? Sandwich a scoop of vanilla or chocolate ice cream between two cookies and freeze. These make fantastic summer treats or a make-ahead dessert for guests. Bonus: you can roll the edges in crushed peanuts or mini chocolate chips.
Looking for more festive cookie creativity? Check out our Christmas Sugar Cookies Recipe for decorating ideas that pair perfectly with these variations.
Frequently Asked Questions (FAQ)
Why do peanut butter cookies have fork marks?
The crisscross fork marks are more than decorative—they help flatten dense dough so the cookies bake evenly. Because peanut butter cookie dough doesn’t spread much on its own, the fork marks ensure they cook uniformly inside and out. It’s also become a signature look that screams “classic!”
Can I make these gluten-free or dairy-free?
Absolutely. For a gluten-free version, swap the all-purpose flour with a 1:1 gluten-free baking blend. For dairy-free cookies, use plant-based butter and make sure your peanut butter doesn’t contain added milk solids. The texture may vary slightly but the flavor will still shine.
What’s the best way to store peanut butter cookies?
Once the cookies have cooled completely, place them in an airtight container at room temperature. They’ll stay soft for up to 5–7 days. For longer storage, freeze the cookies in layers separated by parchment paper and thaw as needed.
How long do peanut butter cookies stay fresh?
At room temperature in a sealed container, they stay fresh and chewy for up to a week. To maintain softness, add a slice of white bread to the container. For longer shelf life, freeze them for up to 3 months.
Can I freeze the cookie dough or baked cookies?
Yes, both! Roll the dough into balls and freeze on a baking sheet. Once firm, transfer them to a freezer-safe bag. When ready to bake, place them directly on the tray and add 1–2 minutes to baking time. Baked cookies can also be frozen—just wrap them tightly and thaw at room temperature.
Conclusion: Bake a Batch of Classic Goodness
Classic peanut butter cookies aren’t just easy to make—they’re comforting, crowd-pleasing, and endlessly customizable. Whether you’re going for the nostalgic simplicity of the original or adding your own creative spin, this recipe will become your go-to for every occasion. Soft centers, golden edges, and that unforgettable nutty richness—what more could a cookie lover want?
Don’t miss our Christmas Sugar Cookies Recipe for another holiday-inspired classic that’s perfect for your baking list!
PrintClassic Peanut Butter Cookies
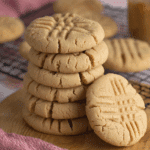
These classic peanut butter cookies are soft, chewy, and perfectly balanced between sweet and salty. With simple pantry ingredients and a quick prep time, they’re a timeless treat for all cookie lovers.
- Prep Time: 10 minutes
- Cook Time: 10 minutes
- Total Time: 20 minutes
- Yield: 18 cookies
- Category: Dessert
- Method: Baking
- Cuisine: American
- Diet: Vegetarian
Ingredients
- 1 1/2 cups all-purpose flour (180g)
- 1/2 cup unsalted butter, room temperature (113g)
- 1 cup creamy peanut butter (250g)
- 1/2 cup brown sugar, lightly packed (100g)
- 1/2 cup granulated sugar (100g)
- 1 tsp vanilla extract (5mL)
- 1 large egg, room temperature
- 3/4 tsp baking powder (3g)
- Optional: 1/4–1/2 tsp sea salt if using unsalted peanut butter
Instructions
- Preheat oven to 350°F (175°C). Line a baking sheet with parchment paper.
- In a bowl, sift together flour and baking powder. Set aside.
- In a stand mixer, cream butter, granulated sugar, and brown sugar until light and fluffy.
- Add peanut butter and mix until fully incorporated.
- Mix in the egg and vanilla extract. Scrape down the bowl and mix again.
- Gradually add the flour mixture, mixing on low speed until just combined.
- Roll dough into 1-inch balls and place on prepared baking sheet.
- Flatten each ball with a fork in a criss-cross pattern.
- Bake for 8–10 minutes, until edges just begin to turn golden.
- Allow cookies to cool completely on the baking sheet before transferring.
Notes
- Do not overbake; cookies continue baking on the sheet after removal.
- If using natural peanut butter, mix thoroughly before measuring.
- Use a spoon-and-level method for accurate flour measurement.
- For picture-perfect fork marks, use skewers instead of a fork.
- Store cookies in an airtight container with a slice of bread to retain softness.
Nutrition
- Serving Size: 1 cookie (105g)
- Calories: 193
- Sugar: 7g
- Sodium: 115mg
- Fat: 13g
- Saturated Fat: 5g
- Unsaturated Fat: 7g
- Trans Fat: 0g
- Carbohydrates: 16g
- Fiber: 1g
- Protein: 5g
- Cholesterol: 23mg