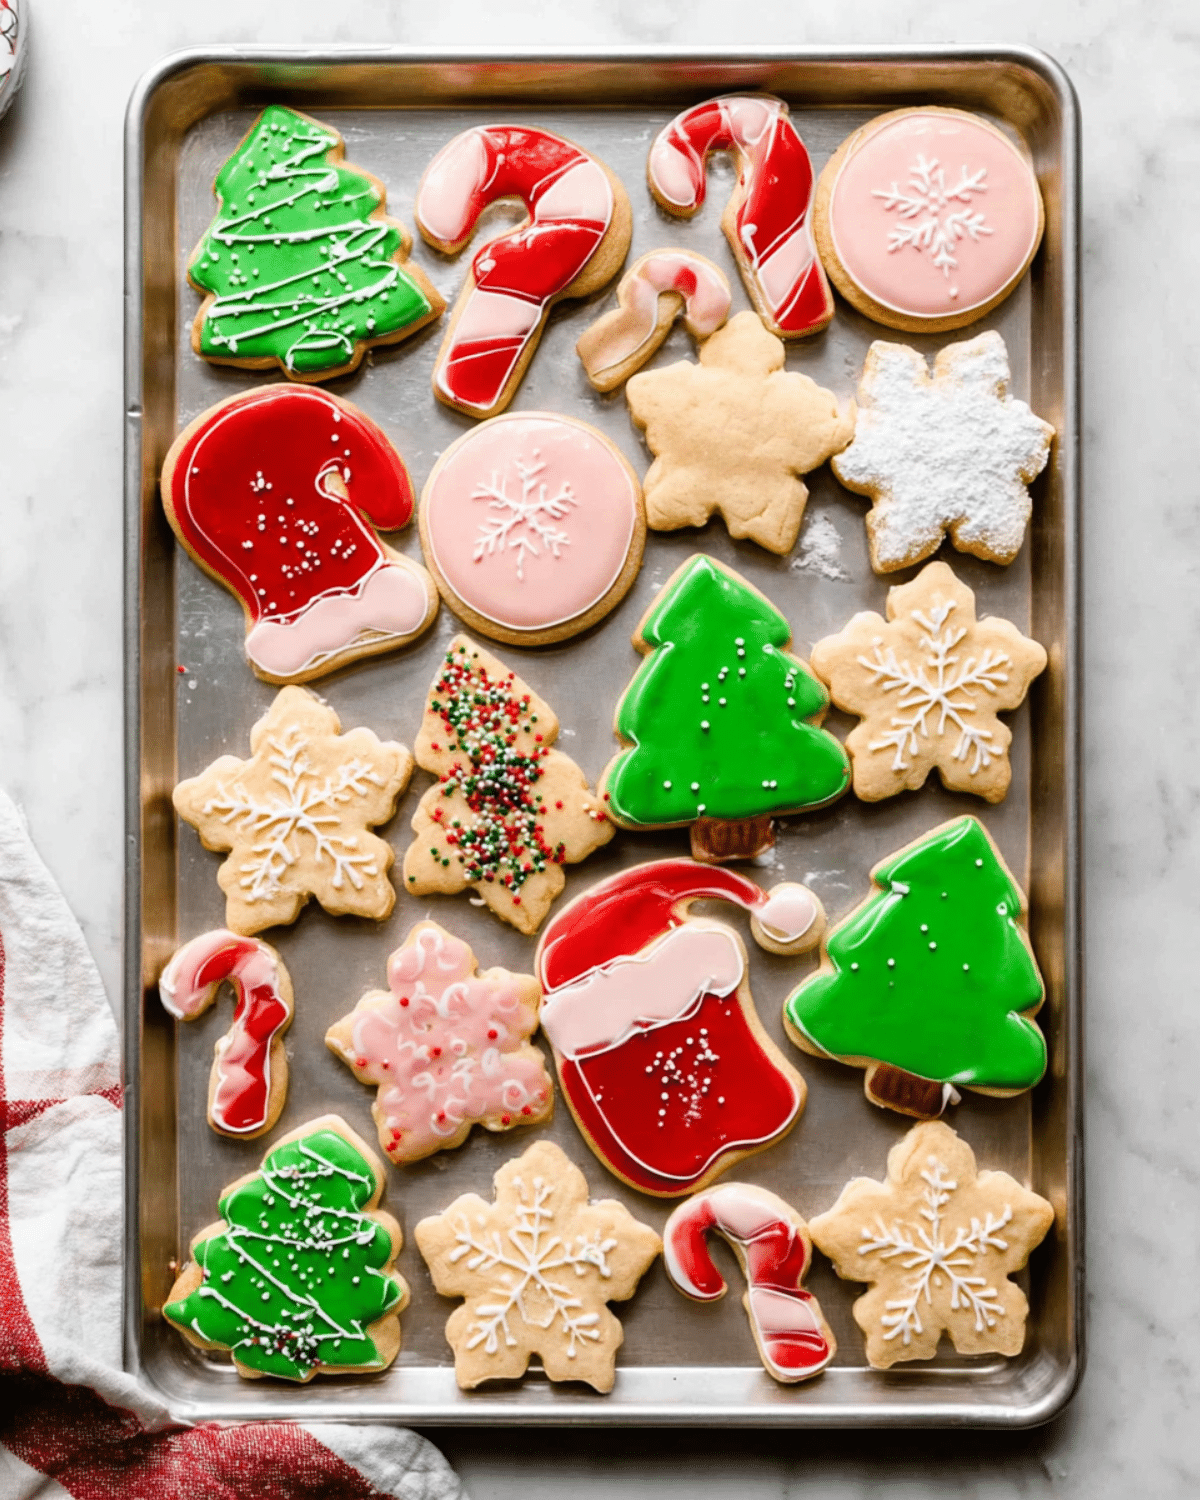
When it comes to holiday baking, nothing quite compares to the charm of Christmas sugar cookies. These delightful treats don’t just satisfy your sweet tooth—they capture the spirit of the season in every buttery bite. Whether you’re baking with kids, hosting a cookie exchange, or looking for a thoughtful edible gift, these cookies bring warmth, flavor, and festive flair to any celebration. In this guide, you’ll find everything you need—from the best sugar cookie dough and foolproof icing tips to creative decorating ideas and make-ahead storage tricks. Get ready to bake cookies that everyone will remember long after the holidays are over.
Don’t miss our Wonderland Chocolate Chip Christmas Cookies for another festive favorite!
JUMP TO
Table of Contents
Why Christmas Sugar Cookies Are a Must-Have Every Holiday Season
The nostalgic magic of decorated sugar cookies
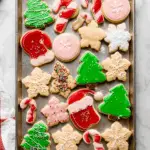
Every bite of a Christmas sugar cookie evokes a memory. Maybe it’s a snow-dusted evening spent decorating cookies with family or the scent of vanilla wafting through grandma’s kitchen. These cookies aren’t just desserts—they’re traditions. Their iconic shapes—stars, trees, stockings—transform simple ingredients into symbols of joy.
Christmas sugar cookies bring more than sweetness to the table. They capture the feeling of togetherness and celebration that defines the holiday season.
A versatile treat for all ages and celebrations
One of the best things about these cookies is how adaptable they are. Want to involve kids? Set up a decorating station with squeeze bottles and sprinkles. Need an elegant holiday dessert? Use a piping bag and gel colors to create snowflake masterpieces. They’re perfect for school parties, cookie swaps, holiday platters, and even as ornaments hung with ribbon.
Unlike complicated bakes, sugar cookies let everyone join in the fun—regardless of skill level. And because you control the flavors, colors, and shapes, no two batches are ever the same.
Gifting, parties, and holiday traditions
Sugar cookies are the ultimate edible gift. Stack them in a clear box, tie with a bow, and you’ve got a handmade present that feels personal and festive. They also freeze beautifully, so you can get ahead of the holiday rush without sacrificing flavor or texture.
Planning a cookie-decorating party? Try setting up multiple icing stations with different themes (classic red-and-green, snow-white elegance, peppermint pastels) to add variety. Looking for inspiration? Try our Soft Pumpkin Cookies with Cream Cheese Frosting—a cozy option perfect for winter trays.
And if you’re hosting or attending a potluck, a platter of brightly decorated sugar cookies is always a showstopper.
Key Ingredients That Make These Sugar Cookies Perfect
Choosing the right butter, sugar, and flour
The foundation of any great Christmas sugar cookies recipe lies in simple, high-quality ingredients. Start with unsalted butter—it adds a rich, creamy flavor and controls the salt level. Make sure it’s at room temperature (about 65°F). You should be able to press a finger into it gently without it feeling greasy or melting.
For the sugar, stick with granulated white sugar. It helps achieve the cookie’s signature crisp edges while keeping the centers soft. Avoid using brown sugar in this recipe, as it can change both the texture and flavor profile.
Use all-purpose flour and be sure to spoon and level it rather than scooping directly from the bag—this ensures you don’t accidentally pack in too much, which can dry out the dough.
Need another holiday baking project? Don’t miss our Raspberry Cake with Lemon Buttercream—it’s a citrusy showstopper.
Flavor boosters: vanilla, almond extract, and more
While vanilla extract is a must for that classic sugar cookie flavor, you can level up your batch by adding almond extract. Just a quarter to half a teaspoon brings a subtle nutty depth that pairs perfectly with the buttery base.
Want to explore other flavors? Try swapping in a few drops of peppermint extract for a cool twist, or experiment with lemon zest or maple extract for something different. You could even split the dough in half and flavor each differently to create a variety pack.
Here’s a quick breakdown of common flavor enhancers and how much to use:
| Flavoring | Recommended Amount |
|---|---|
| Vanilla Extract | 2 tsp |
| Almond Extract | ¼ – ½ tsp |
| Peppermint Extract | ⅛ – ¼ tsp (it’s strong!) |
| Lemon Zest | 1 tbsp |
| Maple Extract | 1 tsp |
Icing essentials: corn syrup, confectioners’ sugar, food coloring
The cookies may be the star, but the icing is what makes them shine—literally. This glaze-style icing uses confectioners’ sugar, corn syrup, a splash of vanilla, and warm water to create a glossy, smooth texture that’s easy to pipe, squeeze, or dip.
Corn syrup is key. It gives the icing that slight elasticity and sheen while helping it set to a firm (but not rock-hard) finish—ideal for stacking or gifting.
Want white icing? Simply leave out the vanilla and replace it with water. And for colorful designs, go for gel food coloring over liquid. It’s more concentrated, meaning you’ll get vibrant colors without watering down the icing.
Looking for inspiration? Try our Easy Pumpkin Delight Recipe for another holiday-ready dessert that’s big on flavor and short on effort.
Step-by-Step Guide: How to Make Christmas Sugar Cookies
Making the dough: tips for smooth blending
Start by whisking together the dry ingredients: all-purpose flour, baking powder, and a pinch of salt. This sets up the perfect structure for your cookies—light, but sturdy enough to hold their shape after baking.
In a separate bowl, beat the softened unsalted butter with granulated sugar until creamy and smooth—about 2 minutes using a hand or stand mixer. This process is crucial; it introduces air into the dough and ensures a tender crumb.
Next, mix in the egg, vanilla, and almond extract (if using) until fully combined. Then gradually add the flour mixture and beat on low until everything comes together. If the dough feels too sticky, don’t worry—just add an extra tablespoon of flour.
Looking for a seasonal companion recipe? Check out our Homemade Pumpkin Chai Cinnamon Rolls—cozy, sweet, and made for chilly mornings.
Rolling and chilling: secrets to shape-holding cookies
This dough is easiest to handle when rolled before chilling. Divide it into two equal parts and roll each out to ¼-inch thick between floured parchment or silicone mats. This trick prevents sticking and makes transferring the dough to the fridge a breeze.
Once rolled, stack the sheets (separated by parchment) and chill them in the refrigerator for at least 1–2 hours. Chilling helps the cookies hold their sharp edges and prevents them from over-spreading in the oven.
Need more flaky dessert inspiration? Discover great ideas like our Apple Hand Pies with Flaky Crust—they’re perfect for holiday guests.
Cutting, baking, and cooling to perfection
After chilling, remove one sheet at a time and use your favorite holiday-themed cookie cutters to cut shapes—trees, stars, snowflakes, reindeer, you name it. Re-roll scraps as needed and get creative.
Place cookies on parchment-lined baking sheets about 3 inches apart, and bake at 350°F (177°C) for 11–12 minutes. The edges should be set but not browned. Allow cookies to cool on the baking sheet for 5 minutes before transferring to a rack to cool completely.
Pro tip: For consistent baking, rotate your cookie sheet halfway through if your oven has hot spots.
Want another cozy bake to pair with these? Don’t miss our Greek Yogurt Cake Recipe—moist, tender, and crowd-pleasing.
Easy Icing Recipe for Perfectly Decorated Sugar Cookies
How to get the right consistency every time
This icing is a breeze to whip up and doesn’t require the fuss of traditional royal icing. All you need is:
- 3 cups confectioners’ sugar
- 2 tsp light corn syrup
- ½ tsp vanilla extract (or swap with water for stark white icing)
- 4.5 to 5 tbsp warm water
- A pinch of salt
Start by mixing everything in a bowl with a fork. The mixture will feel stiff at first, but slowly loosen as you whisk in the final tablespoons of water. You’re looking for an icing that forms ribbons that hold for 2–3 seconds before sinking back in—thick enough to pipe, but smooth enough to settle.
Need a flavor-packed treat while the cookies dry? Don’t miss our Cream Puffs – Delicious Recipe for an impressive yet easy dessert.
Best tools for decorating like a pro
Skip the stress of pastry bags and try squeeze bottles—they’re beginner-friendly and ideal for kids, too. If you’re going for more detailed designs, use piping bags fitted with Wilton tip #4 for precise outlines and fills.
A few helpful tools to have on hand:
- Silicone baking mats or parchment for easy cleanup
- Gel food coloring (liquid can thin the icing too much)
- Toothpicks for spreading and fine detailing
- Sprinkles and edible glitter for festive flair
Want more holiday-themed bakes? Don’t miss our Jello Divinity – Delicious Recipe for a classic, melt-in-your-mouth confection.
How to store and dry icing properly
Icing takes 24 hours to fully set, so be sure to plan ahead. If you’re decorating with kids or gifting cookies, let them dry on a flat tray at room temperature—no need to cover.
Once dry, cookies can be stacked or packaged without smudging. Want to speed things up? Pop the decorated cookies (on a baking sheet) in the fridge for an hour to firm up the icing slightly.
If you’re not decorating right away, you can store the icing in an airtight container or piping bag in the fridge for up to 2 days. Just bring it back to room temperature before using and add a few drops of water if it stiffens too much.
Creative Decorating Ideas, Variations & Storage Tips
Using holiday-themed cookie cutters
Bring festive flair to your cookies with classic shapes like stars, candy canes, snowflakes, gingerbread men, or Christmas trees. Cookie cutters are an easy way to personalize each batch—and they’re fun for kids and adults alike.
For a show-stopping holiday cookie platter, use a mix of sizes and shapes. Group similar colors or designs together for a pro-level presentation. Pro tip: For crisp edges, always chill your dough after rolling and before cutting.
Want a festive cookie with a soft center and a gooey surprise? Don’t miss our Pumpkin Pie Bread Pudding with Challah—a cozy option to pair with cookies.
Gel food coloring vs. liquid: which to choose
If you want vibrant icing that holds its shape, always go with gel food coloring. Unlike liquid versions, gel won’t thin out your icing, so the consistency stays perfect for decorating.
Start with a drop or two and build up to your desired shade—remember, the colors deepen as the icing dries. Divide your icing into bowls before tinting to create multiple shades for one batch.
Want to take your cookies to the next level? Add metallic luster dust, sanding sugar, or holiday-themed sprinkles for texture and sparkle.
Kid-friendly decorating tips
Set up a “cookie decorating station” with:
- Squeeze bottles filled with colored icing
- Assorted sprinkles, chocolate chips, or edible glitter
- Mini spatulas or butter knives
- Plastic aprons or holiday-themed placemats
Keep things mess-free by placing cookies on rimmed baking sheets or parchment before decorating. Let kids go wild with creativity—it’s less about perfection and more about fun memories!
Looking for inspiration? Try our Pumpkin Spice Waffles Recipe for another cozy kitchen activity the whole family can enjoy.
How to freeze, store & ship sugar cookies
Whether you’re prepping early or sending cookies across the country, storage matters.
To freeze dough:
- Shape into discs, wrap tightly in plastic wrap
- Store in a zip-top freezer bag for up to 3 months
- Thaw in fridge, then bring to room temp before rolling and baking
To freeze baked cookies:
- Wait until icing is completely set
- Layer between parchment in a container and freeze for up to 3 months
- Thaw uncovered at room temperature to avoid condensation
To store at room temp:
- Keep decorated cookies in an airtight container for up to 5 days
- Separate layers with wax or parchment paper
To ship:
- Package cookies snugly with padding
- Use sturdy containers and label as fragile
- Ship early in the week to avoid weekend delays

Frequently Asked Questions (FAQ)
How far in advance can I make sugar cookies for Christmas?
You can make the cookie dough up to 2 days ahead and store it in the fridge wrapped tightly in plastic. Baked cookies (without icing) last about 1 week at room temperature, while iced cookies stay fresh for up to 5 days in an airtight container. For long-term storage, freeze baked or decorated cookies for up to 3 months.
How long does the icing take to dry?
This easy glaze icing typically takes 24 hours to fully set at room temperature. While you can enjoy the cookies earlier, stack or package them only after the icing is completely firm and dry to avoid smearing.
Can I use margarine instead of butter?
Technically, yes—but you’ll sacrifice both flavor and texture. Margarine contains more water and less fat than real butter, which may lead to spreading and flatter cookies. For best results, stick with unsalted butter.
What’s the best way to get sharp cookie cutter edges?
Roll your dough to ¼ inch thickness, chill it thoroughly before cutting, and use metal cookie cutters with a firm press. Re-chill the cut shapes before baking to help them maintain their sharp outlines.
How do I keep cookies from spreading too much?
This is all about the chilling step. Roll out the dough before chilling, refrigerate for at least 1–2 hours, and keep it cold until ready to cut and bake. Over-mixing and too-warm butter can also cause spreading, so use room-temp butter that’s still cool to the touch—not greasy or melty.
Final Thoughts: Celebrate the Holidays with the Best Christmas Sugar Cookies
Whether you’re starting a new tradition or perfecting an old favorite, Christmas sugar cookies are the ultimate holiday treat. Their buttery-soft centers, crisp edges, and easy-to-use icing make them ideal for decorating, gifting, and indulging. With just a few simple ingredients and some festive flair, you can turn an ordinary afternoon into a memory-making holiday moment.
So grab your rolling pin, preheat the oven, and get ready to bake cookies that will steal the show at any holiday gathering.
Looking for your next baking adventure? Don’t miss our No-Bake Lemon Blueberry Delight for a refreshing twist after all that holiday sweetness.
PrintChristmas Sugar Cookies
Classic Christmas sugar cookies with soft centers, crisp edges, and an easy glaze icing. Perfect for decorating, gifting, or holiday celebrations.
- Prep Time: 1 hour 30 minutes (includes chilling)
- Cook Time: 12 minutes
- Total Time: 1 hour 45 minutes + 24 hours icing dry time
- Yield: 24 cookies
- Category: Dessert
- Method: Baking
- Cuisine: American
- Diet: Vegetarian
Ingredients
- 2 1/4 cups (281g) all-purpose flour
- 1/2 teaspoon baking powder
- 1/4 teaspoon salt
- 3/4 cup (170g) unsalted butter, softened to room temperature
- 3/4 cup (150g) granulated sugar
- 1 large egg, at room temperature
- 2 teaspoons pure vanilla extract
- 1/4 to 1/2 teaspoon almond extract (optional)
- 3 cups (360g) confectioners’ sugar (for icing)
- 1/2 teaspoon vanilla extract (for icing)
- 2 teaspoons light corn syrup (for icing)
- 4.5–5 tablespoons (67–75ml) warm water (for icing)
- Pinch of salt (for icing)
- Optional: gel food coloring, sprinkles for decorating
Instructions
- Whisk the flour, baking powder, and salt in a bowl. Set aside.
- Beat butter and sugar together until smooth and creamy, about 2 minutes.
- Add egg, vanilla extract, and almond extract. Mix until combined.
- Gradually add dry ingredients. Mix until soft dough forms.
- Divide dough into two portions. Roll each to 1/4-inch thickness on parchment.
- Stack rolled-out dough with parchment between layers. Chill for 1–2 hours.
- Preheat oven to 350°F (177°C). Line baking sheets with parchment.
- Cut chilled dough into shapes using cookie cutters.
- Place cookies 3 inches apart on sheets. Bake for 11–12 minutes until edges are lightly browned.
- Cool on baking sheet for 5 minutes, then transfer to wire rack to cool completely.
- To make icing, stir together confectioners’ sugar, vanilla, corn syrup, salt, and 4.5 tbsp water. Add more water to reach correct consistency.
- Tint icing with gel food coloring as desired.
- Decorate cooled cookies with icing using squeeze bottles or piping bags.
- Allow icing to dry at room temperature for 24 hours before stacking or storing.
Notes
- Chilling dough is essential to prevent spreading.
- Gel food coloring is preferred to maintain icing consistency.
- Cookies can be frozen before or after baking for up to 3 months.
- Decorated cookies can be stored for up to 5 days at room temperature.
- To avoid sticky dough, ensure butter is room temperature—not too soft or melted.
Nutrition
- Serving Size: 1 cookie
- Calories: 160
- Sugar: 14g
- Sodium: 45mg
- Fat: 6g
- Saturated Fat: 4g
- Unsaturated Fat: 1.5g
- Trans Fat: 0g
- Carbohydrates: 24g
- Fiber: 0g
- Protein: 1g
- Cholesterol: 20mg