If you love peanut butter cups and festive desserts, these Chocolate Peanut Butter Christmas Trees are about to become your new holiday favorite. Inspired by the classic Reese’s shapes, this no-bake treat delivers all the creamy, chocolaty magic of peanut butter cups—but in a fun, tree-shaped twist perfect for Christmas. Whether you’re planning to gift them, serve them at a holiday party, or enjoy them with your family, these adorable chocolate-covered trees will steal the show. Plus, they’re freezer-friendly and easy to prep in batches, making them the ideal addition to your Christmas baking lineup. Looking for more seasonal inspiration? Check out our Christmas Tree Deviled Eggs Recipe for another festive holiday favorite.
JUMP TO
Table of Contents
Why These Chocolate Peanut Butter Christmas Trees Are a Must-Try
Inspired by the Classic Reese’s Holiday Treat
These sweet trees pay homage to the beloved Reese’s Holiday Peanut Butter Trees. But here’s the twist—they’re even better. With a thicker peanut butter center and premium chocolate coating, you get more of the good stuff in every bite. It’s the nostalgic flavor we all crave during the holidays, just elevated and homemade.
Perfect for Gifting, Parties, or Snacking
Want to wow guests at your cookie exchange? Or maybe you’re hunting for a thoughtful, edible gift? These chocolate peanut butter trees check every box. Wrap them in a festive bag with a ribbon, or layer them in a holiday tin—they hold their shape and texture beautifully. Plus, they make excellent snackable treats for movie nights, game days, and everything in between. Don’t miss our Santa Claus Macarons Recipe for another sweet gift idea.
No-Bake, Kid-Friendly, and Festive Fun
No oven required! This is a perfect holiday recipe for kids to join in. From rolling the dough to cutting tree shapes and dipping in chocolate, there are so many ways little hands can help. Plus, decorating with a chocolate drizzle or holiday sprinkles adds a layer of creativity to this already delightful process.
Ingredients Needed to Make Chocolate Peanut Butter Christmas Trees
Creating these delicious no-bake trees doesn’t require fancy ingredients—just a few pantry staples and the right tools to bring everything together. Here’s exactly what you’ll need.
Peanut Butter Filling Essentials
The base of these trees is a smooth, creamy peanut butter dough that closely mimics Reese’s filling but with a richer homemade taste.
| Ingredient | Amount | Notes |
|---|---|---|
| Unsalted butter | ½ cup | Room temperature (not melted, just softened) |
| Granulated sugar | ¼ cup | Helps give a little bite and sweetness |
| Creamy peanut butter | 2 cups | Skippy or any high-quality smooth peanut butter |
| Salt | ½ teaspoon | Balances the sweetness |
| Vanilla extract | 1 tablespoon | Mexican vanilla adds extra depth |
| Powdered sugar | 4 cups | No need to sift—add slowly when mixing |
Pro Tip: Avoid natural peanut butter. You want the stability and sweetness of a classic brand to get the right texture.
Choosing the Right Chocolate for the Shell
The outer layer is what locks in that creamy peanut butter goodness. Go for premium chocolate melts that provide a silky coating and snappy shell.
| Ingredient | Amount | Notes |
|---|---|---|
| Ghirardelli Melting Chocolate | 6 cups | Rich flavor, easy to melt, smooth finish |
Looking for more rich and festive desserts? Discover great ideas like our Red Velvet Crinkle Cookies Recipe.
Tools You’ll Need (Cookie Cutter, Parchment, etc.)
To shape and decorate your trees like a pro, be sure to have these items ready:
- Tree-shaped cookie cutter
- Parchment paper
- Rolling pin
- Two cookie sheets
- Microwave-safe bowl for melting chocolate
- Fork for dipping
- Optional: piping bag or squeeze bottle for drizzling
Step-by-Step Instructions for Creating Your Holiday Trees
Making the Perfect Peanut Butter Dough
- In a stand mixer with paddle attachment, beat the butter, granulated sugar, and peanut butter until smooth and fluffy.
- Add salt, vanilla, and powdered sugar a little at a time. Mix slowly at first, then whip on high to create a thick, moldable dough.
Cutting and Freezing for the Ideal Shape
- Roll the dough between two sheets of parchment paper to about ½ inch thick.
- Transfer the rolled dough (still in parchment) onto a cookie sheet and freeze for 30 minutes.
- Once chilled, peel off the top parchment layer and cut tree shapes using your cookie cutter.
- Place the tree cutouts onto a second parchment-lined cookie sheet.
- Re-freeze the trees for another 30 minutes until nearly frozen. This step ensures easy dipping without mess.
Looking for inspiration? Try our Easy Strawberry Santa Treats for another festive no-bake option.
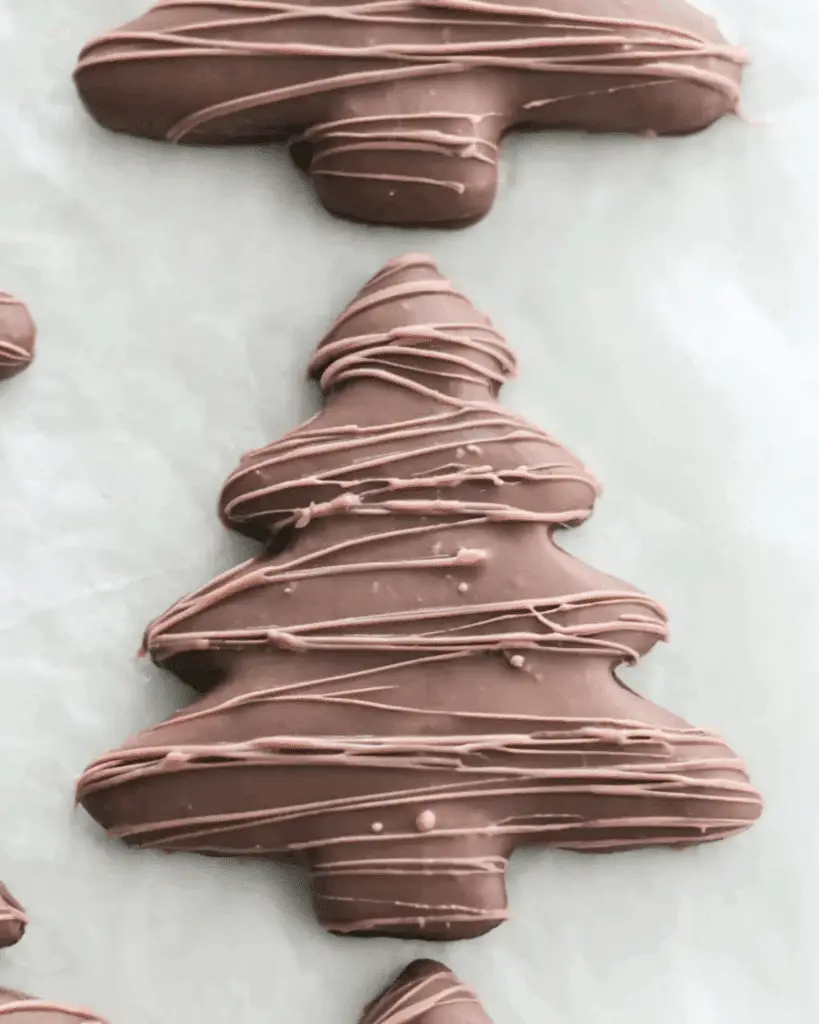
Coating the Trees with Chocolate & Adding Drizzle
- Melt the chocolate in a microwave-safe bowl. Start with 1 minute, stir, then heat in 30-second intervals until fully melted and smooth.
- Working in small batches (2–3 trees at a time), dip each tree into the chocolate using a fork.
- Tap off the excess chocolate and lay each coated tree on a parchment-lined tray.
- Optional: Pour leftover chocolate into a piping bag or squeeze bottle and drizzle zig-zag patterns across the tops.
- Let set at room temp or refrigerate briefly until the chocolate is firm.
For even more creative dessert twists, don’t miss our Cherry Snowball Cookies Recipe—perfect for your cookie platter!
Expert Tips to Make Your Chocolate Peanut Butter Christmas Trees Perfect
Even though this recipe is beginner-friendly, a few expert tips can take your peanut butter trees from great to showstopping.
Keeping the Dough Cold for Easy Handling
Temperature control is key. Since the dough is soft, keeping it cold makes cutting and dipping much easier. Always freeze the dough before shaping and again before coating. If it starts to soften while you work, pop it back in the freezer.
Dipping Without the Mess
To avoid fingerprints and broken trees, use a fork for dipping and tapping off excess chocolate. Work in small batches (2–3 at a time) so the trees stay cold until you’re ready to coat them.
Storage and Shelf Life Tips
Once the chocolate has fully set, transfer the trees to an airtight container. They’ll stay fresh in the fridge for up to two weeks. You can also freeze them—just layer with parchment to prevent sticking.
Looking for something refreshing to serve on the side? Don’t miss our Christmas Apple Cranberry Spritzer—a festive drink that pairs perfectly with these sweet treats.
Creative Twists on the Classic Peanut Butter Christmas Trees
Looking to switch things up? Here are some fun variations to make these trees your own.
Mini Trees for Bite-Sized Treats
Use a smaller cookie cutter to create adorable mini trees. These are perfect for cookie trays, classroom gifts, or portion control (if you’re into that sort of thing).
Add-Ons: Sprinkles, Sea Salt, Crushed Candy Canes
Before the chocolate sets, decorate your trees with:
- Crushed peppermint for a minty finish
- Flaky sea salt to enhance the sweetness
- Holiday sprinkles for festive flair
These small additions make a big difference in presentation and flavor.
Vegan & Allergy-Friendly Substitutions
To make these dairy-free, use plant-based butter and vegan chocolate melts. For nut allergies, swap the peanut butter with sunflower seed butter or almond butter.
Want a plant-based crowd-pleaser? Check out our 3-Ingredient Keto Pumpkin Cookies—delicious and guilt-free.
Frequently Asked Questions (FAQ)
Can I freeze the peanut butter Christmas trees?
Yes! After the chocolate coating has hardened, layer the trees between parchment paper and freeze in an airtight container for up to 2 months.
How long do they last once coated in chocolate?
Stored in the fridge, they’ll stay fresh for up to 2 weeks. If left at room temperature, aim to consume them within 5–7 days.
Can I use almond or sunflower butter instead of peanut butter?
Absolutely. The flavor will be slightly different, but both almond butter and sunflower butter work well, especially for dietary restrictions.
Do I need a specific type of cookie cutter?
Any Christmas tree-shaped cutter will work. We recommend medium-sized metal cutters for the cleanest edges. Silicone cutters may warp the shape slightly.
Final Thoughts on Making Chocolate Peanut Butter Christmas Trees
These Chocolate Peanut Butter Christmas Trees aren’t just a sweet holiday treat—they’re a holiday tradition waiting to happen. They combine the nostalgia of Reese’s cups with the joy of homemade desserts and are endlessly customizable. Whether you’re gifting them or saving every last one for yourself, you’ll be glad you made the effort.
Don’t miss our Christmas Kitchen Sink Cookies for another over-the-top festive baking idea!
PrintChocolate Peanut Butter Christmas Trees
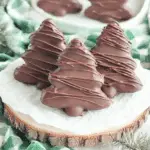
These Chocolate Peanut Butter Christmas Trees are a no-bake holiday treat inspired by Reese’s. With a rich, creamy peanut butter center and a smooth chocolate shell, they are perfect for gifting, parties, or indulging during the festive season.
- Prep Time: 1 hour
- Cook Time: 0 minutes
- Total Time: 1 hour 30 minutes
- Yield: 24 trees (approx.)
- Category: Dessert
- Method: No-Bake
- Cuisine: American
- Diet: Vegetarian
Ingredients
- 1/2 cup unsalted butter (softened)
- 1/4 cup granulated sugar
- 2 cups creamy peanut butter
- 1/2 teaspoon salt
- 1 tablespoon vanilla extract
- 4 cups powdered sugar
- 6 cups Ghirardelli melting chocolate
Instructions
- In a stand mixer, beat butter, sugar, and peanut butter until fluffy.
- Add salt, vanilla, and powdered sugar gradually. Mix on low, then whip on high to form a dough.
- Roll the dough between two parchment sheets to 1/2 inch thick.
- Transfer dough on parchment to a cookie sheet and freeze for 30 minutes.
- Remove top parchment and use a tree-shaped cookie cutter to cut out shapes.
- Place shaped dough on another parchment-lined sheet and freeze for 30 more minutes.
- Melt chocolate in the microwave in 30-second intervals until smooth.
- Dip 2–3 frozen trees at a time into melted chocolate using a fork; tap off excess.
- Place dipped trees on parchment paper and let chocolate firm up.
- Optional: Drizzle remaining melted chocolate on top for decoration.
Notes
- Use classic peanut butter (not natural) for best texture.
- Freeze twice to ensure easy handling and dipping.
- Store in an airtight container for up to two weeks.
- Decorate with sprinkles, crushed candy canes, or sea salt before chocolate sets.
- Mini cookie cutters work well for bite-sized versions.
Nutrition
- Serving Size: 1 tree
- Calories: 220
- Sugar: 18g
- Sodium: 90mg
- Fat: 14g
- Saturated Fat: 5g
- Unsaturated Fat: 7g
- Trans Fat: 0g
- Carbohydrates: 21g
- Fiber: 1g
- Protein: 4g
- Cholesterol: 5mg