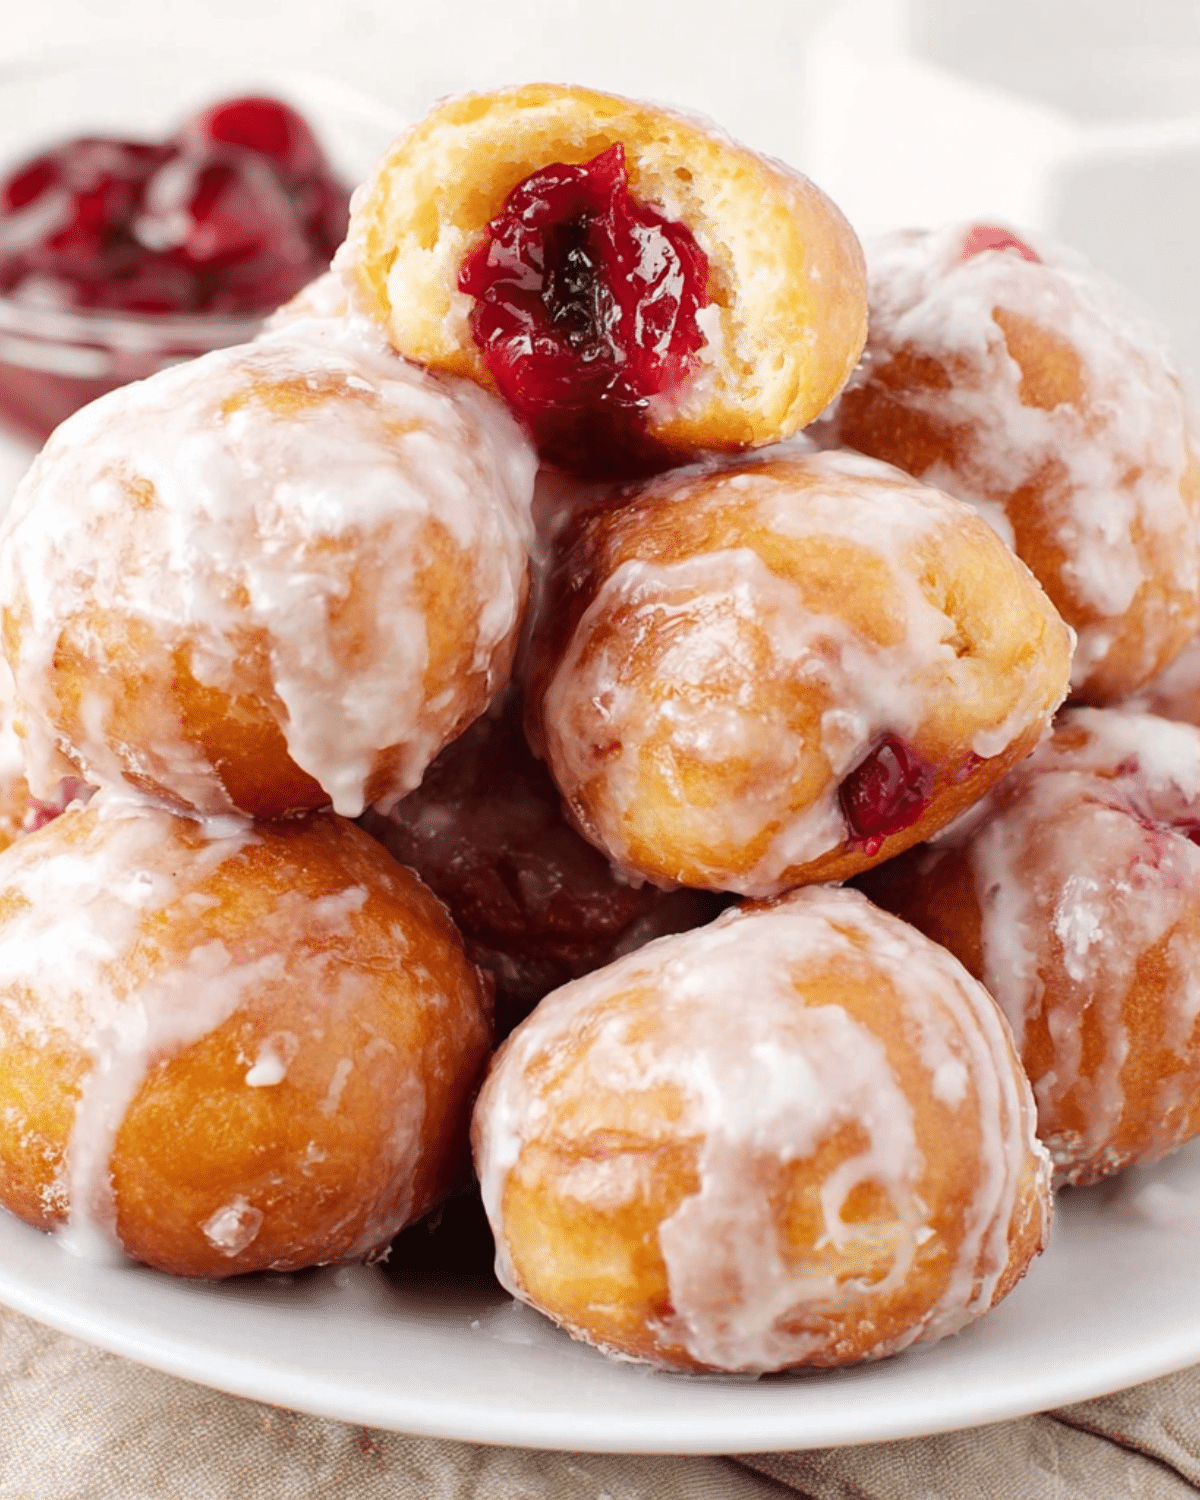
If you love bite-sized desserts that are crispy on the outside and bursting with sweet cherry flavor inside, you’re going to adore these easy cherry pie bombs. This simple yet impressive treat wraps gooey cherry pie filling in buttery biscuit dough, fries it to a golden brown, and tops it all off with a sugary glaze that sets just right. Whether you’re planning a cozy weekend dessert, a party platter, or a fun baking session with the kids, cherry pie bombs are guaranteed to steal the spotlight. Don’t miss our cheesy meatball bombs if you’re into creative “bomb” style recipes.
JUMP TO
Table of Contents
What Are Cherry Pie Bombs and Why They’re So Popular
A twist on classic cherry pie in a handheld treat
Cherry pie bombs are a fun, mess-free alternative to traditional cherry pie. Instead of rolling out pie dough and slicing a full pie, you get handheld, snackable bombs of flavor. Think of them as the dessert version of a biscuit-wrapped donut hole—with a luscious cherry surprise inside.
Originally popularized as a quick dessert hack, they’ve gone viral thanks to their crispy texture, juicy filling, and how fast they disappear at parties. They’re perfect for last-minute gatherings or when that cherry pie craving hits hard but time is short.
The irresistible combo of flaky biscuit and sweet cherry filling
What makes cherry pie bombs stand out is the contrast in texture: the flaky biscuit shell crisps up beautifully when fried, while the cherry filling stays gooey and warm inside. Each bite gives you that nostalgic cherry pie flavor without the effort of baking from scratch.
The outer shell, typically made from prepackaged flaky biscuit dough like Grands, turns golden and puffy with minimal effort. That’s part of the magic—no pastry skills required, just a few pantry staples and a little time.
Essential Ingredients for the Perfect Cherry Pie Bombs
Best type of biscuit dough to use (Grands vs others)
Most successful cherry pie bomb recipes start with refrigerated Grands “Big” flaky biscuits. Their layers make it easy to split them in half and wrap around the filling. However, you can use regular-sized biscuits for smaller bombs. Just adjust the amount of filling to avoid leaks.
If you can’t find Grands, other flaky biscuit dough will still work, but avoid doughs that are too thin or overly buttery, as they may split during frying.
Using canned vs. homemade cherry pie filling
Canned cherry pie filling is the go-to for ease and consistent results. It has the right texture to stay intact during frying, and the thickened juice helps keep the filling from leaking out. If you’re feeling adventurous, you can swap in homemade cherry filling—but make sure it’s thick and cooled before using.
Looking for inspiration? Try our apple crisp dessert if you’re into warm, fruit-based treats with a flaky topping.
Optional ingredients for glaze and flavor twists
The signature glaze on cherry pie bombs is a simple mix of powdered sugar, milk, and corn syrup. This glaze sets perfectly and adds that glossy finish, similar to what you see on bakery donuts.
You can personalize your glaze by adding a drop of vanilla or almond extract, or switch it up with a lemon or orange twist to complement the cherry flavor.
For those with a sweet tooth, don’t miss our magic brownie cookies, another crowd-pleasing, gooey dessert you’ll want to add to your list.
Step-by-Step: How to Make Cherry Pie Bombs at Home
Prepping the dough and filling correctly
Start by opening a can of flaky biscuits—Grands “Big” biscuits are ideal. Split each biscuit in half along the natural flaky layers, then gently flatten them with your fingers or a rolling pin. Don’t roll the dough too thin—just enough to hold the filling securely.
Spoon about a tablespoon of cherry pie filling into the center of each dough circle. Avoid overfilling, as this can cause leakage during frying. Carefully pinch the dough edges to fully seal the filling inside, then shape the sealed edge underneath into a neat ball. This helps the pie bombs fry evenly and hold their shape.
Frying techniques for golden perfection
Heat vegetable oil in a heavy-bottomed saucepan to precisely 325°F. This lower frying temperature ensures the biscuit dough cooks through without over-browning the outside. Drop in two to three dough balls at a time—don’t overcrowd the pan.
Use a slotted spoon to gently rotate the pie bombs in the oil. This helps them brown evenly and prevents sticking. Fry until all sides are golden brown—about five minutes. Be sure to monitor the temperature and adjust the heat to maintain consistent cooking. Too hot, and the dough will burn. Too cool, and the centers won’t cook through.
Once golden, transfer the pie bombs to a paper towel-lined plate to drain excess oil. Repeat until all are fried.
Check out our cookie empanadas recipe for another filled dessert twist that’s equally fun to make.
Making the glaze and applying it evenly
While the pie bombs cool slightly, whisk together 2 cups of powdered sugar, ¼ cup of milk, and 1 tablespoon of light corn syrup. This simple glaze adds a shiny finish and locks in the flavor. The corn syrup is optional but recommended for that perfect sheen and slightly firm set.
Toss each pie bomb in the glaze while still warm, letting the excess drip off. Set on parchment paper or a cooling rack to allow the glaze to dry—about 10 minutes. You can also dip just the tops if you prefer less sweetness.
Baking or Air Frying Cherry Pie Bombs: A Healthier Option?
Oven instructions for crispy results without oil
If frying isn’t your thing, you can easily bake cherry pie bombs instead. Preheat your oven to 350°F and place the sealed dough balls on a parchment-lined baking sheet. Brush each one with a little melted butter or milk for a golden finish.
Bake for 12–15 minutes or until they’re puffed and golden. The filling may bubble slightly, so leave space between bombs. Once out of the oven, let them cool a few minutes before glazing.
This method reduces oil and cleanup while still giving you that flaky crust.
Air fryer method and time/temp tips
To air fry, preheat your air fryer to 325°F. Place bombs in a single layer in the basket—don’t overcrowd. Lightly spray with cooking oil. Cook for 8–10 minutes, flipping halfway through for even browning.
Air frying gives you the crispy exterior you crave without deep frying. It’s fast, convenient, and great for small batches.
Looking for a quick dessert that doesn’t need baking? Don’t miss our pineapple dump cake—it’s easy, fruity, and done in minutes.
Pros and cons vs. traditional frying
While baking and air frying are healthier and cleaner, frying gives you that ultra-crisp, golden-brown shell that’s hard to replicate. On the flip side, baked and air-fried versions are lighter and slightly less greasy—great if you’re watching your oil intake or cooking with kids.
Ultimately, the best method depends on your time, tools, and taste preferences.
Tips for Serving, Storing, and Reheating
Make-ahead and freezing methods
You can prep cherry pie bombs ahead of time by assembling the dough balls with filling and freezing them un-fried. Place them on a baking sheet until solid, then transfer to a freezer-safe bag. When ready to cook, fry or bake directly from frozen—just add a few extra minutes to the cook time.
Best way to store leftovers
Store fully cooked pie bombs in an airtight container at room temperature for up to 24 hours. If glazed, separate layers with parchment paper. For longer storage, refrigerate them for up to 3 days, though they may lose some of their crispiness.
Want to add a festive pie to your next holiday meal? Try our eggnog pie for a rich, seasonal dessert option.
How to reheat for crispiness
For best results, reheat in a toaster oven or air fryer at 325°F for 3–5 minutes. This restores the crispy texture. You can microwave them for 10–15 seconds in a pinch, but they may become soft. Avoid overheating, as this can cause the filling to ooze out.
Frequently Asked Questions (FAQ)
Can I bake cherry pie bombs instead of frying?
Yes, absolutely. While frying gives you the crispiest finish, baking is a great alternative if you prefer less oil. Bake at 350°F for 12–15 minutes until golden brown. You can also air fry them for an even quicker and healthier method.
How do I keep the filling from leaking out?
The key is in sealing the dough well. After placing the cherry filling in the center, pinch the edges tightly and roll the seam under. This helps lock in the filling and keeps the bombs intact during cooking.
Can I make these with other pie fillings?
Definitely! These bombs are versatile. Try apple, blueberry, peach, or even pumpkin filling for seasonal variations. Just be sure the filling isn’t too runny, or it may leak during frying or baking.
Are cherry pie bombs freezer-friendly?
Yes. You can freeze them before frying. Arrange the assembled, un-fried dough balls on a tray, freeze until firm, then transfer to a freezer bag. Cook from frozen by adding a few extra minutes to the frying or baking time.
What oil is best for frying desserts?
Neutral oils with high smoke points like vegetable, canola, or peanut oil are ideal. They ensure safe frying and won’t alter the flavor of your cherry pie bombs.
Final Thoughts on Making Cherry Pie Bombs at Home
Why this recipe is a must-try for every dessert lover
Cherry pie bombs strike the perfect balance between nostalgic flavor and modern convenience. With minimal ingredients, no need for pie crust skills, and quick cooking options, this is a recipe even beginner bakers can master. They’re quick, cute, and crowd-pleasing—what’s not to love?
They also serve as a blank canvas for creativity. Want to turn these into a brunch showstopper? Try dusting them with cinnamon sugar or adding a cream cheese center. Hosting a party? Make a trio with different fillings and glazes.
Discover great ideas like our chocolate chip banana cookies for other easy-to-make, irresistible sweets that your whole family will love.
Easy variations to impress your guests
Looking to level up? Here are a few creative spins on the classic cherry pie bomb:
- Drizzle with white chocolate after glazing
- Top with crushed graham crackers for a pie crust feel
- Add almond extract to the filling or glaze for a cherry-almond twist
- Stuff with chocolate chips for double-layer flavor bombs
No matter how you tweak them, these little treats deliver big satisfaction. And if you love creative, comforting desserts, don’t miss our apple bread pudding, a warm and hearty classic.
PrintCherry Pie Bombs

Cherry pie bombs are quick and delicious bite-sized desserts made with flaky biscuit dough filled with sweet cherry pie filling, deep-fried to golden perfection, and coated in a sugary glaze.
- Prep Time: 10 minutes
- Cook Time: 5 minutes
- Total Time: 15 minutes
- Yield: 16 pie bombs
- Category: Dessert
- Method: Frying
- Cuisine: American
- Diet: Vegetarian
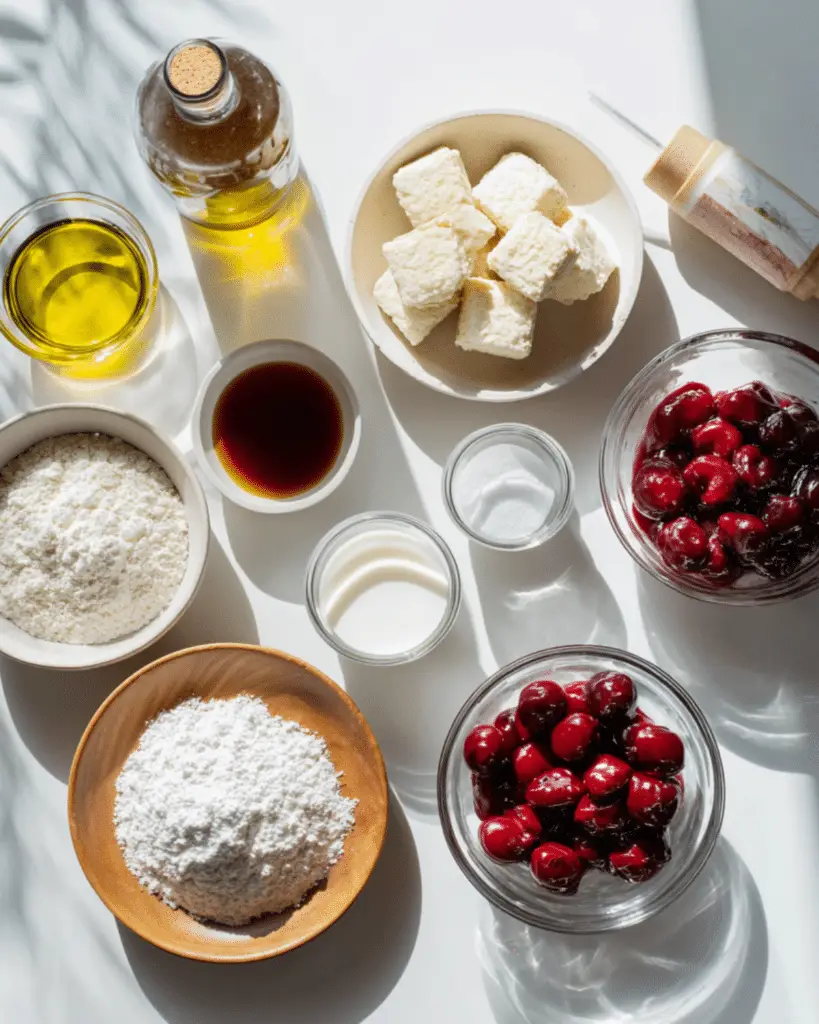
Ingredients
- Vegetable oil, for frying
- 1 (16.3-ounce) can of Grands “Big” biscuits, flaky
- 1 (21-ounce) can of cherry pie filling
- 2 cups powdered sugar
- 1/4 cup milk
- 1 tablespoon light corn syrup
Instructions
- Fill a heavy-bottomed saucepan halfway with vegetable oil and set aside.
- Open the biscuit can and split each biscuit in half using the flaky layers.
- Flatten each half slightly using your fingers or a rolling pin.
- Place 1 tablespoon of cherry pie filling in the center of each dough piece.
- Pinch the edges to seal, roll into a ball, and tuck the seam under.
- Heat the oil to 325°F and maintain this temperature during frying.
- Fry 2–3 bombs at a time for about 5 minutes, rotating to ensure even browning.
- Remove and drain on paper towels.
- In a bowl, whisk together powdered sugar, milk, and corn syrup to make glaze.
- Dip each pie bomb in the glaze and let excess drip off.
- Place on parchment or a rack to let the glaze set for 10 minutes before serving.
Notes
- Do not overcrowd the frying pan to ensure even cooking.
- Keep oil temperature steady at 325°F for best results.
- Glaze can be customized with extracts like vanilla or almond.
- Make ahead and freeze assembled (unfried) pie bombs for quick desserts later.
- Alternative cooking methods include oven-baking and air frying.
Nutrition
- Serving Size: 1 pie bomb
- Calories: 213 kcal
- Sugar: 17 g
- Sodium: 281 mg
- Fat: 5 g
- Saturated Fat: 1 g
- Unsaturated Fat: 4 g
- Trans Fat: 0 g
- Carbohydrates: 41 g
- Fiber: 1 g
- Protein: 2 g
- Cholesterol: 1 mg