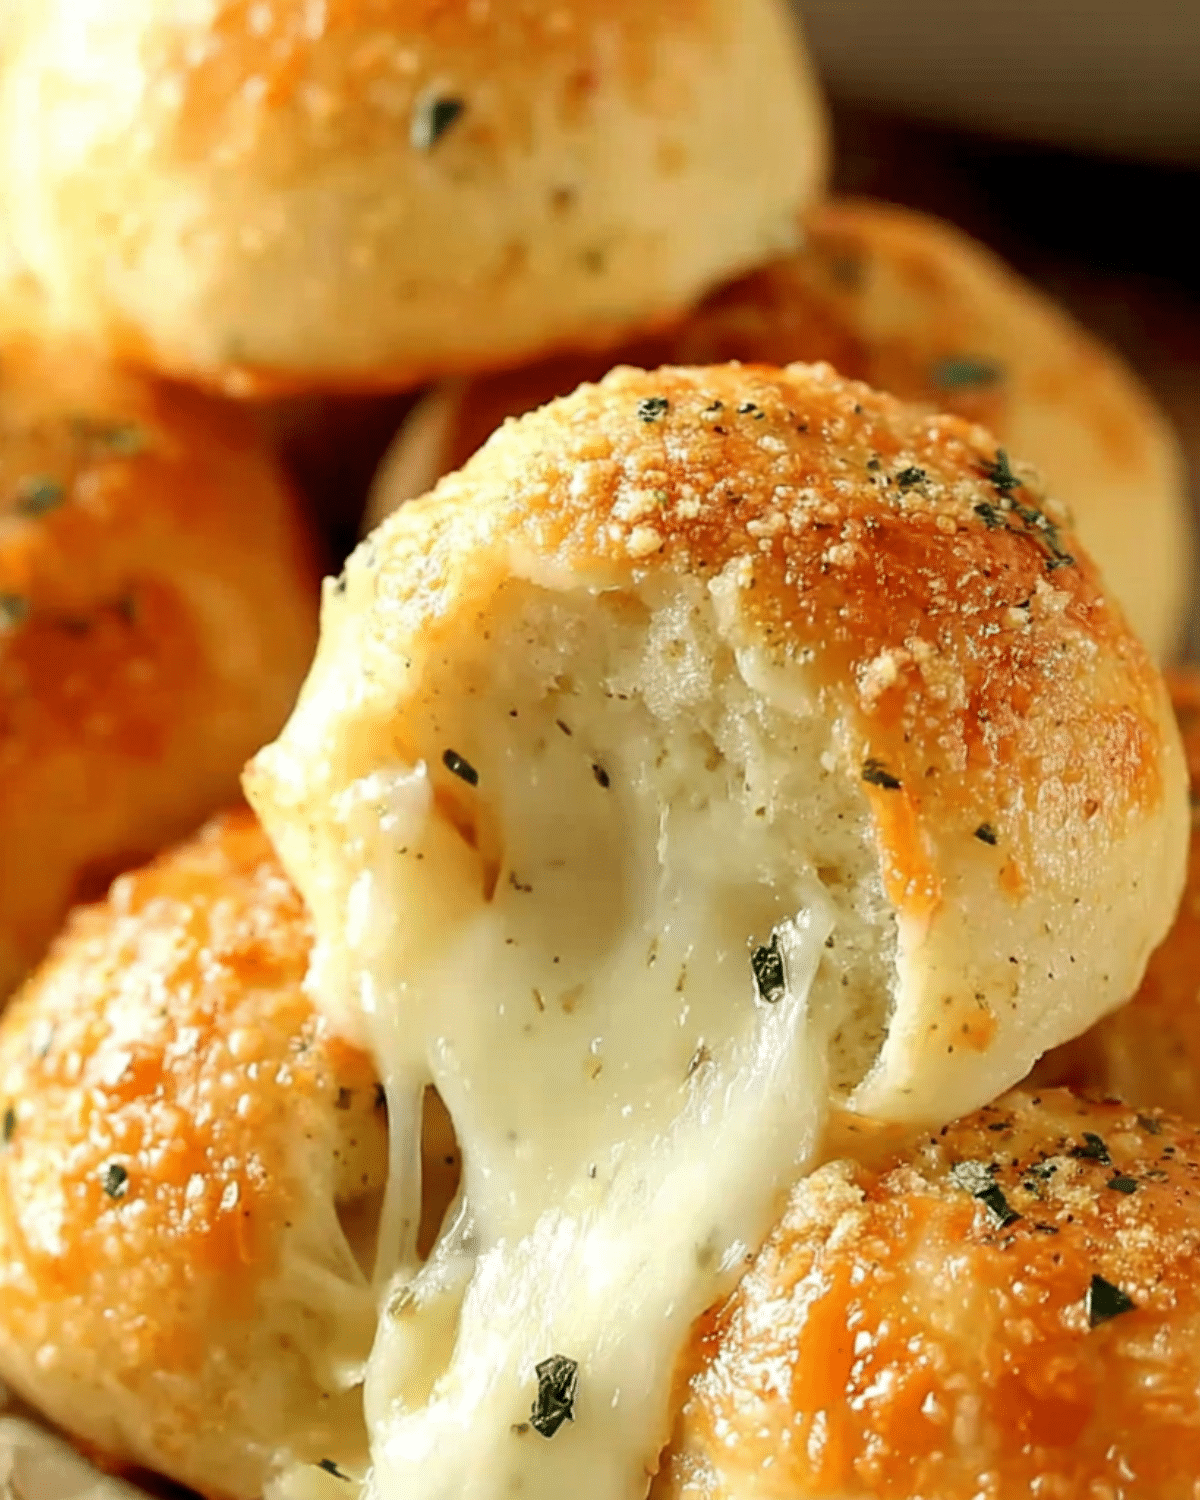
When it comes to comfort food, few things beat the rich aroma of garlic and the gooey stretch of melted cheese. That’s exactly what you get with cheesy garlic bombs—soft, golden bites stuffed with molten cheese and brushed with buttery garlic topping. These little treasures are more than just snacks; they’re the kind of treat that brings people together whether it’s for game day, a potluck, or a quick family dinner side. With just a handful of pantry staples and less than 20 minutes of cook time, they’ve become a viral favorite for home cooks everywhere. Looking for inspiration? Try this easy garlic butter shrimp recipe as another fast, flavor-packed dish that pairs beautifully with these cheesy delights.
JUMP TO
Table of Contents
Why Cheesy Garlic Bombs Are the Ultimate Party Snack
The irresistible combo of garlic, butter, and cheese
The magic behind cheesy garlic bombs lies in the holy trinity of flavor: garlic, butter, and cheese. Every bite delivers the same satisfaction as tearing into garlic bread, but with a molten, cheesy center that takes it up a notch. The buttery glaze seeps into the soft dough, ensuring each piece is loaded with rich, savory goodness.
Quick prep and minimal ingredients
One of the biggest perks of this recipe is how accessible it is. You don’t need to be a seasoned baker—just grab a can of refrigerated biscuits, a block of mozzarella, and a few spices. From there, it’s a simple matter of stuffing, sealing, and baking. No waiting for dough to rise, no complicated techniques, just pure flavor in under 20 minutes. For another effortless comfort food, check out Air Fryer Buffalo Chicken Quesadillas.
Perfect for game nights, holidays, and potlucks
Cheesy garlic bombs are made for sharing. They’re bite-sized, easy to serve, and almost impossible to resist, making them ideal for parties and gatherings. Pair them with marinara sauce or ranch dip, and they’ll be the first dish to vanish from the table. Don’t miss our crispy onion rings recipe if you’re building the ultimate snack platter.
Ingredients for Cheesy Garlic Bombs That Make Them Perfect
Choosing the right dough (biscuits, pizza, or puff pastry)
The base of your garlic bombs sets the tone for the whole dish. Most people prefer refrigerated biscuit dough because it’s soft, reliable, and easy to seal around cheese. If you want a chewier bite, pizza dough works beautifully, while puff pastry gives you a flakier, buttery texture. No matter which dough you choose, make sure it’s sturdy enough to hold the filling without breaking apart. Learn more about dough options with our homemade pizza dough recipe.
Best cheeses to use beyond mozzarella
Mozzarella is the classic choice thanks to its gooey melt and mild flavor. But don’t stop there—sharp cheddar adds a tangy punch, pepper jack brings heat, and gouda offers a creamy, nutty twist. For an indulgent bite, you can even mix cheeses. Try mozzarella and cheddar together for the best of both worlds. Check out our cheesy baked mac and cheese for more melty cheese inspiration.
Garlic butter topping: herbs, seasonings, and hacks
The real flavor booster comes after baking, when you brush your bombs with garlic butter. Start with unsalted butter, then add garlic powder, dried parsley, and a pinch of salt. Want to get creative? Toss in Italian seasoning, red pepper flakes, or even a drizzle of honey for a sweet-savory twist. And if you’re a garlic lover, fresh minced garlic sautéed in the butter takes things to the next level. Don’t miss our garlic butter roasted potatoes for another way to enjoy this classic combo.
Step-by-Step Instructions to Make Cheesy Garlic Bombs
How to stuff and seal the dough for maximum gooeyness
Start by flattening each piece of dough slightly in your hand. Place a cube of cheese or a chunk of string cheese in the center. Gather the edges and pinch them together tightly so no cheese leaks out. Rolling the sealed dough gently in your palms ensures a smooth, round shape. Place seam-side down on a lined baking sheet for best results.
Baking tips for golden, fluffy garlic bombs
Preheat your oven to 400°F (200°C). Bake the bombs for 10–12 minutes, or until golden brown and puffed. Rotate the baking tray halfway through to ensure even cooking. Keep an eye on them toward the end—overbaking can dry them out. A perfectly baked garlic bomb will look golden on the outside and feel light and airy when you touch it.
Brushing with garlic butter for maximum flavor
As soon as the bombs come out of the oven, brush them generously with your garlic butter mixture. The heat will help the butter seep into every crevice of the dough. For extra flair, sprinkle Parmesan cheese or smoked paprika on top. Serve warm to enjoy the gooey cheese at its best. Looking for another cheesy side? Try our pull-apart cheesy bread to keep the theme going.
Creative Variations and Custom Twists
Spicy garlic bombs with jalapeños or pepper jack
If you like heat, upgrade your cheesy garlic bombs with pepper jack or a few slices of fresh jalapeños tucked inside. You can also sprinkle red chili flakes directly into the garlic butter for an extra kick. These spicy versions are especially popular at game day gatherings where bold flavors win every time.
Sweet-and-savory honey garlic bombs
For a brunch-friendly twist, try brushing your bombs with honey garlic butter. Just add a teaspoon of honey or maple syrup to your butter mixture and brush while hot. The sweet glaze balances the savory cheese, making it an unforgettable treat for holidays and potlucks.
Kid-friendly mini garlic bombs for lunchboxes
Cheesy garlic bombs aren’t just party food—they’re also a kid-approved snack. Simply cut your dough smaller, use mozzarella sticks cut into thirds, and bake until golden. Pack them in school lunches or serve as after-school bites. They’re simple, fun, and guaranteed to disappear quickly.
Serving Suggestions and Storage Tips
What to serve with cheesy garlic bombs
Pairing these bombs with dipping sauces makes them even better. Marinara, ranch, or garlic aioli are classics. You can also serve them alongside pasta, soup, or as part of a brunch spread with eggs and fruit. For a full comfort meal, try them with our creamy tomato soup recipe.
How to keep them crispy and fresh longer
To avoid soggy bottoms, cool your garlic bombs on a wire rack instead of a plate. This prevents steam buildup underneath. For reheating, skip the microwave—use an oven or air fryer at 350°F for 5–7 minutes to restore crispiness.
Freezing and reheating without losing flavor
Yes, you can freeze cheesy garlic bombs. Let them cool completely, wrap individually in foil, and freeze for up to 2 months. Reheat straight from frozen in the oven for best results. They’ll taste just as fresh as the day you baked them.

Frequently Asked Questions About Cheesy Garlic Bombs
Can I make cheesy garlic bombs ahead of time?
Yes! Assemble the bombs, cover, and refrigerate for up to 24 hours before baking. Brush with garlic butter right after baking for best flavor.
What’s the best cheese to use inside garlic bombs?
Mozzarella is the go-to for its melt and stretch. But cheddar, pepper jack, or a mozzarella-cheddar mix are excellent options too.
How do I prevent cheese from leaking out?
The trick is sealing the dough properly. Pinch the edges tightly and bake seam-side down. Avoid overstuffing with cheese.
Can I use puff pastry or pizza dough instead of biscuits?
Absolutely. Puff pastry gives a flakier result, while pizza dough is chewier. Adjust baking time slightly depending on the dough.
Do garlic bombs need to be served warm?
They’re best fresh from the oven, but you can reheat them in the oven or air fryer and still enjoy that cheesy center.
Conclusion: Why You’ll Want to Keep This Recipe on Repeat
Cheesy garlic bombs aren’t just a recipe—they’re an experience. With only a few ingredients, a quick prep, and endless variations, they fit into every occasion from casual snacking to holiday spreads. Gooey cheese, buttery garlic, and golden dough combine for a bite that everyone will crave. Don’t miss our cheesy stuffed breadsticks if you’re looking for another way to impress with cheese and garlic magic.
PrintCheesy Garlic Bombs

Cheesy Garlic Bombs are golden biscuit dough balls stuffed with gooey mozzarella and brushed with garlic butter. Ready in under 20 minutes, they’re the perfect party snack, side dish, or kid-friendly treat.
- Prep Time: 8 minutes
- Cook Time: 12 minutes
- Total Time: 20 minutes
- Yield: 8 garlic bombs
- Category: Appetizer, Snack, Side Dish
- Method: Baking
- Cuisine: American
- Diet: Vegetarian
Ingredients
- 1 can refrigerated buttermilk biscuits (8-count)
- 6 oz mozzarella cheese (block or string cheese)
- 4 tablespoons unsalted butter
- 1 teaspoon garlic powder
- 1 teaspoon dried parsley (or fresh)
- Salt to taste (optional)
Instructions
- Preheat oven to 400°F (200°C) and line a baking sheet with parchment paper or silicone mat.
- Cut mozzarella cheese into 8 equal cubes or pieces.
- Flatten each biscuit and place one piece of cheese in the center.
- Pinch the dough around the cheese to seal and roll into a ball.
- Place seam-side down on the baking sheet.
- Bake for 10–12 minutes until golden brown and puffed.
- While baking, melt butter and stir in garlic powder, parsley, and salt if needed.
- Brush the garlic butter over the bombs immediately after baking while hot.
- Serve warm with dipping sauces or as a side dish.
Notes
- Use whole milk mozzarella for best meltability.
- Seal the dough tightly to prevent cheese leakage.
- Add chili flakes or pepper jack for a spicy version.
- Store leftovers in the fridge and reheat in the oven or air fryer.
- Freeze after baking and reheat at 350°F for best results.
Nutrition
- Serving Size: 1 garlic bomb
- Calories: 180
- Sugar: 2g
- Sodium: 370mg
- Fat: 10g
- Saturated Fat: 5g
- Unsaturated Fat: 4g
- Trans Fat: 0g
- Carbohydrates: 16g
- Fiber: 1g
- Protein: 6g
- Cholesterol: 20mg