There’s something nostalgic and wholesome about the act of canning fresh peaches. Whether you’re new to preserving or an experienced home canner, mastering the art of canning allows you to enjoy juicy, sun-ripened peaches long after the season fades. This guide walks you through everything—from choosing the best peaches and preparing them properly, to making the ideal syrup and ensuring each jar is sealed with perfection. You’ll also discover common mistakes to avoid, creative ways to use your canned peaches, and practical tips pulled straight from expert canning techniques.
Looking for inspiration? Try our fresh peach cobbler recipe to use up your jars of canned peaches in the most comforting way.
JUMP TO
Table of Contents
Why You Should Be Canning Fresh Peaches at Home
The unbeatable taste of homemade canned peaches
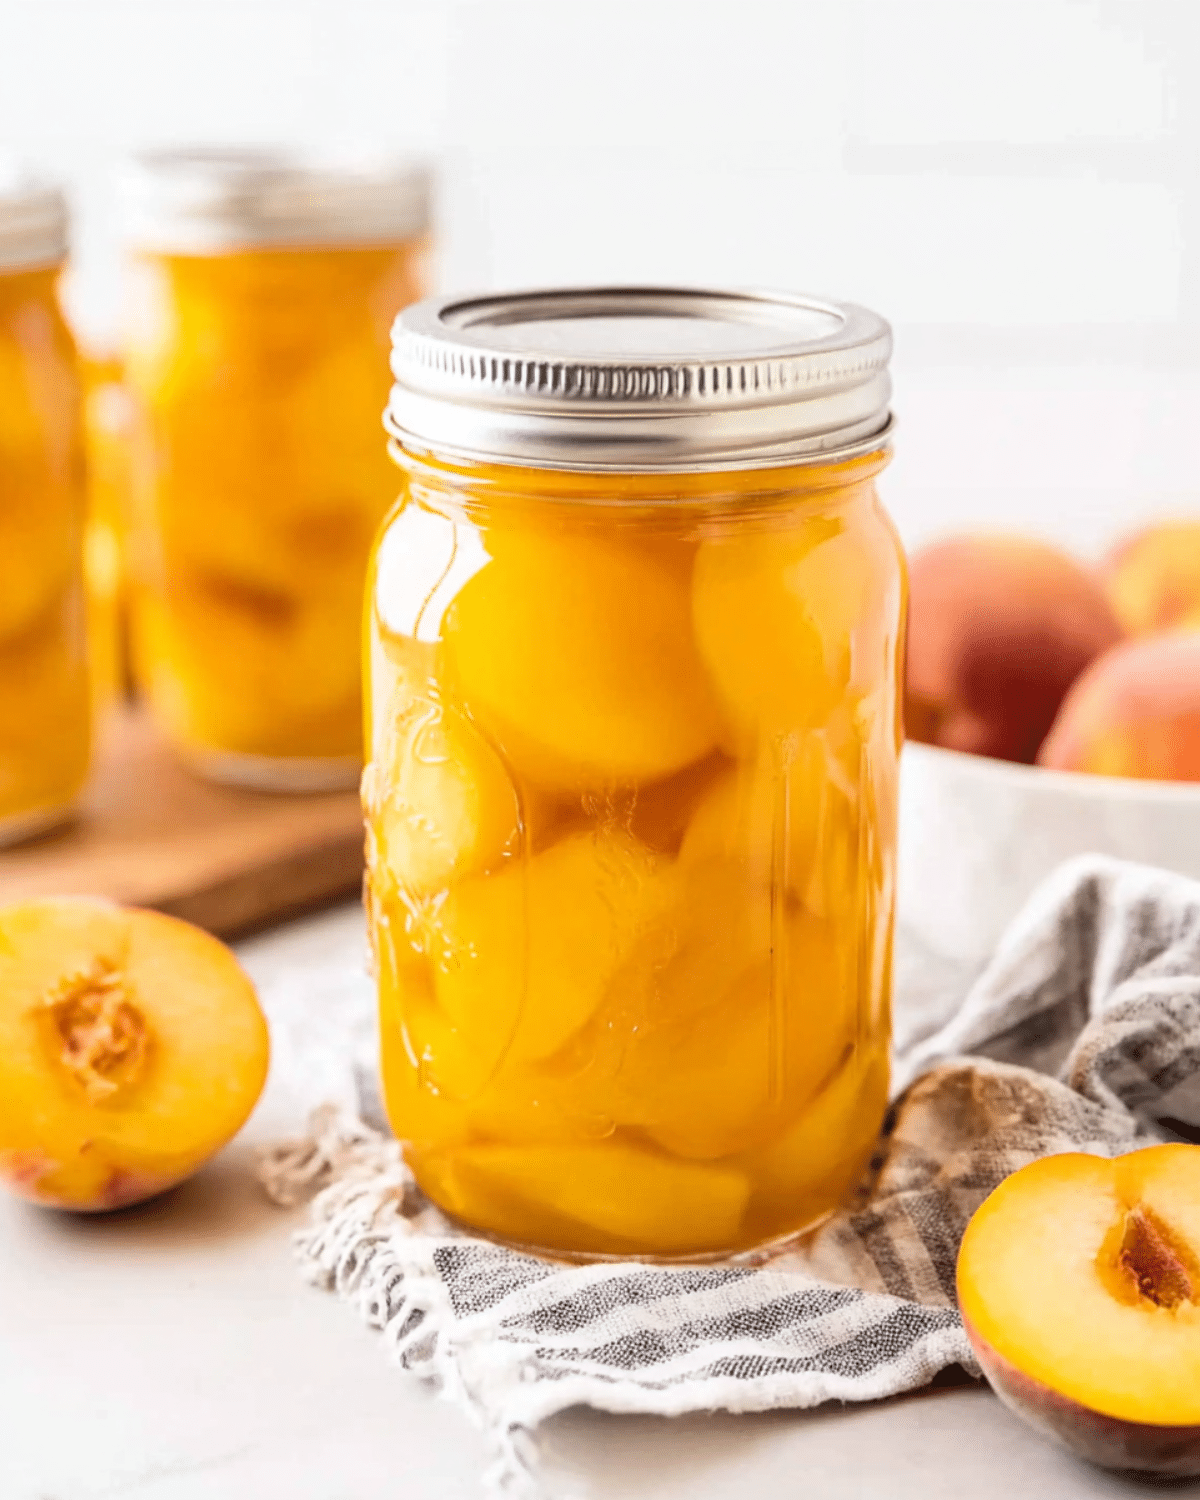
Nothing compares to the fresh flavor of peaches preserved at home. Commercially canned peaches often sit in overly sweet syrups or lose their natural aroma in transit. Home-canned peaches, on the other hand, retain a rich, ripe flavor that tastes like summer in a jar. Whether you spoon them over yogurt or bake them into a crisp, you’ll notice the difference instantly.
Health benefits vs. store-bought varieties
Canning fresh peaches at home means you’re in control of the ingredients. You can skip the artificial preservatives and tone down the sugar—or even sweeten naturally with honey. Store-bought versions usually contain heavy syrup and additives that reduce the nutritional value. Homemade peaches keep their vitamins, fiber, and antioxidants intact, making them a healthier long-term option for your pantry.
Cost savings and seasonal advantages
Buying peaches in bulk during peak season is often much cheaper. When you can them yourself, you stretch that savings even further. Plus, instead of letting peaches go soft or spoil, you turn them into shelf-stable goods. Don’t miss our peach brioche recipe for another way to use ripe or leftover peaches beautifully.
Choosing the Right Peaches for Canning
Best peach varieties for preserving
Freestone peaches are ideal for canning. They’re easier to pit, have firm flesh, and hold up well during processing. Varieties like Elberta, Red Haven, and Cresthaven are known for their sweetness and texture. Avoid clingstone peaches, which are better suited for eating fresh or baking but can be hard to work with when preserving.
How to tell when peaches are perfectly ripe
The key to great canned peaches is choosing ripe—but not overripe—fruit. You want peaches that are slightly soft to the touch and emit a sweet, fragrant aroma. The skin should peel off easily with a little help from blanching. Under-ripe peaches will taste bland, while overly soft ones can fall apart during processing. Check out our tip on selecting stone fruit in this nectarine crumble bar recipe.
Organic vs. store-bought: what matters most
While organic peaches have fewer pesticide residues, the real focus should be on freshness. If you can buy directly from local orchards or farmers’ markets, you’ll get peaches picked at peak ripeness. Store-bought peaches may be harvested early for shipping, reducing their flavor and sweetness. If you go the supermarket route, let them ripen fully at home before canning.
How to Prep Peaches Before Canning
Peeling and pitting made simple
Start by blanching your peaches. Bring a large pot of water to a boil, drop the peaches in for 30–60 seconds, then transfer them to an ice bath. The skins should slip off easily. Halve the peaches and remove the pits carefully. A paring knife works best for guiding the pit out without bruising the flesh.
Preventing browning with lemon or citric acid
As you prep your peaches, place them in a bowl of water mixed with either lemon juice or citric acid. This keeps the fruit looking bright and fresh. A typical ratio is 1 tablespoon of lemon juice per quart of water. It’s a simple trick to keep your peaches visually appealing, especially if gifting.
Slicing, halving, or keeping whole: what works best
For traditional canning, halved peaches fit best into quart jars and retain their shape during processing. However, sliced peaches are great if you plan to use them for toppings or smoothies. Whole peaches are more work and often don’t pack as neatly, but they can make for a rustic presentation.
Don’t miss our peach bars recipe for a simple dessert idea using pre-sliced peaches.
Water Bath Canning Method Explained
Tools you need to get started
Before diving into the process, gather the right tools for safety and efficiency. You’ll need:
- A large water bath canner with a rack
- Sterilized wide-mouth quart jars
- New lids and bands
- A canning funnel
- A jar lifter
- A ladle
- A clean towel
These are basic items but make a huge difference in speed and safety.
Looking for inspiration? Try our homemade peach lemonade with your canned peach syrup for a refreshing summer drink.
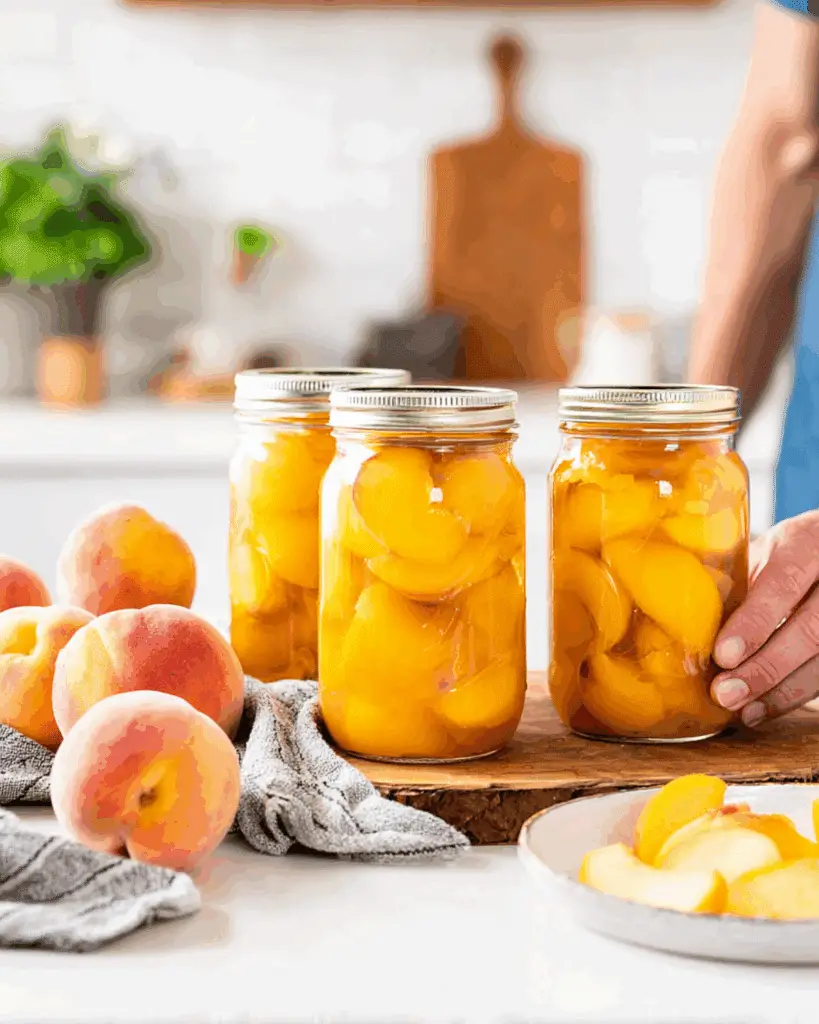
Step-by-step breakdown of the canning process
- Make the syrup: Simmer 2½ cups water, ½ cup honey, and 1 tablespoon lemon juice.
- Fill the jars: Gently place peeled and halved peaches in the jars. Don’t press down—leave room for syrup circulation.
- Add syrup: Use a ladle and funnel to pour hot syrup into jars, leaving ½ inch of headspace.
- Remove bubbles: Run a spatula along the inside edge to release trapped air.
- Seal and process: Wipe rims, apply lids and bands, then lower jars into boiling water.
- Boil for 20 minutes: Start timing when water returns to a boil.
- Cool and check seals: Remove jars and place on a towel. Let sit for 24 hours. Press lids the next day to confirm a seal.
These simple but critical steps ensure your peaches stay safe and shelf-stable.
Ensuring proper sterilization and sealing
Sterilizing jars is non-negotiable. Even clean-looking jars can harbor bacteria that spoil food or cause illness. Boil your jars for 10 minutes, or run them through the dishwasher on a high-heat cycle. Make sure jars are hot when filled—this prevents thermal shock. After sealing, check for a “pop” sound or test lids for movement. A sealed lid will not flex up and down.
The Perfect Syrup for Canning Peaches
Honey syrup vs. sugar syrup vs. juice-based
The liquid you can peaches in affects taste, texture, and nutrition.
- Honey Syrup: A natural option that enhances the fruit’s flavor without overpowering sweetness.
- Light Sugar Syrup: Classic and versatile—combine 2 cups water with 1 cup sugar.
- Fruit Juice (like white grape): Great for no-sugar diets, though it adds a distinct taste.
Each liquid brings something different to the table depending on your goals—flavor intensity, sugar content, or diet needs.
How much syrup per quart jar?
On average, each quart jar requires ½ to ¾ cup of syrup to cover the fruit. Make extra to avoid scrambling mid-process. Always leave that ½-inch headspace for proper expansion and sealing. Syrup should be hot when added to prevent jar cracking and to aid in air removal.
Discover great ideas like our frozen peach lemonade slushie that uses leftover syrup creatively.
Storing and reusing leftover syrup
Leftover syrup doesn’t go to waste. Use it in:
- Cocktails and mocktails
- Baking glazes for fruit tarts
- Pancake syrups or oatmeal toppings
Store in a sterilized jar in the fridge for up to 2 weeks. Always check for cloudiness or off-smells before using.
Common Canning Mistakes to Avoid
Floating fruit and cloudy syrup causes
Floating fruit usually means under-packed jars or trapped air bubbles. Always gently tap jars or use a utensil to release air. Cloudy syrup can come from using overripe peaches or from starch residue. Use ripe but firm fruit and clean water. If it still happens, it’s usually aesthetic, not dangerous.
Underripe or overripe peaches: why it matters
- Underripe peaches are firm and hard to peel. They won’t soften well in jars and may taste sour.
- Overripe ones are mushy and collapse when heated, making your jars messy or underfilled.
Find the sweet spot—peaches that yield slightly under gentle pressure and smell fragrant.
Headspace and air bubbles: small issues, big impact
Too much headspace can cause poor seals or extra oxygen, leading to spoilage. Too little can make syrup overflow during boiling. Stick to the golden rule: ½ inch. Air bubbles left inside can cause pressure imbalances and failed seals. Always take the time to de-bubble with a spatula or chopstick.
Check out our summer peach fruit salad recipe for a simple side dish that puts your canned peaches to delicious use.
Frequently Asked Questions About Canning Fresh Peaches
Do peaches need to be blanched before canning?
Yes. Blanching loosens the skin, making it easy to peel without bruising the flesh. It also helps preserve color and texture during processing.
Can I use honey instead of sugar in canning syrup?
Absolutely. Honey is not only natural but also enhances peach flavor. Just keep the ratio low—about ½ cup honey per 2½ cups water—for balance and safety.
How long do canned peaches last?
When properly sealed and stored in a cool, dark place, canned peaches last 12 to 18 months. Always label jars with the canning date and discard any that show signs of spoilage.
Why did my peaches float in the jar?
This often happens if the fruit was too ripe, under-packed, or not properly de-bubbled. While unsightly, it’s not usually dangerous unless the jar seal failed.
What’s the safest way to check if a jar sealed properly?
After 24 hours, press the center of each lid. If it doesn’t move or pop, it’s sealed. Any flex means the jar needs to be refrigerated and consumed within days.
Creative Ways to Use Canned Peaches
Peach desserts and breakfast ideas
Canned peaches are more than just a pantry filler—they’re a flavor powerhouse. Use them to make quick cobblers, crisps, or turnovers without the prep time. Spoon them over Greek yogurt or pancakes for an easy breakfast upgrade. They’re also perfect for muffins, peach upside-down cake, and peach-stuffed French toast.
Don’t miss our bourbon peach upside-down cake recipe for a dessert that’s big on taste and presentation.
Savory dishes that pair well
Pair peaches with savory ingredients like pork chops, grilled chicken, or prosciutto. The sweet, soft fruit balances salty and spicy elements beautifully. Dice them up for salsa, chutneys, or to add a sweet contrast in grain salads. A peach-glazed salmon or grilled peach salad will turn heads at any dinner party.
Easy smoothies and drinks using canned peaches
Drop a few peach halves into your blender with banana, yogurt, and ice—done! Add a splash of syrup for extra sweetness or blend with ginger and orange juice for a tropical twist. You can also freeze syrup and peach chunks in molds to make simple, kid-friendly popsicles.
Check out our easy fresh peach fritters recipe for another fun idea using canned or leftover peaches.
Conclusion: The Joy of Year-Round Peach Goodness
Canning fresh peaches might seem old-fashioned, but it’s truly timeless. Once you taste your first spoonful of home-canned fruit, you’ll wonder why you didn’t start sooner. It’s more nutritious, affordable, and rewarding than grabbing a store-bought can—and the satisfaction of enjoying summer fruit in the dead of winter? Unbeatable.
Discover great ideas like our peach bruschetta recipe for savory snacking with your canned goods.
PrintCanning Fresh Peaches
This step-by-step guide teaches you how to can fresh peaches at home using a simple honey syrup, preserving the taste of summer all year long.
- Prep Time: 30 minutes
- Cook Time: 30 minutes
- Total Time: 1 hour
- Yield: 3 quarts
- Category: Preserving
- Method: Canning
- Cuisine: American
- Diet: Vegetarian
Ingredients
- 6–10 lb peaches (small to medium, peeled and pitted)
- 2 ½ cups water
- ½ cup honey
- 1 tbsp fresh lemon juice
- Optional: lemon juice or citric acid for soaking peaches
Instructions
- Blanch peaches in boiling water for 30–60 seconds, then transfer to an ice bath and peel skins.
- Halve and pit the peaches. Place them in a bowl of water with lemon juice to prevent browning.
- Prepare syrup by simmering 2½ cups water, ½ cup honey, and 1 tbsp lemon juice.
- Sterilize quart jars by boiling or using the dishwasher on a high-heat cycle.
- Pack peach halves into jars in a stacked pattern without forcing them in.
- Pour hot syrup into jars using a canning funnel, leaving ½ inch headspace. Top with boiling water if needed.
- Remove air bubbles using a spatula or chopstick and wipe jar rims clean.
- Apply lids and bands according to the manufacturer’s instructions.
- Place jars in a boiling water bath canner and process for 20 minutes.
- Remove jars and let cool on a towel for 24 hours. Check that all jars are sealed.
Notes
- Use wide-mouth jars for easier packing and handling.
- Cloudy syrup is usually aesthetic but may result from overripe fruit or air bubbles.
- If a jar doesn’t seal, refrigerate and consume within a few days.
- Label each jar with the canning date and store in a cool, dark place.
Nutrition
- Serving Size: 2 peach halves
- Calories: 85
- Sugar: 18g
- Sodium: 2mg
- Fat: 0g
- Saturated Fat: 0g
- Unsaturated Fat: 0g
- Trans Fat: 0g
- Carbohydrates: 22g
- Fiber: 2g
- Protein: 1g
- Cholesterol: 0mg