When the holidays roll around, few treats capture the spirit of the season quite like candy cane cookies. With their signature red-and-white twist and refreshing peppermint flavor, these cookies have become a classic on Christmas cookie trays across the country. Whether you’re baking for a cookie exchange, gifting homemade treats, or starting a new family tradition, candy cane cookies are an irresistible choice. In this article, you’ll learn everything from the history of this nostalgic recipe to tips, storage advice, and creative ways to make them your own.
Looking for inspiration? Try our Christmas sugar cookies recipe for another timeless holiday treat.
JUMP TO
Table of Contents
The History and Popularity of Candy Cane Cookies
A nostalgic treat with a twist
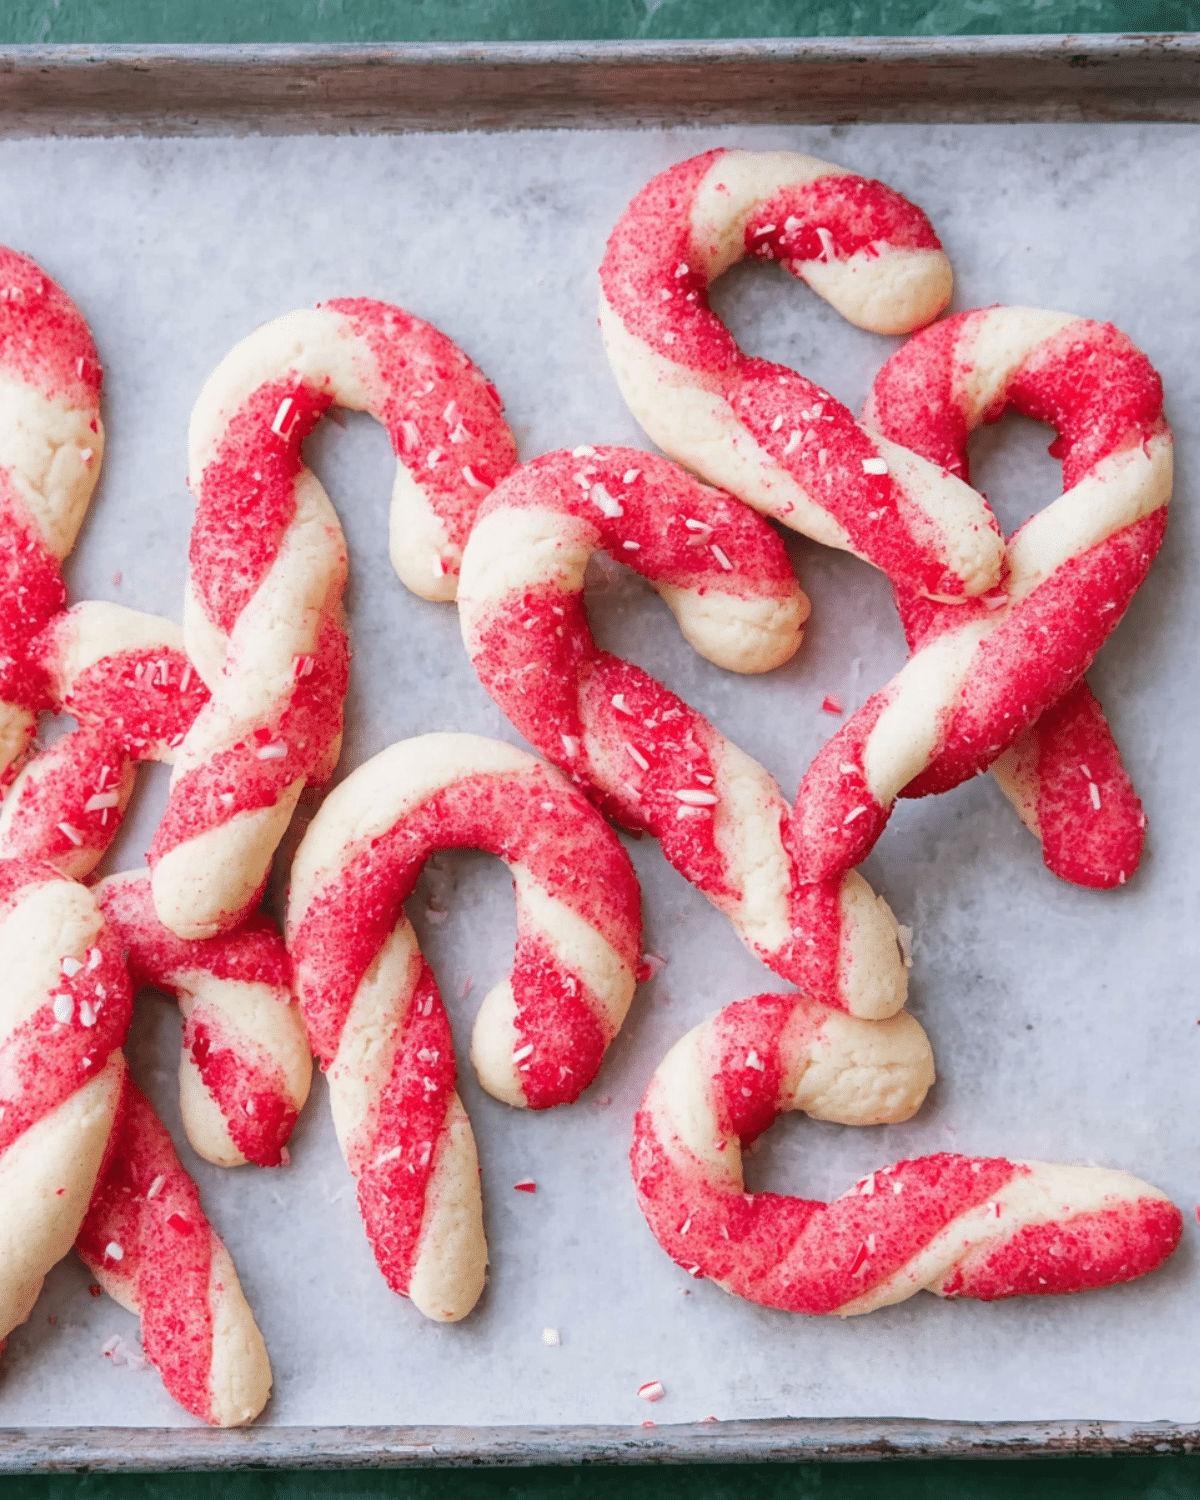
The roots of candy cane cookies stretch back to mid-century America when holiday baking took on a decorative, almost theatrical flair. These cookies mimic the look of real candy canes, with red and white dough twisted together and formed into canes. Their visual appeal made them a hit on holiday tables and in festive cookbooks.
The design isn’t just for looks—each strand of dough carries that classic peppermint aroma that screams Christmas. Over time, these cookies became a go-to for seasonal baking enthusiasts who wanted something playful yet delicious.
Why they’re a holiday favorite
There’s a reason candy cane cookies have stood the test of time. The mix of buttery vanilla dough and peppermint creates a flavor combo that’s both nostalgic and refreshing. But let’s be honest—it’s the presentation that wows people. That swirl of red and white feels joyful, especially when topped with sparkling sugar.
They also photograph beautifully, making them popular for blogs, Instagram, and even printed gift tags. Plus, they’re ideal for gifting—just pack them in a holiday tin or clear bag with a ribbon and you’re all set.
Fun family tradition for all ages
One of the best parts about making candy cane cookies? They’re interactive. Kids love rolling out the ropes, twisting the colors, and shaping them into canes. It’s a hands-on experience that turns baking into a memory-making event.
These cookies are often passed down through generations, with each family tweaking the method or adding their own special flair. If you’re looking to build a new baking tradition this year, this recipe is a perfect pick.
Ingredients and Tools You’ll Need
Classic ingredients for perfect peppermint flavor
To get the signature taste and look of candy cane cookies, you’ll need the following:
| Ingredient | Quantity |
|---|---|
| Unsalted Butter | 2 sticks (227g) |
| Granulated Sugar | 1 cup (200g) |
| Peppermint Extract | 1 ½ teaspoons |
| Vanilla Extract | 1 teaspoon |
| Baking Powder | 1 teaspoon |
| Kosher Salt | ½ teaspoon |
| Egg | 1 large |
| All-purpose Flour | 2 ¾ cups (385g) |
| Liquid Red Food Coloring | 1 teaspoon |
| Egg White (for wash) | 1 |
| Sparkling Sugar (for topping) | 2 tablespoons |
These are pantry staples with a holiday twist. The peppermint extract gives the cookies their defining flavor, while red food coloring adds the festive stripe.
Must-have tools for easy baking
To make your baking smooth and mess-free, gather these tools before starting:
- Stand mixer or hand mixer
- Rubber spatula
- Plastic wrap
- Parchment paper or silicone baking mat
- Baking sheets
- Cooling rack
- Measuring cups and spoons
- Rolling surface or clean counter
Having everything ready makes it easier to manage the chilling, shaping, and baking without stress.
Optional additions and substitutions
If you’re feeling creative, you can substitute the peppermint extract with almond extract for a different take. Don’t have red food coloring? Gel-based dyes work too—just use a little less.
Prefer a crunchier topping? Crushed candy canes can replace sparkling sugar. You could even use gluten-free flour to accommodate dietary needs—just ensure it’s a 1:1 blend.
Check out our lemon sugar cookies recipe for another flavorful twist using basic pantry ingredients.
Step-by-Step Guide to Making Candy Cane Cookies
Preparing the dough
Start by beating together room-temperature butter, sugar, peppermint extract, vanilla, baking powder, and salt until a thick paste forms. Scrape down the sides of the bowl, then beat in the egg until fully incorporated.
Slowly add flour and mix until the dough comes together. At this point, divide the dough in half. Set one half aside, and add red food coloring to the other, mixing until evenly tinted.
Wrap each half in plastic wrap, flatten into disks, and refrigerate for at least 3 hours. Chilling the dough ensures it’s firm enough to shape without sticking.
Shaping and twisting like a pro
Once chilled, roll a 1-inch ball from each dough and stretch them into equal-length ropes—about 5 inches long. Place one red rope and one white rope side by side and twist them together gently.
Curve the top into a hook to mimic a candy cane shape and place it on a parchment-lined baking sheet. Repeat with remaining dough, spacing cookies 2 inches apart.
Don’t miss our Santa Claus macarons recipe for another holiday showstopper dessert.
Baking and finishing touches
Preheat the oven to 350°F. Make an egg white wash by whisking an egg white with 1 tablespoon of water. Brush the tops of your shaped cookies with the wash and sprinkle with sparkling sugar.
Bake for 8 to 10 minutes, or until the edges are just lightly golden. Let them cool on the baking sheet for 10 minutes, then transfer to a wire rack to finish cooling.
Discover great ideas like Christmas kitchen sink cookies for more colorful baking fun.
Tips and Tricks for the Best Candy Cane Cookies
Keep the dough from drying or cracking
Working with two-colored dough ropes might seem easy, but many home bakers run into trouble with dryness. If your dough is cracking while you twist it, it’s likely too dry. To fix it, lightly wet your fingertips and knead a touch of cool water into the dough until it softens.
Humidity can affect your dough too. If you’re baking in a dry climate, cover unused dough with plastic wrap while working to keep it pliable. This ensures your cookies twist beautifully without falling apart.
Chill for control
Chilling your dough isn’t just a suggestion—it’s essential. When you chill your dough for at least 3 hours (overnight is even better), it becomes firm enough to hold its shape while rolling and twisting.
Shaped cookies also benefit from a short chill in the freezer before baking. This prevents spreading and helps the cookies retain their iconic candy cane form in the oven. If your cookies spread too much during baking, you likely skipped or shortened this step.
Freezing and make-ahead strategies
These cookies are a baker’s dream when it comes to prepping ahead. You can freeze the shaped, unbaked cookies in a single layer on a tray. Once solid, transfer them to a zip-top freezer bag. When you’re ready to bake, place them straight into a preheated oven—no thawing needed. Just add 1-2 minutes to the baking time.
Prefer to freeze them after baking? Let cookies cool completely, then wrap them in foil and store in a freezer-safe bag for up to two months. They’ll taste fresh out of the oven after a short rest at room temp.
Discover great ideas like pumpkin whoopie pies with cream cheese filling for more freezer-friendly treats.
Storage and Shelf Life
How to store for freshness
Candy cane cookies stay fresh for up to 2 weeks when stored in an airtight container at room temperature. Make sure the container is completely sealed to prevent the cookies from drying out or absorbing odors from other foods.
You can also refrigerate the dough, tightly wrapped in plastic, for up to 3 days if you want to break up the baking process.
Freezing baked vs unbaked
Here’s a quick breakdown:
| Storage Method | Shelf Life | Best Use |
|---|---|---|
| Unbaked Dough | 3 days (fridge), 1 month (freezer) | Prep ahead |
| Baked Cookies | 2 weeks (room temp), 2 months (freezer) | Gifting, serving |
| Shaped, Unbaked Cookies | 1 month (freezer) | Bake fresh when needed |
Unbaked cookies tend to hold their shape better when frozen, while baked ones are more convenient for quick gift boxes or party trays.
Reheating and serving tips
While these cookies don’t require reheating, you can refresh frozen or stored cookies by placing them in a warm 300°F oven for about 3 minutes. This revives their texture and makes them taste bakery-fresh.
To serve, arrange them with contrasting treats like chocolate crinkles or shortbread to make the red and white colors pop.
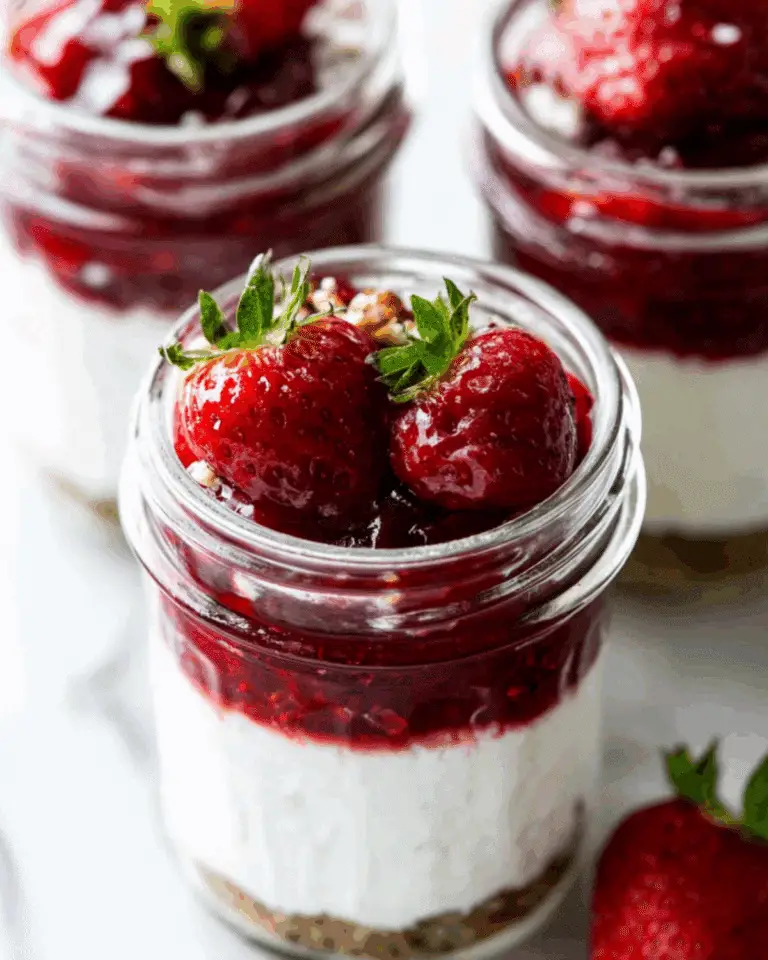
Looking for inspiration? Try our autumn cheesecake recipe to complement your holiday dessert spread.
Decorating Ideas and Flavor Variations
Creative decorating options
If you’re looking to take your candy cane cookies to the next level, try:
- Rolling the twisted cookies in crushed candy canes before baking
- Using colored sanding sugar instead of white sparkling sugar
- Adding a light drizzle of white chocolate after baking
- Dipping half the cookie in melted dark chocolate
These finishing touches elevate presentation and make them ideal for gifting or cookie swaps.
Make them your own with flavors
Want to switch things up? Here are some fun alternatives to the classic peppermint profile:
- Almond extract for a more nutty, European-style flavor
- Coconut extract for a tropical spin
- Lemon or orange zest to brighten the taste
- A few tablespoons of cocoa powder in the dough for a peppermint mocha vibe
You can even split the batch and make multiple variations from a single dough recipe.
Gift box ready
Candy cane cookies aren’t just tasty—they’re visually striking. Stack them in a clear gift box with festive ribbon, or layer them between sheets of wax paper in a holiday tin. Add a tag and you’ve got a gift everyone will love.
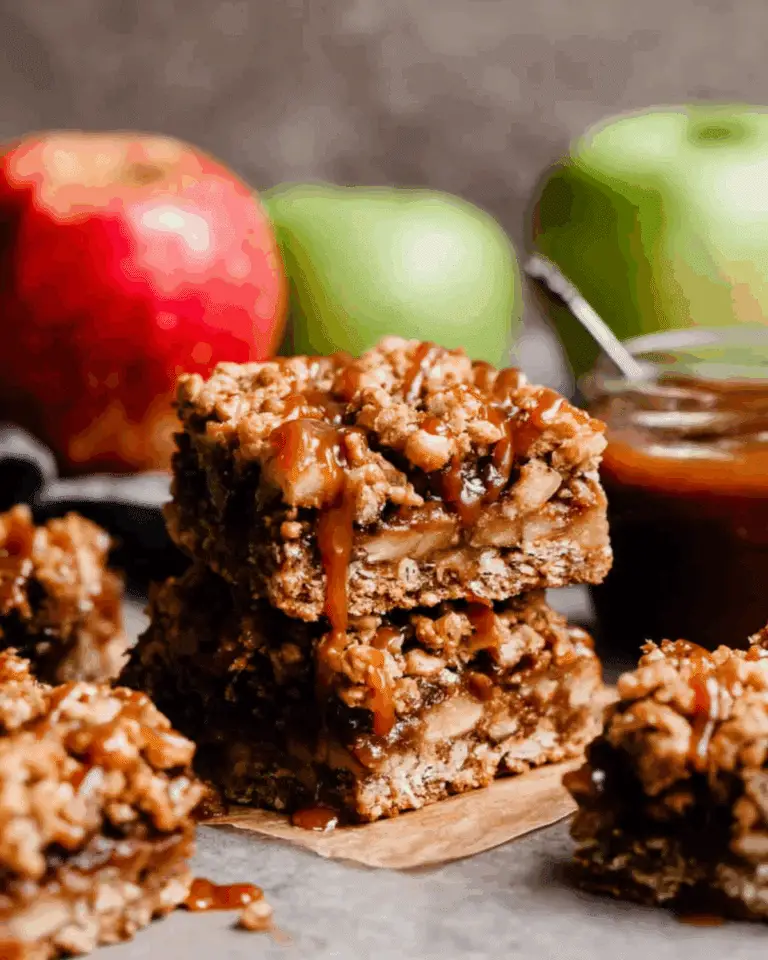
Check out our caramel apple cups with cinnamon apples for more holiday-perfect giftable treats.

Candy Cane Cookies FAQs
Can I use gel food coloring instead of liquid?
Yes, you can substitute gel food coloring for liquid. Because gel is more concentrated, use less—start with just a small amount and add gradually to get your desired red shade without over-hydrating the dough.
Why are my cookies cracking when I twist them?
Cracking often means your dough is too dry or too cold. Let the dough rest at room temperature for a few minutes before shaping, and if needed, add a touch of water to soften it up.
Can I make candy cane cookies without peppermint extract?
Absolutely. If peppermint isn’t your thing, substitute it with vanilla, almond, lemon, or orange extract for a personalized flavor profile. Almond extract, in particular, pairs wonderfully with the buttery base.
Do I really need to chill the dough?
Yes! Chilling helps solidify the fats and makes the dough easier to shape without spreading during baking. It’s a critical step for clean, crisp candy cane shapes.
How can I prevent the cookies from spreading too much?
After shaping, chill the cookies again before baking—10 minutes in the freezer or 20 in the fridge should do the trick. Use parchment paper and cool baking sheets to help maintain their structure.
Conclusion: Bake the Magic Into Your Holidays
Few cookies bring as much holiday joy as candy cane cookies. With their cheerful swirls, refreshing peppermint taste, and fun shaping process, they’re a holiday tradition worth sharing. Whether you’re baking with the kids, preparing gifts, or just enjoying a cozy kitchen moment, these cookies bring the magic of the season to life.
Don’t miss our white chocolate dipped chewy maple cookies for a soft, melt-in-your-mouth addition to your holiday cookie tray.
PrintCandy Cane Cookies

Festive red and white twisted peppermint cookies shaped like candy canes, perfect for holiday baking and gifting.
- Prep Time: 25 minutes (plus 3 hours chilling)
- Cook Time: 10 minutes
- Total Time: 3 hours 35 minutes
- Yield: 36 cookies
- Category: Dessert
- Method: Baking
- Cuisine: American
- Diet: Vegetarian
Ingredients
- 2 sticks (227g) unsalted butter, at room temperature
- 1 cup (200g) sugar
- 1 1/2 teaspoons peppermint extract
- 1 teaspoon vanilla extract
- 1 teaspoon baking powder
- 1/2 teaspoon kosher salt
- 1 large egg
- 2 3/4 cups (385g) all-purpose flour
- 1 teaspoon liquid red food coloring
- 1 egg white (for wash)
- 2 tablespoons sparkling sugar (for topping)
Instructions
- In a stand mixer, beat butter, sugar, peppermint extract, vanilla extract, baking powder, and salt until a paste forms.
- Scrape down the bowl, add the egg, and mix until absorbed.
- Add flour and mix just until no dry flour remains.
- Divide the dough in half. Mix red food coloring into one half until evenly colored.
- Wrap each half in plastic wrap, flatten into disks, and refrigerate for at least 3 hours or overnight.
- Preheat oven to 350°F. Line baking sheets with parchment paper or silicone mats.
- Roll 1-inch balls from each dough and stretch into 5-inch ropes. Twist one red and one white rope together and shape into a candy cane.
- Place on baking sheets 2 inches apart. Beat egg white with 1 tablespoon water, brush over cookies, and sprinkle with sparkling sugar.
- Bake for 8–10 minutes or until edges are barely golden.
- Let cool on the sheet for 10 minutes, then transfer to wire racks.
Notes
- Chill shaped cookies before baking to prevent spreading.
- If dough is too dry, add a few drops of water and knead gently.
- Freeze shaped unbaked cookies on a tray before transferring to bags.
- Cookies can be baked straight from frozen—add 1–2 minutes to baking time.
- Store baked cookies in an airtight container at room temp for up to 2 weeks.
Nutrition
- Serving Size: 1 cookie
- Calories: 111
- Sugar: 6g
- Sodium: 36mg
- Fat: 5g
- Saturated Fat: 3g
- Unsaturated Fat: 2g
- Trans Fat: 0g
- Carbohydrates: 14g
- Fiber: 0g
- Protein: 2g
- Cholesterol: 24mg