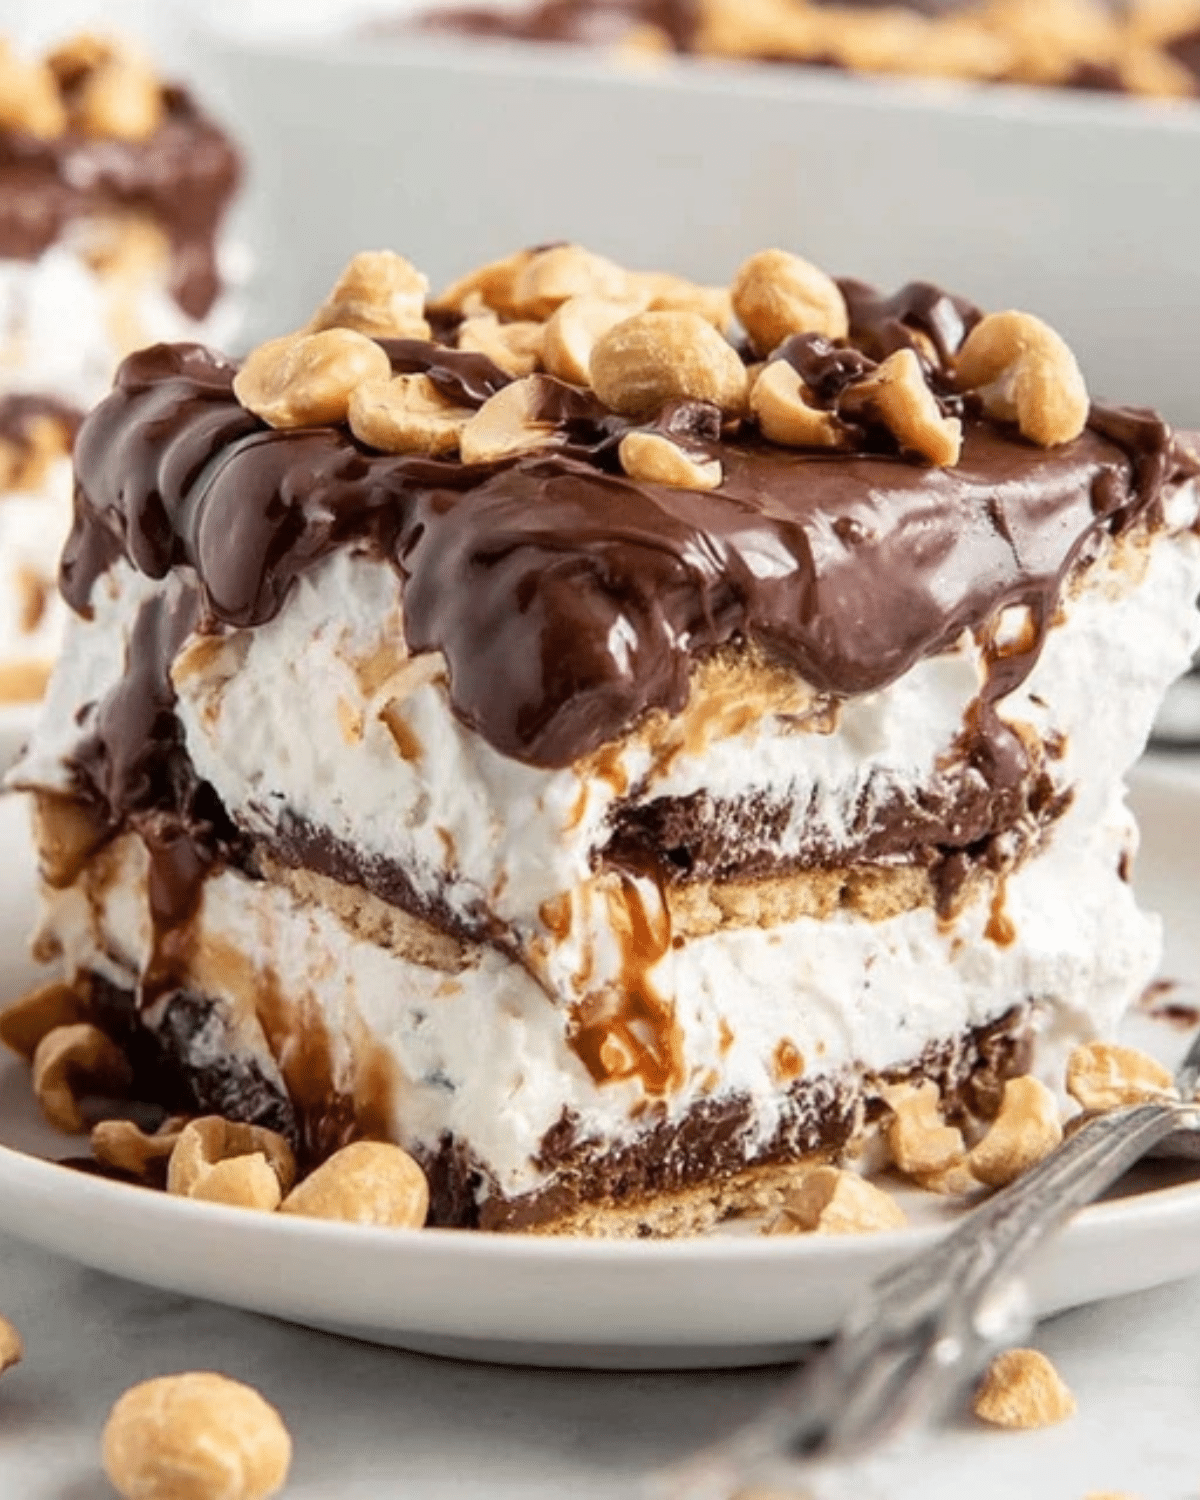
Buster Bar Ice Cream Cake is a nostalgic, crowd-pleasing dessert that combines layers of ice cream, chocolate, peanuts, and cookie crust into one irresistible treat. Inspired by the classic DQ Buster Bar, this homemade version delivers all the flavors people love in an easy, no-bake cake that’s perfect for birthdays, summer parties, or anytime you need a guaranteed hit.
What makes Buster Bar Ice Cream Cake so popular is the contrast of textures. Creamy ice cream layers meet crunchy cookie crust, while rich chocolate and salty peanuts add depth and balance. Every bite feels indulgent without being overly complicated.
This dessert is especially appealing because it requires no oven and very little hands-on time. With simple ingredients and a freezer doing most of the work, Buster Bar Ice Cream Cake is as easy as it is impressive.
JUMP TO
Table of Contents
Why Buster Bar Ice Cream Cake Is a Classic Favorite
Buster Bar Ice Cream Cake has remained a favorite for years because it delivers comfort, nostalgia, and bold flavor all at once. It’s the kind of dessert that brings back memories while still feeling exciting to serve.
One reason it stands out is its layered structure. Each layer plays a role, from the firm cookie crust to the creamy ice cream and rich chocolate topping. The peanuts add crunch and a salty contrast that keeps the dessert from feeling too sweet.
Another reason this cake is so loved is its simplicity. You don’t need advanced baking skills or special equipment. As long as you can layer ingredients and wait for them to freeze, you can make this dessert successfully.
Because it’s served frozen, it’s especially popular during warm months. However, its rich flavors make it just as enjoyable year-round.
What Makes a True Buster Bar–Style Dessert
A true Buster Bar Ice Cream Cake stays faithful to the flavors of the original treat while adapting them into a shareable format.
Vanilla ice cream is the base. Its mild flavor allows the chocolate and peanuts to shine. Hot fudge or chocolate sauce provides richness and that classic chocolate layer people expect.
Peanuts are essential. They add crunch and saltiness, balancing the sweetness of the ice cream and chocolate. Finely chopped peanuts distribute evenly and ensure every bite has texture.
The crust is typically made from crushed cookies mixed with butter. This creates a firm base that holds the layers together and adds a slight crunch.
Together, these elements create the unmistakable flavor and texture that define Buster Bar Ice Cream Cake.
Why This No-Bake Dessert Is So Easy to Make
One of the biggest advantages of Buster Bar Ice Cream Cake is how easy it is to prepare. Because there’s no baking involved, the process feels relaxed and low-pressure.
Most of the time is spent layering ingredients and allowing them to freeze. This makes it ideal for busy schedules or when you need to prepare dessert ahead of time.
It’s also forgiving. Layers don’t need to be perfectly smooth to taste amazing. The rustic, layered look adds to its charm and makes it feel homemade.
This ease is what makes Buster Bar Ice Cream Cake a go-to dessert for gatherings and celebrations.
A Dessert That’s Perfect for Sharing
Buster Bar Ice Cream Cake is designed to be shared. Because it’s made in a pan and sliced into portions, it’s easy to serve a crowd.
It works well for birthdays, potlucks, barbecues, and summer parties. You can make it ahead, keep it frozen, and slice it just before serving.
The combination of familiar flavors makes it appealing to both kids and adults. It’s rich without being overwhelming, making it easy to enjoy even after a big meal.
Ingredients Needed to Make Buster Bar Ice Cream Cake

Buster Bar Ice Cream Cake comes together with a short list of familiar ingredients, which is part of what makes it so easy and approachable. Each ingredient plays a clear role in building layers of flavor and texture.
Vanilla ice cream forms the foundation of the cake. Its creamy, mild flavor balances the richness of the chocolate and the saltiness of the peanuts. Using a good-quality vanilla ice cream makes a noticeable difference in the final taste.
Chocolate sandwich cookies are commonly used for the crust. When crushed and combined with melted butter, they create a firm, chocolatey base that holds the cake together. This crust adds structure and a slight crunch.
Butter binds the cookie crumbs and helps the crust set firmly once frozen. Melted butter mixes evenly with the crumbs, creating a base that slices cleanly.
Hot fudge or chocolate sauce is essential for that classic Buster Bar flavor. It adds richness and creates a smooth chocolate layer that contrasts with the cold ice cream.
Chopped peanuts provide crunch and a salty bite. Finely chopping them helps distribute them evenly throughout the cake so every slice has texture.
Optional ingredients like whipped topping or extra chocolate drizzle can be added for decoration, but the classic version shines with just the basics.
How to Make the Cookie Crust
The crust is the foundation of Buster Bar Ice Cream Cake, and making it properly ensures clean slices and good structure.
Start by crushing the cookies into fine crumbs. A food processor works well, but a zip-top bag and rolling pin can also do the job. The crumbs should be uniform so the crust holds together evenly.
Mix the cookie crumbs with melted butter until fully combined. The mixture should resemble wet sand and hold together when pressed.
Press the crust firmly into the bottom of a lined baking pan. Using the bottom of a glass or measuring cup helps create an even, compact layer. Pressing firmly is important, as it prevents the crust from crumbling when sliced.
Place the pan in the freezer for a short time to set the crust before adding the ice cream layer. This helps keep the layers distinct and neat.
Layering the Ice Cream Smoothly
Layering the ice cream correctly is key to achieving a clean, even Buster Bar Ice Cream Cake.
Let the ice cream soften slightly at room temperature. This makes it easier to spread without tearing the crust. The ice cream should be soft enough to spread but not melted.
Scoop the softened ice cream onto the crust and spread it into an even layer. Take your time to smooth it out so the thickness is consistent across the pan.
Once the ice cream layer is smooth, place the pan back into the freezer until the ice cream is firm. This step prevents the chocolate layer from mixing into the ice cream.
Adding the Chocolate and Peanut Layers
Once the ice cream layer is firm, it’s time to add the classic Buster Bar toppings.
Warm the hot fudge or chocolate sauce slightly so it’s pourable but not hot. Pour it evenly over the frozen ice cream layer, spreading gently if needed.
Sprinkle the chopped peanuts evenly over the chocolate layer. Lightly pressing them into the sauce helps them stick and ensures they stay in place when slicing.
At this stage, additional layers of ice cream, chocolate, and peanuts can be added if desired. Each layer should be frozen before adding the next to keep everything neat.
Freezing the Cake Until Set
Freezing is what brings Buster Bar Ice Cream Cake together. After all layers are added, return the cake to the freezer and allow it to set completely.
Freezing for several hours or overnight ensures the cake is firm and easy to slice. This also allows the flavors to meld, creating a cohesive dessert.
Covering the pan with foil or plastic wrap prevents freezer odors from affecting the cake.
Fun Variations and Easy Substitutions
One of the best things about Buster Bar Ice Cream Cake is how easy it is to customize while still keeping that classic flavor everyone loves. Small changes can make the dessert feel new without complicating the process.
Chocolate ice cream can be used instead of vanilla for a richer base. This creates a deeper chocolate flavor that pairs especially well with peanuts and fudge. You can also use a combination of vanilla and chocolate ice cream for layered contrast.
If peanuts aren’t your favorite, chopped almonds or pecans work well. These nuts still provide crunch and balance the sweetness of the ice cream and chocolate.
For a peanut-free version, crushed pretzels make an excellent topping. They add saltiness and crunch while keeping the dessert allergy-friendly.
You can also experiment with different sauces. Caramel sauce adds a buttery sweetness, while dark chocolate sauce creates a more intense chocolate layer.
No matter the variation, keeping the layered structure intact ensures the dessert still feels like a true Buster Bar Ice Cream Cake.
Best Ways to Serve Buster Bar Ice Cream Cake
Buster Bar Ice Cream Cake is best served straight from the freezer, but letting it sit at room temperature for a few minutes makes slicing easier and improves texture.
Using a sharp knife warmed under hot water helps create clean slices. Wiping the knife between cuts keeps the layers neat and visually appealing.
This dessert is perfect on its own, but adding a dollop of whipped topping or an extra drizzle of chocolate sauce can make it feel even more indulgent.
Because it’s rich and cold, smaller slices are often enough to satisfy. This makes it easy to serve a crowd without needing large portions.
Storage and Make-Ahead Tips
Buster Bar Ice Cream Cake is an excellent make-ahead dessert. In fact, it’s designed to be prepared in advance, which makes it ideal for parties and gatherings.
Once fully frozen, cover the cake tightly with plastic wrap and foil. This protects it from freezer burn and helps preserve flavor.
Stored properly, the cake can last in the freezer for up to two weeks. For best texture and flavor, try to serve it within the first week.
If you’ve already sliced the cake, place parchment paper between pieces before storing. This keeps slices from sticking together and makes serving easier later.
Frequently Asked Questions About Buster Bar Ice Cream Cake
Can I make this dessert ahead of time?
Yes, it’s best made ahead and stored in the freezer until ready to serve.
Do I have to use vanilla ice cream?
Vanilla is classic, but other flavors can be used.
How long should I freeze the cake?
Freeze for at least 4 hours, or overnight for best results.
Can I use store-bought crust instead of making one?
Yes, but a homemade cookie crust provides better structure.
Why Buster Bar Ice Cream Cake Is Always a Crowd-Pleaser
Buster Bar Ice Cream Cake delivers everything people love about the original treat in a shareable, homemade format. Creamy ice cream, rich chocolate, crunchy peanuts, and a firm cookie crust come together in perfect balance.
Because it’s easy to make, customizable, and ideal for serving a crowd, it’s become a go-to dessert for celebrations. The no-bake preparation makes it approachable, while the layered flavors make it feel special.
Once you serve this dessert, it quickly becomes a requested favorite. Buster Bar Ice Cream Cake is proof that simple ingredients and thoughtful layering can create something truly memorable.
PrintBuster Bar Ice Cream Cake – Easy No-Bake Treat

Buster Bar Ice Cream Cake is an easy no-bake dessert made with layers of vanilla ice cream, rich chocolate fudge, crunchy peanuts, and a chocolate cookie crust. It’s a nostalgic, crowd-pleasing frozen treat perfect for parties and celebrations.
- Prep Time: 20 minutes
- Cook Time: 0 minutes
- Total Time: 4 hours 20 minutes
- Yield: 12 servings
- Category: Dessert
- Method: No-Bake
- Cuisine: American
- Diet: Vegetarian
Ingredients
- 24 chocolate sandwich cookies, crushed
- 6 tablespoons unsalted butter, melted
- 1.5 quarts vanilla ice cream, softened
- 1 cup hot fudge sauce
- 3/4 cup salted peanuts, finely chopped
- Whipped topping or extra chocolate sauce (optional)
Instructions
- Line a 9×13-inch baking dish with parchment paper.
- Mix crushed cookies with melted butter until combined.
- Press mixture firmly into the bottom of the pan to form the crust.
- Freeze crust for 10–15 minutes until firm.
- Spread softened vanilla ice cream evenly over the crust.
- Freeze until ice cream is firm, about 30 minutes.
- Warm hot fudge slightly and pour evenly over ice cream.
- Sprinkle chopped peanuts evenly over the chocolate layer.
- Cover and freeze for at least 4 hours or until fully set.
- Slice and serve straight from the freezer.
Notes
- Let ice cream soften slightly for easy spreading.
- Use a warm knife for clean slices.
- Freeze overnight for best results.
- Store tightly covered to prevent freezer burn.
Nutrition
- Serving Size: 1 slice
- Calories: 410
- Sugar: 34g
- Sodium: 260mg
- Fat: 22g
- Saturated Fat: 11g
- Unsaturated Fat: 9g
- Trans Fat: 0g
- Carbohydrates: 46g
- Fiber: 2g
- Protein: 6g
- Cholesterol: 45mg