Nothing beats the aroma of freshly simmered apples with cinnamon wafting through your kitchen. If you’re still reaching for canned pie filling, it’s time to upgrade. In this guide, you’ll discover exactly how to make a stovetop apple pie filling that’s rich in flavor, quick to prepare, and easy to store. You’ll learn the best apples to use, pro tips for the perfect texture, and creative ways to use your filling in desserts far beyond traditional pie.
Looking for inspiration? Try our apple cinnamon oatmeal cookies for a perfect pairing with this filling.
JUMP TO
Table of Contents
Why Make Your Own Apple Pie Filling?
Better Flavor & Texture than Store-Bought
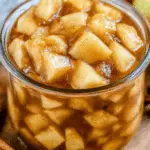
Homemade apple pie filling is worlds apart from the goopy, overly sweet canned versions. You control the texture—tender, not mushy—and the flavor, striking that perfect balance between sweet and tart. Unlike many store-bought options, your homemade version contains no artificial preservatives or thickening agents.
When you cook apples fresh on the stovetop with butter, cinnamon, and a touch of sugar, the flavor becomes deeply caramelized. This depth simply can’t be matched by processed alternatives.
Healthier and Customizable Ingredients
Another major win for DIY apple pie filling? You decide what goes in. Watching your sugar intake? Use honey or a natural sugar substitute. Prefer organic ingredients? Go for it. Want a richer flavor? Swap in brown sugar or a dash of nutmeg. The flexibility makes this recipe suitable for different diets, including gluten-free, dairy-free, and refined sugar-free with easy tweaks.
In fact, this version uses only a handful of pantry staples: apples, butter, cinnamon, water, sugar, and cornstarch—no junk, no fillers.
Saves Money and Time in the Long Run
Store-bought cans of pie filling can cost $2–$4 each. When you’re baking for a crowd or batch-prepping fall desserts, that cost adds up. Making your own not only saves money but gives you more filling per batch. The stovetop version we’re featuring takes just 12 minutes and makes the equivalent of a 21 oz. can.
Freeze leftovers, use it for weekday desserts, or prep it in advance for Thanksgiving pies—it’s one of those recipes that works overtime in your kitchen.
Don’t miss our easy Halloween snack mix recipe for a fun twist that could use this apple pie filling as a spooky topping!
Choosing the Right Apples for Pie Filling
Top Varieties: Granny Smith, Honeycrisp & More
For the best apple pie filling, firm apples with a balance of sweet and tart flavors are key. Granny Smith apples are a popular choice thanks to their tartness, which helps cut through the sweetness of the sauce. But don’t stop there—mixing apple varieties gives your filling more depth.
Other great choices:
- Honeycrisp – crisp, sweet-tart, and holds shape beautifully
- Braeburn – slightly spicy, well-balanced
- Golden Delicious – softens more, ideal for smoother texture
How Tartness and Firmness Affect the Result
Firm apples retain their structure during cooking, which prevents your filling from becoming applesauce. A blend of tart and sweet apples gives you the best of both worlds—zesty flavor with just enough sugar to balance it out.
For example, combining Granny Smith and Honeycrisp delivers both bite and brightness, making it ideal for pies, tarts, and dumplings.
Can You Mix Apple Types in One Batch?
Absolutely. In fact, it’s encouraged. Mixing varieties—like Granny Smith for tartness and Gala for sweetness—adds complexity. It also helps ensure that not all apples break down the same way, improving both texture and taste.
Check out our caramel apple slices to see how different apple types play into a dessert’s final flavor.
Ingredients and Tools You’ll Need
Essential Ingredients for Flavor and Consistency
Here’s a simple list to get you started:
| Ingredient | Quantity | Purpose |
|---|---|---|
| Apples (4 medium) | ~4 cups chopped | Main base |
| Granulated Sugar | ⅓ cup | Sweetness |
| Water | 3 tbsp + 2 tbsp | Sauce and slurry |
| Butter | 2 tbsp | Richness, base for sautéing |
| Cinnamon | 1 tsp | Warm spice |
| Cornstarch | 4 tsp | Thickener |
This makes about 2½ cups of filling, which replaces 1 can of store-bought apple pie filling.
Optional Add-ins: Brown Sugar, Nutmeg, Lemon Juice
If you’re looking to jazz things up:
- Brown sugar – adds a caramel note
- Nutmeg or clove – warm spice depth
- Lemon juice – adds brightness and prevents browning
- Apple pie spice blend – simplifies seasoning with a pre-made mix
Best Kitchen Tools for Easy Preparation
To streamline your stovetop apple pie filling recipe, keep these tools handy:
- Apple peeler/corer
- Sharp chef’s knife
- Medium saucepan with lid
- Silicone spatula for stirring
- Measuring cups and spoons
Discover great ideas like our apple cake pops that turn filling into cute, portable treats.
Step-by-Step Apple Pie Filling Recipe (Stovetop)
Making your own apple pie filling is simpler than you think. With a handful of ingredients and just one saucepan, you’ll have a rich, gooey filling ready in minutes. Here’s how to make it like a pro.
How to Peel, Core & Chop Apples Correctly
Start by choosing 4 medium-sized apples. Wash, peel, core, and either chop them into ½-inch cubes or slice into thin ¼-inch wedges. Uniform pieces help cook the apples evenly. If you want a rustic texture, go chunky; for hand pies or pancakes, thin slices work better.
Quick Tip: Use an apple corer and slicer tool to save time—especially handy when batch-prepping!
Simmering the Cinnamon Sauce to Perfection
Melt 2 tablespoons of butter in a saucepan over medium heat. Add 1 teaspoon of ground cinnamon, ⅓ cup of granulated sugar, 3 tablespoons of water, and your prepared apples.
Stir everything together, cover the pan, and cook for 4–6 minutes. Stir occasionally to prevent sticking. The apples should be slightly tender—not fully soft yet.
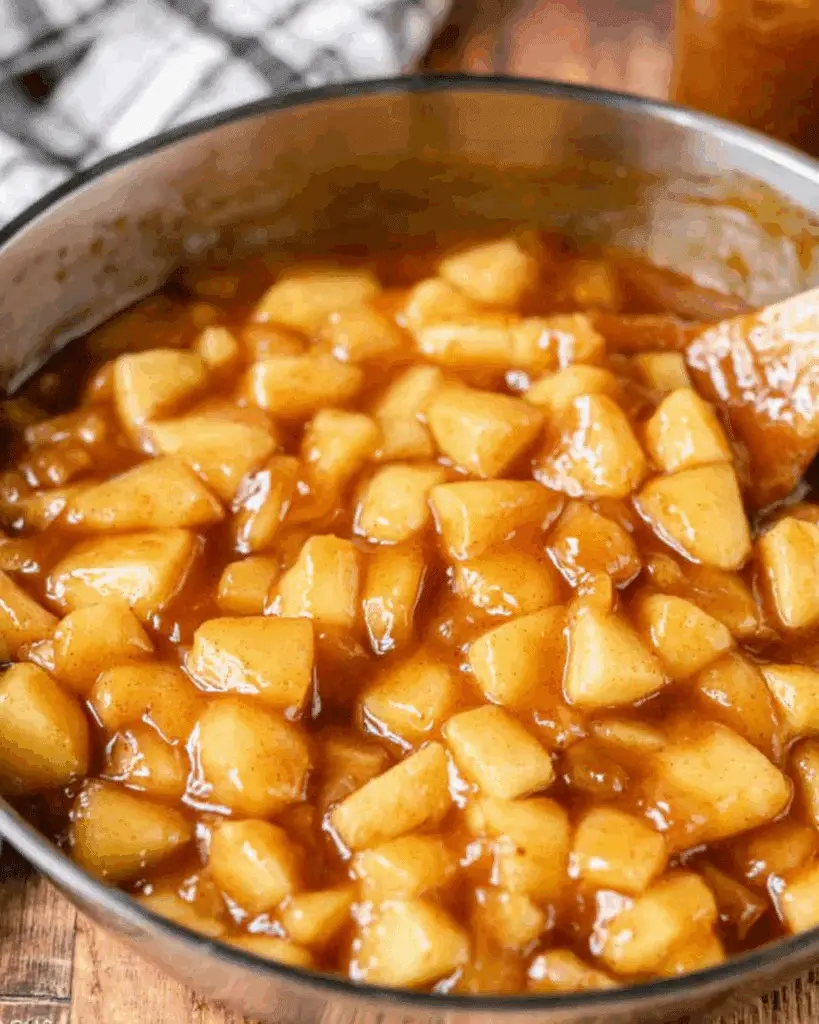
Achieving the Ideal Thickness with Cornstarch
In a small bowl, mix 4 teaspoons of cornstarch with 2 tablespoons of water until smooth. Pour this slurry into the pan, stirring constantly to prevent clumping.
Continue cooking, uncovered, for another 2–3 minutes until the mixture bubbles and thickens. You’ll know it’s ready when the apples are fork-tender and the sauce has a glossy finish.
Let the filling bubble for 1 minute to activate the cornstarch fully, then remove from heat and cool before storing.
Looking for inspiration? Try this apple hand pies flaky crust recipe that pairs perfectly with this filling.
Tips for Perfect Apple Pie Filling Every Time
How to Avoid Overcooking the Apples
Overcooked apples turn mushy, which ruins the texture. Keep a close eye and test doneness with a fork—when it goes in easily but still feels firm, they’re ready.
If using softer apples like Golden Delicious, shorten the cooking time by 1–2 minutes.
Adjusting Sweetness and Spice to Taste
Not all apples are created equal. If yours are sweeter (like Fuji or Gala), reduce the sugar slightly. Prefer a stronger cinnamon flavor? Add an extra ½ teaspoon or toss in a pinch of nutmeg.
Try a splash of lemon juice to brighten up the flavors and prevent browning during cooking.
Check out our cinnamon apple bread for another warm, cozy way to use this filling.
Doubling the Recipe for Batch Cooking
This recipe yields about 2½ cups—enough for one pie or a few desserts. But it doubles easily without changing the method. Just be sure your saucepan is big enough to allow for even cooking and stirring.
Bonus: Make a large batch ahead of the holidays and freeze portions for quick baking days.
Don’t miss our salted caramel apple bars—a decadent treat made even better with homemade filling.
How to Store, Freeze & Reheat Apple Pie Filling
Best Storage Methods (Fridge, Freezer)
Once your filling has cooled completely, store it in an airtight container in the fridge for up to 4 days. For longer storage, spoon it into a freezer-safe bag or jar, label it, and freeze for up to 3 months.
Lay bags flat for space-saving storage and quick thawing.
How Long Does It Last?
- Fridge: Up to 4 days
- Freezer: 3 months (optimal quality)
Once thawed, don’t refreeze. Always store cooled filling to avoid condensation and sogginess.
Reheating Without Losing Texture
To reheat, microwave in 30-second intervals or warm on the stovetop over low heat. Stir gently to preserve the apple chunks. Add a splash of water if it looks too thick.
This method keeps the flavor and texture just as fresh as day one.
Looking for more cozy flavors? Don’t miss our apple cinnamon sheet cake—perfect with a drizzle of warm pie filling.
Creative Ways to Use Apple Pie Filling
Homemade apple pie filling isn’t just for pies—its rich cinnamon flavor and soft apple texture make it perfect for dozens of quick recipes, snacks, and breakfasts. Here are some popular ways to enjoy it.
Beyond the Pie: Breakfast, Dessert & Snacks
Apple Pie Pancakes, Yogurt Bowls & More
Start your morning with a warm spoonful of pie filling over pancakes or waffles. The sweet, gooey apples melt right into each bite—like having dessert for breakfast. Add a sprinkle of granola or nuts for crunch, or stir it into plain Greek yogurt for a quick fall-flavored parfait.
Try it over our pumpkin spice waffles recipe for a fall breakfast dream combo.
Easy Apple Crisp and Crumble Cups
No time to bake a whole pie? Scoop your filling into ramekins, top with oats and brown sugar, and bake for 10 minutes for instant apple crisp. It’s fast, warm, and perfect with a scoop of vanilla ice cream.
Apple Pie Egg Rolls, Dumplings & Hand Pies
For a fun twist, wrap your filling in egg roll wrappers, brush with butter, sprinkle with cinnamon sugar, and air fry until golden. Or fill puff pastry squares and bake hand pies—perfect for parties or holidays.
Looking for something crowd-pleasing? Don’t miss our no-bake caramel apple pie cheesecake parfaits that layer beautifully with this filling.
FAQs About Homemade Apple Pie Filling
What’s the Best Thickener: Cornstarch or Flour?
Cornstarch is preferred because it creates a glossy, smooth sauce without adding a grainy texture or clouding the filling. It’s also gluten-free. Flour can work in a pinch but may dull the flavor and appearance.
Can I Use Apple Pie Spice Instead of Cinnamon?
Absolutely! Apple pie spice blends often include cinnamon, nutmeg, and allspice—great for a deeper, warmer flavor profile. Start with 1 to 1½ teaspoons and adjust to taste.
Is It Safe to Can Homemade Apple Pie Filling?
Canning apple pie filling at home requires strict guidelines for acidity and sterilization. While it is possible with the right tools and recipes approved by the USDA, freezing is a much safer and quicker method for most home cooks.
How Many Cups Does One Batch Yield?
This stovetop version makes about 2½ cups, which is the same as one standard 21 oz. can. If you need more, the recipe scales up easily—just double the ingredients and use a larger pot.
Can I Make It Sugar-Free?
Yes. Substitute granulated sugar with Stevia, erythritol, or monk fruit sweetener. Keep in mind that some sugar alternatives affect the texture slightly, so adjust the cornstarch as needed for your preferred consistency.
Conclusion: Make Your Own and Never Buy Cans Again
Once you try this stovetop apple pie filling, you’ll never want to go back to the canned stuff. It’s fresher, richer, and completely customizable for all your baking, breakfast, and snacking needs. Whether you’re meal-prepping for the holidays or looking to upgrade your Sunday brunch, this recipe is a staple worth mastering.
Check out our pumpkin caramel cheesecake recipe and add a dollop of this filling on top for the ultimate fall fusion dessert.
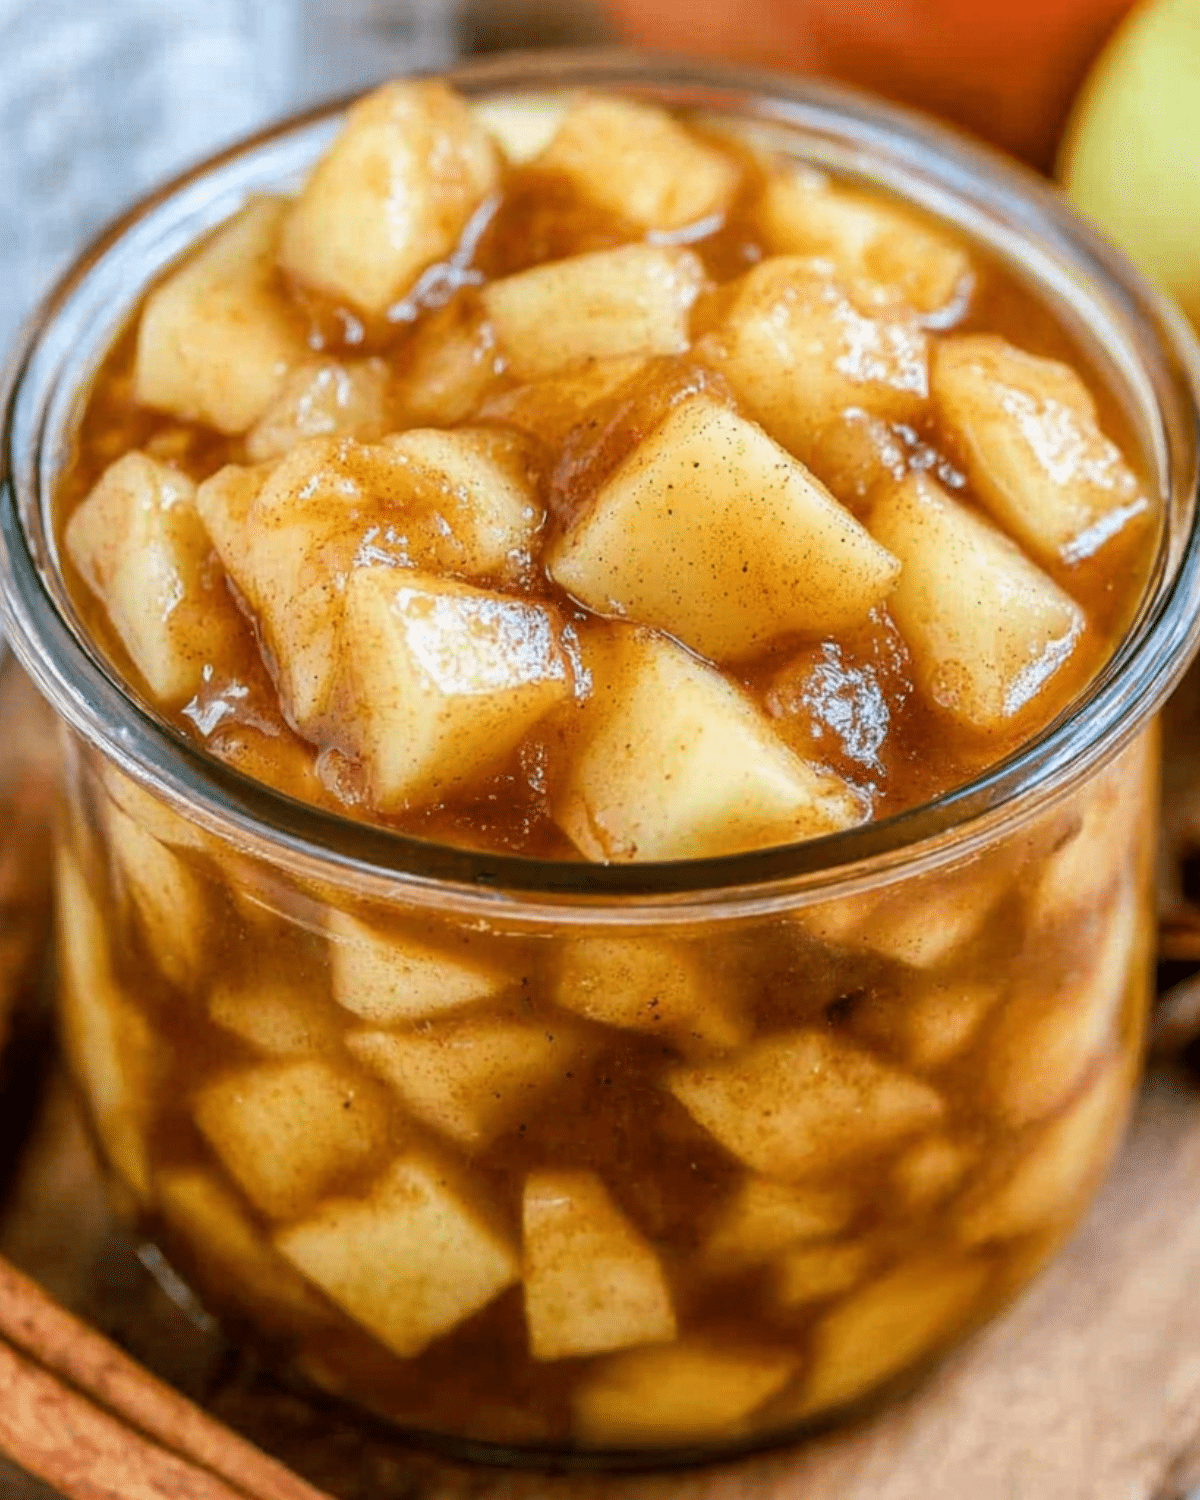
PrintApple Pie Filling
Quick and easy stovetop apple pie filling made with fresh apples, perfect for pies, crisps, and other fall desserts. Ready in just 12 minutes, this recipe delivers rich flavor and customizable sweetness with simple pantry ingredients.
- Prep Time: 5 minutes
- Cook Time: 7 minutes
- Total Time: 12 minutes
- Yield: 8 servings (approx. 2½ cups)
- Category: Dessert
- Method: Stovetop
- Cuisine: American
- Diet: Gluten Free
Ingredients
- 4 medium apples (peeled, cored, chopped or sliced)
- 1/3 cup granulated sugar
- 3 tablespoons water
- 2 tablespoons butter
- 1 teaspoon ground cinnamon
- 4 teaspoons cornstarch
- 2 tablespoons water (for cornstarch slurry)
Instructions
- Peel, core, and chop or slice apples into 1/2-inch cubes or 1/4-inch slices.
- In a medium saucepan, melt butter over medium heat and stir in cinnamon.
- Add apples, sugar, and 3 tablespoons water to the pan. Stir well to coat.
- Cover and cook, stirring occasionally, for 4–6 minutes until slightly softened.
- In a small bowl, mix cornstarch with 2 tablespoons water to make a slurry.
- Pour slurry into the pan while stirring. Cook uncovered for another 2–3 minutes until sauce thickens and apples are tender.
- Let the mixture bubble for 1 minute, then remove from heat and allow to cool.
Notes
- Use a mix of apple varieties like Granny Smith and Honeycrisp for best flavor.
- Add lemon juice to enhance tartness and prevent browning.
- Double the batch for freezing or holiday prep.
- Store in fridge up to 4 days or freeze up to 3 months.
- Adjust sugar or spices to match your apple variety.
Nutrition
- Serving Size: 1/8 of recipe (approx. 1/3 cup)
- Calories: 109
- Sugar: 17g
- Sodium: 26mg
- Fat: 2g
- Saturated Fat: 1g
- Unsaturated Fat: 1g
- Trans Fat: 0g
- Carbohydrates: 22g
- Fiber: 2g
- Protein: 0g
- Cholesterol: 7mg